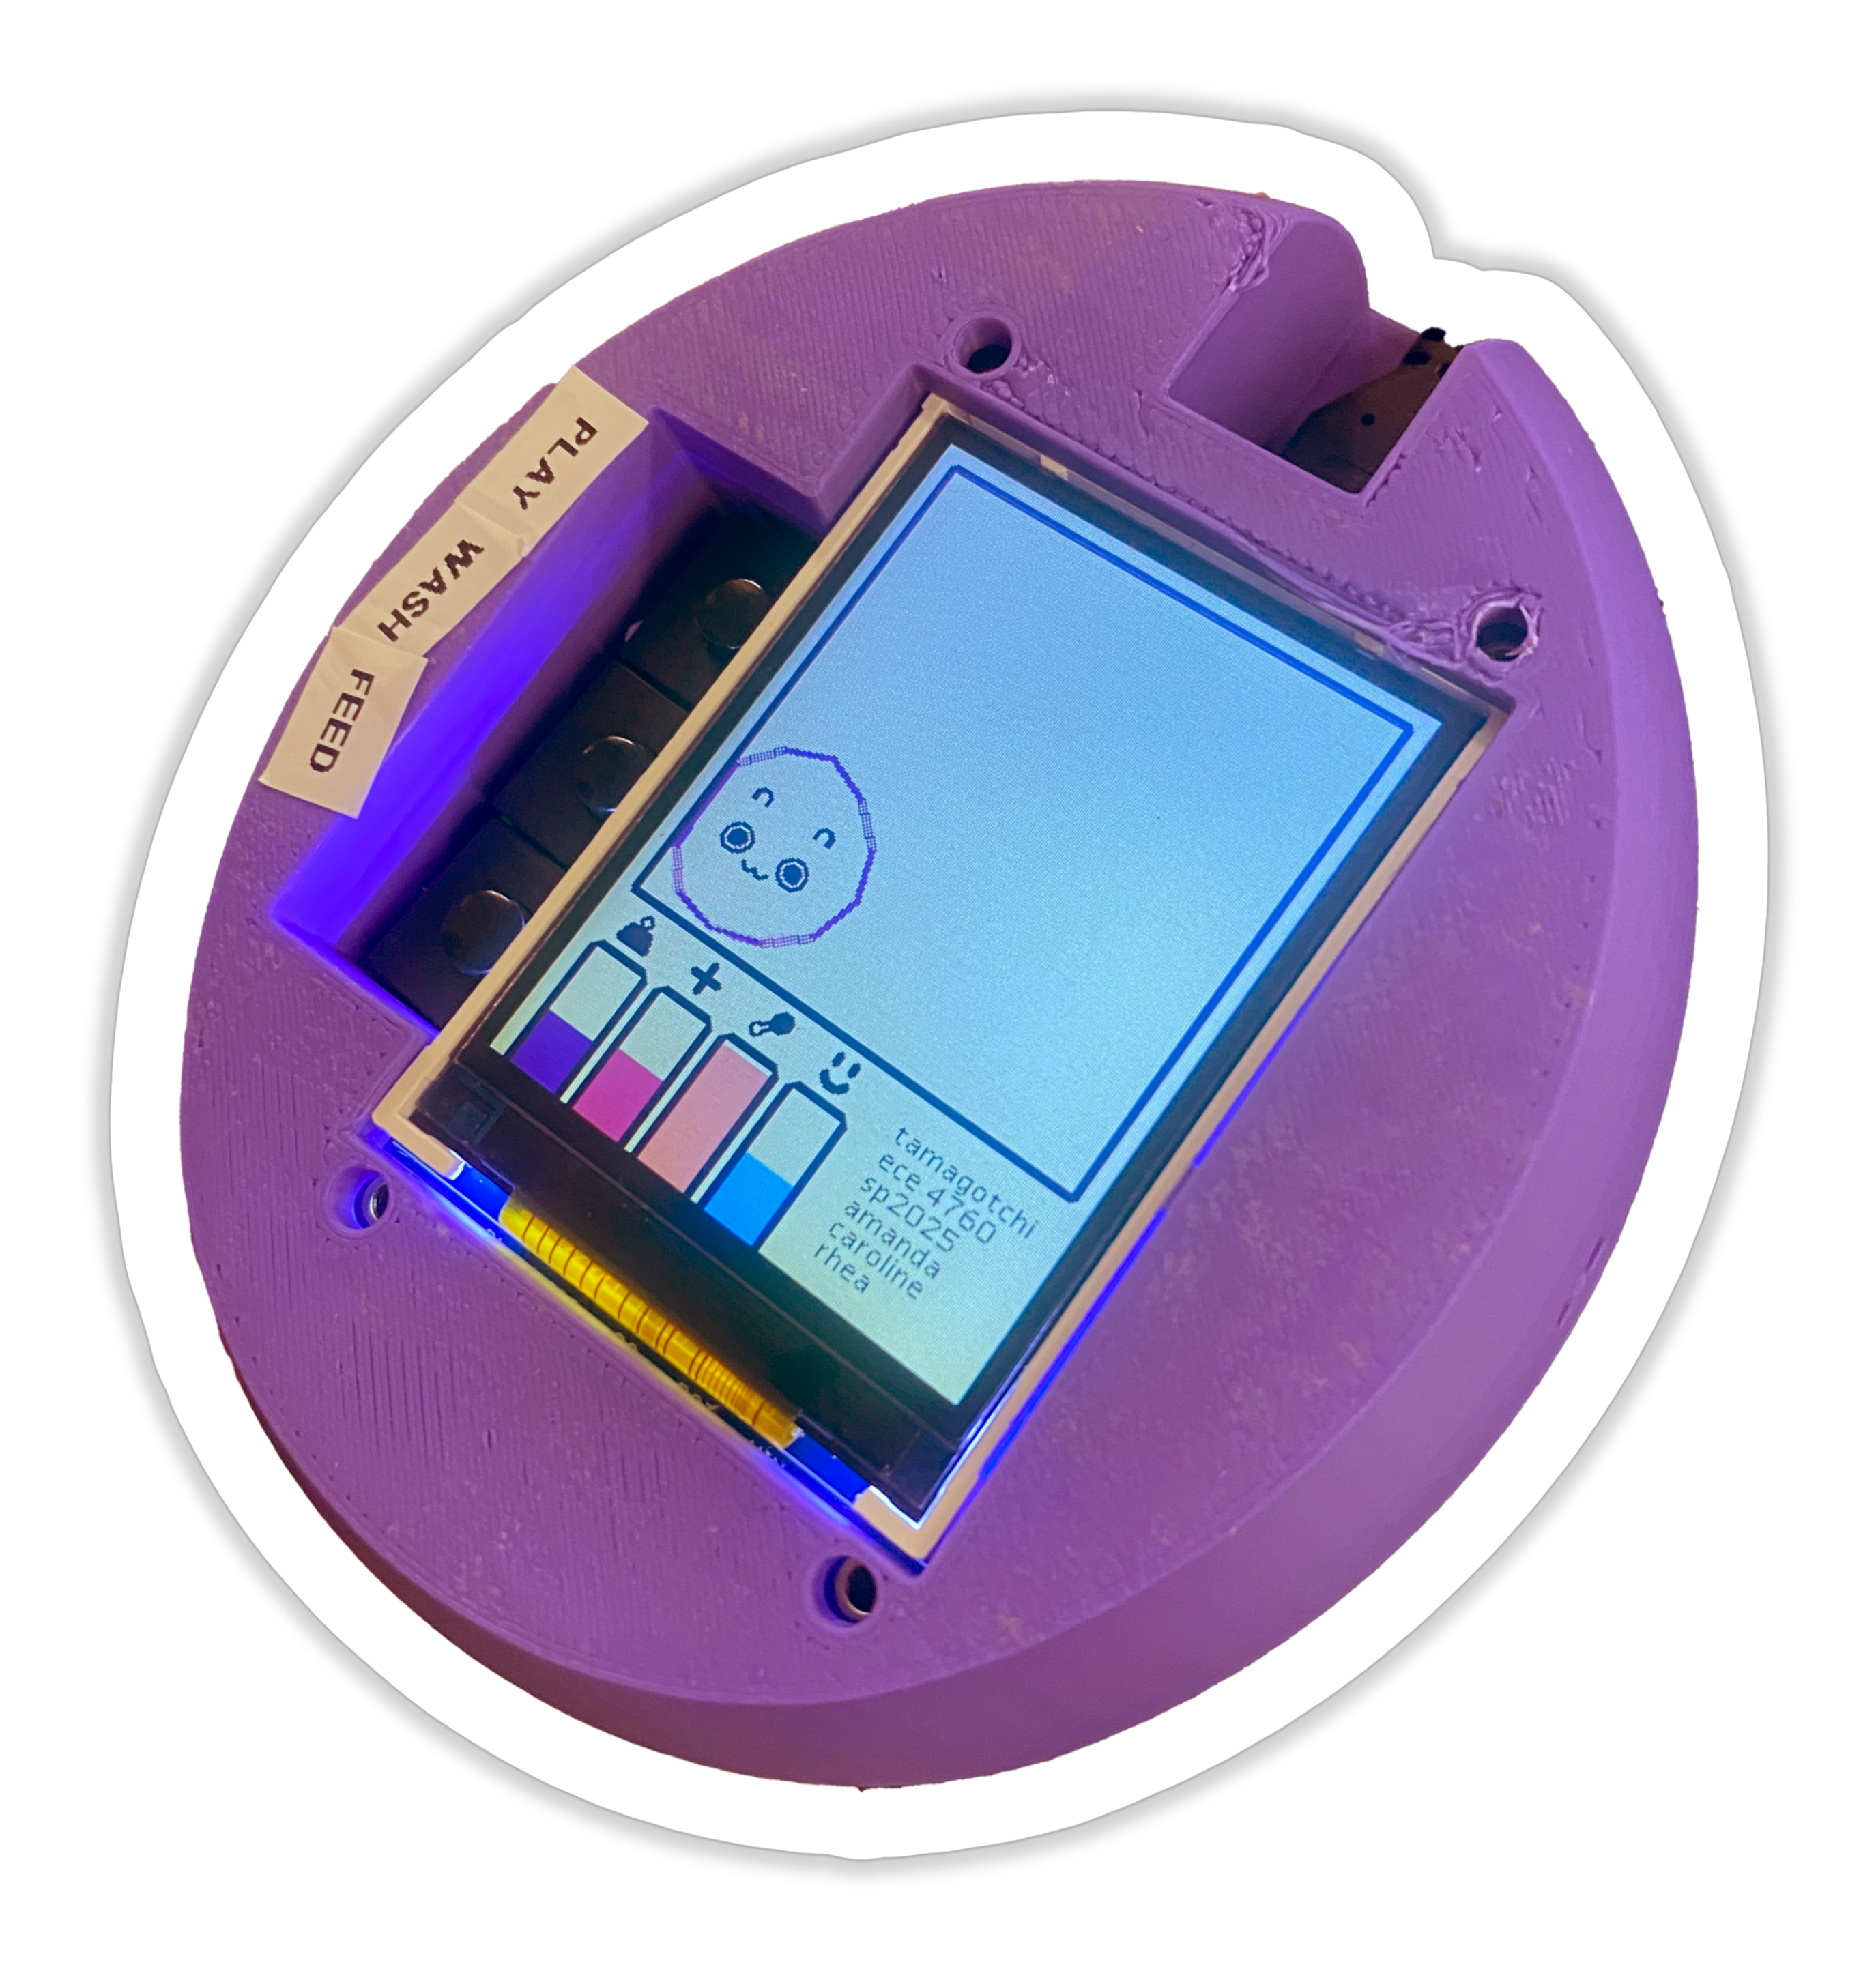
Tamagatchi
[Spring 2025] Do not be alarmed by the name of our project! Ok, maybe be a little alarmed. The Tamagotchi Torture Chamber combines the iconic 90s toy with a soft-body physics simulation and an accelerometer, allowing users to roll a squishy pet around a digital enclosure. The Tamagotchi Torture Chamber is a fully hand-held device that persists the state of your pet across boots, so they can never forget what you've done to them. Our soft-body physics simulatio
- Suitable forB.Tech/B.E Embedded Systems students
- Build time4-6 weeks
- LevelIntermediate
- Available atAjvika Labs, Kakinada
About this project
by Amanda Huang, Caroline Hohner, and Rhea Goswami
Watch our demo!
Introduction
Do not be alarmed by the name of our project! Ok, maybe be a little
alarmed. The Tamagotchi Torture Chamber combines the iconic 90s toy with
a soft-body physics simulation and an accelerometer, allowing users to
roll a squishy pet around a digital enclosure. The Tamagotchi Torture
Chamber is a fully hand-held device that persists the state of your pet
across boots, so they can never forget what you've done to them. Our
soft-body physics simulation is based on the 2004 paper
"How to
implement a pressure soft body model" by Maciej Matyk.
The creature is represented by a ring of vertices, with adjacent
vertices connected by springs. Internal pressure, responsible for
maintaining the creature's roughly spherical shape, is derived from its
current surface area. Put together, we have a shape that can collapse on
collisions but generally maintain its shape.
When you first power on a new Tamagotchi Torture Chamber, a default
initial state is persisted in external memory (FRAM). However, on
subsequent boots, your pet’s previous state is automatically loaded so
you can pick up right where you left off!
Using the three buttons located on the side of the TTC, you can interact
with your pet! Feed it, play with it, or clean it. Your pet has four
stats: weight, food, happiness, and health. Feeding your pet increases
its food meter as well as its weight. Playing with your pet increases
its happiness meter and decreases its weight. Cleaning your pet
increases its health, but decreases its happiness. If you let any of
these stats get too low (or too high, for weight), your pet will start
crying. If all of these stats fall to 0, or you overfeed your pet, it
will die. Not to worry, though, because pressing any button after your
pet dies will reset it.
Of course, you may also interact with the pet by knocking it around its
enclosure. If your pet slams against any wall too hard, it will look
dizzy and its health will decrease. Tilt the TTC to slide your pet
around and watch it squish up against the walls.
High-Level Design
Rationale
Our project was motivated by our desire to create a silly little game
that was portable and a little twisted. It was also motivated by
Caroline’s interest in game design and video games and our desire to put
a technical swing on a more visual project. By adding extra devices like
the FRAM and IMU, we turned our game into a comprehensive electrical
system design project. We wanted to develop an interactive game that a
lot of people have experience with. We also wanted to have a game that
the user could “take on the go” with them, and we felt like adding
acceleration to change the little digital pet’s motion was the perfect
touch of user interaction. We honestly thought the Tamagotchi was
adorable and wanted to put our twist on the game. Our project draws
inspiration from digital display (not the VGA, however) from Lab 2:
Digital Galton Board and calculating IMU orientation in Lab 3: PID
control of a 1D helicopter.
Background Math: Softbody Physics Simulation
We simulate softbody physics in our game play as a user interaction with
your pet as a result of the IMU readings. Unlike rigid bodies, the shape
of soft bodies can change as they have force applied to them (either
from other bodies or their environment like colliding with a wall). We
can decompose a soft body to be an n-polygon where n is the number of
vertices on the polygon. Each vertex of the polygon is connected to a
spring which connects to an adjacent vertex, which can be seen in the
figure below.
Fig. 1: Adjacent vertices are connected by springs, creating the
impression of a soft body. Image from Maciej Matyka’s paper.
The forces acting on each vertex are summed (both external from gravity
and internal from the springs). There is also an internal pressure force
that dictates how much the soft body deflates when the force is applied,
but it is a constant that requires tuning to make sure that the soft
body does not completely lose its shape when it deflates. Then, Euler
Integration is applied to find the next position of each vertex.
Since we do not have another body in our simulation, the only collisions
we have to detect are those against the wall. We are able to detect
those collisions through checks in the physics thread, which checks if
any of the vertices on the soft body was outside the TFT screen
dimensions. If this was the case, then we inverted the velocity in that
direction to create a “bounce” effect for the soft body.
Logical Structure
Fig. 2: General layout of the TTC's code, excluding driver
implementations. The three smaller boxes represent shared state data,
positioned by users.
Our code is divided into five threads and an alarm IRQ, with the physics
simulation thread running on core 1 (and the rest on core 0). We have
threads for UI updates, drawing the sprite canvas, running the physics
simulation, updating the FRAM device, and polling button input from
users. These threads share data regarding the screen-space location of
each vertex in the soft body and the stats of the pet. The IRQ is
responsible for polling acceleration data from the IMU.
Hardware/Software Tradeoffs
The hardware tradeoffs that we decided on were between using the full
RP2040 that we were provided from previous labs or a mini RP2040.
Ultimately, we decided to use the full RP2040 because the VGA screen
fully covered the RP2040. We also decided that the full RP2040 made it
easier for us to solder connections to the solder perfboard. However, it
did make our Tamagotchi egg thicker than expected. Another hardware
tradeoff that we had was soldering all of our connections to keep them
robust and sturdy while we play the game. To limit the clunkiness of the
egg case, we decided to not make our tamagotchi fully portable. This is
because the battery holder for 2 AA batteries to power full RP2040 was a
couple inches thick. For the software tradeoffs, we decided to put
everything but the physics logic on core 0. The physics logic was put on
core 1 because it was the only computationally heavy thread and we
needed the physics logic to be fast. So, the physics protothread needed
all the CPU to be allocated to it. Another software tradeoff that we had
was the level of detail with animations compared to the efficiency of
the drawing calls.
Relevant Work
Our project is based on the product, Tamagotchi, which has a
US Patent from 1997.
Thus, our primary intellectual property consideration is the function
and the design of the game itself. The patent describes several things
unique to the Tamagotchi game, which are its icons for interactions
(surrounding the little pet), the drawing of the little pet itself, the
egg structure, and the logic behind how the user can interact with this
game. Though we are drawing lots of inspiration from the original
Tamagotchi functionality and essence, we fully intend to make it our own
by having our own interactions and procedure for how to keep the
Tamagotchi alive (which will be more simplistic than the original
Tamagotchi game) and our little digital pet will be one of our own
design. We aim to emulate the things that made the Tamagotchi unique,
such as its egg shape and the interactions with the digital pet, to
invoke that sense of familiarity and nostalgia with our users to
increase usability of our game. However, that is where our similarities
will stop as we will create the rest based on our own ideas and add new
features (such as movement of the pet around the screen).
As we previously mentioned, our physics simulation is based on the 2004
paper
"How to
implement a pressure soft body model" by Maciej Matyk.
This is a pretty common model for implementing soft-body physics, with
one of the main points of deviation being the layout of the springs.
Safety
Mostly because our device comes in a printed case which prevents user
access to the hardware, we do not see any safety or hardware concerns.
Programming & Hardware Design
Graphics
We adapted
Parth Sharma's driver for the TFT screen
to optimize and improve our graphics. Instead of the full 16-bit color
spectrum allowed by the driver, we are using an indexed color scheme
based on the
Sweetie 16 palette by GrafxKid on Lospec.
This allows us to maintain a consistent aesthetic and pack our images
into smaller bitmaps, needing only one byte per pixel.
Fig. 3: One of GrafxKid's examples of their Sweetie 16 palette.
Images in our project are stored in flash memory as byte arrays, where
every byte contains the index of a pixel’s nearest color in our palette
and a bit representing its transparency (we decided higher resolution
alpha channels probably wouldn’t be necessary for this project). We
wrote a short python script in order to convert PNG files to our
bitmaps. The nearest color function, seen below, weighs each color
channel by how visible they are to the human eye, with green being
considered the most visible.
def distance(r, g, b, rr, gg, bb):
return 0.3 * (r - rr) ** 2 + 0.59 * (g - gg) **
2 + 0.11 * (b - bb) ** 2
Figs. 4 & 5: From left to right, an image of Zoe Matzkin ('27), and
that same image drawn to the TFT screen after being processed into the
RGB565 version of the Sweetie 16 color pale
Technologies used
Hardware components
- RP2040
- IMU
- accelerometer
Software & tools
- Python
Project demo video
What you get
- Working project / hardware kit, tested before delivery
- Complete source code with explanation
- Project demo and guidance for your viva
- Project report, PPT and IEEE paper support (on request)
Related Embedded Systems projects

Gas Leakage Detector Using Arduino
A budget-friendly LPG gas leak detector built with an Arduino and MQ-5 gas sensor, triggering a buzzer and LED when unsafe gas levels are de...
View project
Simple Alarm System
A beginner-friendly home alarm with PIR motion sensing, keypad PIN entry, and separate entry/exit timing delays, built to be easy to expand.
View project
Ultrasonic Sensor Project with Arduino UNO Q
A beginner-friendly first Arduino UNO Q project: a servo-swept ultrasonic sensor that renders a live sweeping radar display in a web browser...
View project
3D Audio Localization
[Fall 2025] We designed a real-time embedded system that localizes sound sources in three dimensions and visualizes them live using a four-m...
View project