Shepherding game
[Fall 2022] Cornell University ECE5730 Final ProjectMichael Wu (yw2464) | Yuqian Cao (yc2443)
- Suitable forB.Tech/B.E Embedded Systems students
- Build time4-6 weeks
- LevelBeginner
- Available atAjvika Labs, Kakinada
About this project
Toggle navigation
Shepherding
Introduction
High Level Design
Program and Hardware Design
Results
Conclusion
Team members
Appendix
Shepherding Game
Cornell University ECE5730 Final Project
Demonstration Video
Introduction
Sound Bite
We design and build a two-player video game based on the shepherding scenario.
Brief Summary
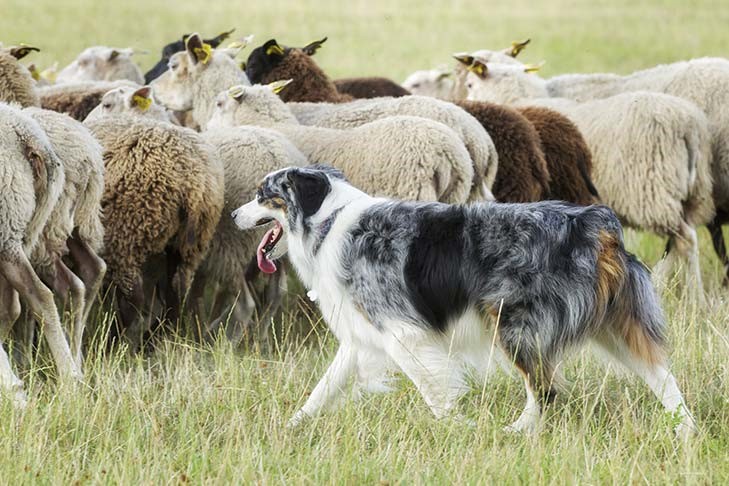
We design a shepherding game that includes one shepherd dog, one wolf, and 200 sheep. The idea is inspired by some videos on the internet about the magical shepherd dog who can regulate the movement of a very big flock of sheep by running around them. We search for some information about the shepherding process and build the game. We try to make the reaction of sheep under the shepherd dog more natural and reasonable. To make the game more stimulating, we add a wolf feeding on sheep. The game is a competition between the shepherd dog and the wolf, the shepherd dog aims to herd more sheep into the sheep pen, and the wolf wants to eat more sheep during the process.
Fig.1 Shepherd dog and sheep flock [1]
High Level Design
Rationale and Sources of Our Project Idea
The labs with the boid algorithm as the background are very interesting, and we would like to continue building this kind of project
as our final project. Yuqian happened to see the process of shepherd dog herding sheep in the vast grassland on YouTube platform, and he was very fascinated by it, one shepherd dog can actually regulate the movement of a large flock of sheep. On the one hand, Yuqian marveled at the sheepdog's intelligence and amazing shepherding mechanism, and on the other hand, he wanted to implement this process with RP2040.
Fig.2 Shepherding Process Recorded by BBC Earth [2]
We do not want to make the previous labs to be just laboratory exercises. On the contrary, we want to do our project partly based on, and advanced than lab2. In lab2, we realized the boids algorithm to model bees in flight. From the final presented results, such boids algorithm is able to simulate reasonable herd animal movements. So, in this project, the movement of the sheep flock itself can be implemented based on boids algorithm instead of simple random movement. This looks more natural. In the ECE5730 course, Prof. Adams always found papers to help realize the logic inherent in bionic scenario. Regarding shepherding, we also found some related papers[3][4][5]. However, these papers present more shepherding process-inspired ideas to solve other problems. We finally decided to implement the shepherding logic algorithmically according to our own ideas, with the goal of making the final shepherding process appear natural and reasonable, in comparison with the YouTube video.
Logical Structure
We use a top-down approach to build our project. Firstly, we finalize our idea, as described above. Secondly, the hardware, two players manipulate shepherd dog and wolf respectively need two hardware for manipulation, either joystick or button set can be applied; in addition, VGA cable is used to connect the monitor to display the position of each element and related information. Software design is also a very important part of this project, and the specific algorithm logic will be presented later.
Hardware Tradeoff
Because we were late in deciding the hardware, we did not make the first group purchase, and subsequently encountered problems such as slow delivery. We finally only got one joystick, we can only use this joystick control shepherd dog, wolf is controlled by a set of four buttons. At the same time, we made appropriate adjustments to the game balance, making the competition between the two players fairer and more reasonable.
Program and Hardware Design
Hardware Details
In our project, the RP2040's external devices include a VGA monitor, a joystick, four buttons. The hardware connection can be represented by the graph as below.
Fig.3 Hardware Connection (VGA & PC)
Fig.4 Hardware Connection (Joystick)
Fig.5 Hardware Connection (Button Set)
In applying Joystick, we refer the previous project listed on the course website, called “Boids, Predators, Joysticks, and Friends” [6]. There is no datasheet or schematic for the joystick, so we have to test them to figure out how they worked. Using a multimeter, we tested to see which pins were shorted together when a given direction is actuated. Then, we can deduce which is the common pin we will use as ground. The other four pins are the directions, so we pull them up to 3V3 with a 1k Ohm resistor to ensure they are never floating. Making use of the buttons is easier than the joystick. It is worth noting that out of the correct connection on the circuit, we have placed the buttons in convenient positions on the breadboard for operation.
Fig.6 Button Set and Joystick
When trying to use the ADC (analog-digital-converter) pins of an RP2040 to control an analog joystick, we accidentally burned the RP2040 and were forced to rebuild the circuit with a new RP2040. We initially thought that the cause was that we were connecting each GPIO ADC port in series with a 330-ohm resistor and the current of 0.01 A was high enough to burn the PICO. However, after checking RP2040’s datasheet we knew that GPIO input pins are protected by internal resistors so the issue should be something else.
Program Details
The complete code and line markers will be listed in Appendix B. In this section, I will use the line numbers directly to indicate which part of the code I am discussing. Lines 71 to 80 define the GPIO ports required by joystick and button set, corresponding to the hardware connections. Lines 82 to 100 define the global variables and give them reasonable initial values. Lines 113 to 146 define the sheep, shepherd dog and wolf, respectively, where the sheep are represented using arrays of structures, each representing seven pieces of information about a sheep, x position, y position, x speed, y speed, color, whether it is in the pen and whether it is alive. Shepherd dog and wolf also require five pieces of information each to represent, including x position, y position, x velocity, y velocity and color. The boid_initialize, dog_initialize, and wolf_initialize functions on lines 148 to 173 are reasonable initializations of them. We want the sheep have random initial position and velocity in Lines 175 to 190. For a random initial position, the "random" function is used to generate the horizontal and vertical coordinates of the initial point in a specific range. Since the specification of the velocity range is based on the synthetic velocity, the velocities in the x,y directions expressed in right-angle coordinates are difficult to use to generate the most reasonable random initial velocities. We use the polar coordinate system to generate the initial velocities (within minspeed and maxspeed) and their angles, and then convert them to velocities in the x, y directions in the right-angle coordinate system. We have a sheep pen, also called a safe zone. The inHome function between line 207 and 213 uses the x and y position to judge whether the sheep is in the pen. The function boundary_check between line 215 and 242 is used to make the sheep turn if it is near an edge. The boid_update function (245-442) is the core part of the program design. Before applying boids' algorithm, the first step is to determine the life and death (near a wolf) and herding (near a dog) status of the sheep. If the sheep is eaten by the wolf, it is marked, the value of the corresponding global variable is modified, and return. Among them, safe zone will work so that the sheep at home will not die. If there is a shepherd dog around the sheep and the sheep is not at home, the sheep is not applicable to the boid algorithm and moves away from the shepherd dog under the action of sheep_dog_factor. After this sequence of logic, the boids algorithm is applied if the sheep is not at home, and the Brownian motion algorithm is applied if the sheep is at home. Finally, do the detailed boundary check after update the position of sheep by its velocity. The dog_update function (444-481) and the wolf_update function (483-520) are quite similar, because the joystick and button set have the same mechanism inside. The functions use gpio_get to get the information from user through GPIO. The x and y direction velocities are decoupled and controlled separately. In addition, there are restrictions on the boundaries, that is, shepherd dog and wolf can only move within the specified range. The code after line 524 is basically the same as in lab2, where the text content displayed through VGA is changed, and the yield function is still used to keep the screen refresh rate at 30fps. In the process of coding, we encounter some problems. In order to save the hardware resources of the RP2040 and to maintain a certain level of precision, we make extensive use of the fix15 data type. The operations defined in line 51-59 are used to perform operations on this type of data, and when performing operations with other data, the corresponding conversions have to be performed first. We sometimes forget to convert data types when writing code, and this leads to many strange bugs. After modifying and confirming that the data type operations are correct, the bugs are fixed. In addition, we had great trouble keeping the sheep at home and they always managed to get out through the corners. There should be not any problem with our code implementation as the same logic and code applied to the outer field worked well to keep the sheep inside. To fix this, we let the sheep perform Brownian motion of minimum speed and random direction for each time interrupt. Hence, it is extremely unlikely for them to both touch the corner and having a speed with an angle of exactly 45 degrees diagonally outward and we kept them inside home (the safe area).
Results
Eventually we implement the previously designed function where the
Shepherding
Introduction
High Level Design
Program and Hardware Design
Results
Conclusion
Team members
Appendix
Shepherding Game
Cornell University ECE5730 Final Project
Demonstration Video
Introduction
Sound Bite
We design and build a two-player video game based on the shepherding scenario.
Brief Summary
We design a shepherding game that includes one shepherd dog, one wolf, and 200 sheep. The idea is inspired by some videos on the internet about the magical shepherd dog who can regulate the movement of a very big flock of sheep by running around them. We search for some information about the shepherding process and build the game. We try to make the reaction of sheep under the shepherd dog more natural and reasonable. To make the game more stimulating, we add a wolf feeding on sheep. The game is a competition between the shepherd dog and the wolf, the shepherd dog aims to herd more sheep into the sheep pen, and the wolf wants to eat more sheep during the process.
Fig.1 Shepherd dog and sheep flock [1]
High Level Design
Rationale and Sources of Our Project Idea
The labs with the boid algorithm as the background are very interesting, and we would like to continue building this kind of project
as our final project. Yuqian happened to see the process of shepherd dog herding sheep in the vast grassland on YouTube platform, and he was very fascinated by it, one shepherd dog can actually regulate the movement of a large flock of sheep. On the one hand, Yuqian marveled at the sheepdog's intelligence and amazing shepherding mechanism, and on the other hand, he wanted to implement this process with RP2040.
Fig.2 Shepherding Process Recorded by BBC Earth [2]
We do not want to make the previous labs to be just laboratory exercises. On the contrary, we want to do our project partly based on, and advanced than lab2. In lab2, we realized the boids algorithm to model bees in flight. From the final presented results, such boids algorithm is able to simulate reasonable herd animal movements. So, in this project, the movement of the sheep flock itself can be implemented based on boids algorithm instead of simple random movement. This looks more natural. In the ECE5730 course, Prof. Adams always found papers to help realize the logic inherent in bionic scenario. Regarding shepherding, we also found some related papers[3][4][5]. However, these papers present more shepherding process-inspired ideas to solve other problems. We finally decided to implement the shepherding logic algorithmically according to our own ideas, with the goal of making the final shepherding process appear natural and reasonable, in comparison with the YouTube video.
Logical Structure
We use a top-down approach to build our project. Firstly, we finalize our idea, as described above. Secondly, the hardware, two players manipulate shepherd dog and wolf respectively need two hardware for manipulation, either joystick or button set can be applied; in addition, VGA cable is used to connect the monitor to display the position of each element and related information. Software design is also a very important part of this project, and the specific algorithm logic will be presented later.
Hardware Tradeoff
Because we were late in deciding the hardware, we did not make the first group purchase, and subsequently encountered problems such as slow delivery. We finally only got one joystick, we can only use this joystick control shepherd dog, wolf is controlled by a set of four buttons. At the same time, we made appropriate adjustments to the game balance, making the competition between the two players fairer and more reasonable.
Program and Hardware Design
Hardware Details
In our project, the RP2040's external devices include a VGA monitor, a joystick, four buttons. The hardware connection can be represented by the graph as below.
Fig.3 Hardware Connection (VGA & PC)
Fig.4 Hardware Connection (Joystick)
Fig.5 Hardware Connection (Button Set)
In applying Joystick, we refer the previous project listed on the course website, called “Boids, Predators, Joysticks, and Friends” [6]. There is no datasheet or schematic for the joystick, so we have to test them to figure out how they worked. Using a multimeter, we tested to see which pins were shorted together when a given direction is actuated. Then, we can deduce which is the common pin we will use as ground. The other four pins are the directions, so we pull them up to 3V3 with a 1k Ohm resistor to ensure they are never floating. Making use of the buttons is easier than the joystick. It is worth noting that out of the correct connection on the circuit, we have placed the buttons in convenient positions on the breadboard for operation.
Fig.6 Button Set and Joystick
When trying to use the ADC (analog-digital-converter) pins of an RP2040 to control an analog joystick, we accidentally burned the RP2040 and were forced to rebuild the circuit with a new RP2040. We initially thought that the cause was that we were connecting each GPIO ADC port in series with a 330-ohm resistor and the current of 0.01 A was high enough to burn the PICO. However, after checking RP2040’s datasheet we knew that GPIO input pins are protected by internal resistors so the issue should be something else.
Program Details
The complete code and line markers will be listed in Appendix B. In this section, I will use the line numbers directly to indicate which part of the code I am discussing. Lines 71 to 80 define the GPIO ports required by joystick and button set, corresponding to the hardware connections. Lines 82 to 100 define the global variables and give them reasonable initial values. Lines 113 to 146 define the sheep, shepherd dog and wolf, respectively, where the sheep are represented using arrays of structures, each representing seven pieces of information about a sheep, x position, y position, x speed, y speed, color, whether it is in the pen and whether it is alive. Shepherd dog and wolf also require five pieces of information each to represent, including x position, y position, x velocity, y velocity and color. The boid_initialize, dog_initialize, and wolf_initialize functions on lines 148 to 173 are reasonable initializations of them. We want the sheep have random initial position and velocity in Lines 175 to 190. For a random initial position, the "random" function is used to generate the horizontal and vertical coordinates of the initial point in a specific range. Since the specification of the velocity range is based on the synthetic velocity, the velocities in the x,y directions expressed in right-angle coordinates are difficult to use to generate the most reasonable random initial velocities. We use the polar coordinate system to generate the initial velocities (within minspeed and maxspeed) and their angles, and then convert them to velocities in the x, y directions in the right-angle coordinate system. We have a sheep pen, also called a safe zone. The inHome function between line 207 and 213 uses the x and y position to judge whether the sheep is in the pen. The function boundary_check between line 215 and 242 is used to make the sheep turn if it is near an edge. The boid_update function (245-442) is the core part of the program design. Before applying boids' algorithm, the first step is to determine the life and death (near a wolf) and herding (near a dog) status of the sheep. If the sheep is eaten by the wolf, it is marked, the value of the corresponding global variable is modified, and return. Among them, safe zone will work so that the sheep at home will not die. If there is a shepherd dog around the sheep and the sheep is not at home, the sheep is not applicable to the boid algorithm and moves away from the shepherd dog under the action of sheep_dog_factor. After this sequence of logic, the boids algorithm is applied if the sheep is not at home, and the Brownian motion algorithm is applied if the sheep is at home. Finally, do the detailed boundary check after update the position of sheep by its velocity. The dog_update function (444-481) and the wolf_update function (483-520) are quite similar, because the joystick and button set have the same mechanism inside. The functions use gpio_get to get the information from user through GPIO. The x and y direction velocities are decoupled and controlled separately. In addition, there are restrictions on the boundaries, that is, shepherd dog and wolf can only move within the specified range. The code after line 524 is basically the same as in lab2, where the text content displayed through VGA is changed, and the yield function is still used to keep the screen refresh rate at 30fps. In the process of coding, we encounter some problems. In order to save the hardware resources of the RP2040 and to maintain a certain level of precision, we make extensive use of the fix15 data type. The operations defined in line 51-59 are used to perform operations on this type of data, and when performing operations with other data, the corresponding conversions have to be performed first. We sometimes forget to convert data types when writing code, and this leads to many strange bugs. After modifying and confirming that the data type operations are correct, the bugs are fixed. In addition, we had great trouble keeping the sheep at home and they always managed to get out through the corners. There should be not any problem with our code implementation as the same logic and code applied to the outer field worked well to keep the sheep inside. To fix this, we let the sheep perform Brownian motion of minimum speed and random direction for each time interrupt. Hence, it is extremely unlikely for them to both touch the corner and having a speed with an angle of exactly 45 degrees diagonally outward and we kept them inside home (the safe area).
Results
Eventually we implement the previously designed function where the
Technologies used
Hardware components
- RP2040
- IMU
- ADC
Software & tools
- C
- Arduino IDE
Project demo video
What you get
- Working project / hardware kit, tested before delivery
- Complete source code with explanation
- Project demo and guidance for your viva
- Project report, PPT and IEEE paper support (on request)
Delivery & Payment
Delivery takes a minimum of two weeks from the date your inquiry is confirmed.
Payment is in two parts:
• 50% advance to start the project
• Remaining 50% before delivery
Note:
• Documentation and PPT are not included by default
• If you need documentation/PPT, it can be arranged for extra time and cost
We'll confirm the exact timeline and cost with you after reviewing your requirements.
Related Embedded Systems projects

Embedded Systems
Gas Leakage Detector Using Arduino
A budget-friendly LPG gas leak detector built with an Arduino and MQ-5 gas sensor, triggering a buzzer and LED when unsafe gas levels are de...
View project
Embedded Systems
Simple Alarm System
A beginner-friendly home alarm with PIR motion sensing, keypad PIN entry, and separate entry/exit timing delays, built to be easy to expand.
View project
Embedded Systems
Ultrasonic Sensor Project with Arduino UNO Q
A beginner-friendly first Arduino UNO Q project: a servo-swept ultrasonic sensor that renders a live sweeping radar display in a web browser...
View project
Embedded Systems
3D Audio Localization
[Fall 2025] We designed a real-time embedded system that localizes sound sources in three dimensions and visualizes them live using a four-m...
View project