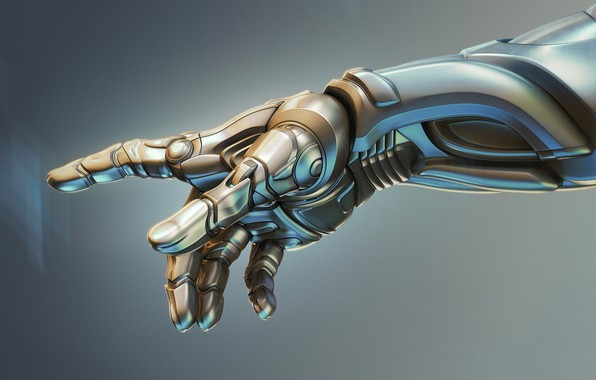
Animatronic hand
[Fall 2022] For our final project, we used a Pi Pico with several servo motors for our final project to control an Animatronic Hand. Specifically, we used these servo motors actuated by flex sensors to control the fingers of an Animatronic Hand. These flex sensors were attached to fingers on a glove enabling any user to wear this glove and actuate the animatronic hand by flexing their fingers.
- Suitable forB.Tech/B.E Embedded Systems students
- Build time4-6 weeks
- LevelIntermediate
- Available atAjvika Labs, Kakinada
About this project
Animatronic Hand
Project Introduction
For our final project, we used a Pi Pico with several servo motors for our final project to control an Animatronic Hand. Specifically, we used these servo motors actuated by flex sensors to control the fingers of an Animatronic Hand. These flex sensors were attached to fingers on a glove enabling any user to wear this glove and actuate the animatronic hand by flexing their fingers.
The expected performance of this project is human hand can directly control each finger’s movement of the animatronic hand by moving the corresponding finger. Technology and industries are continuously looking for improvements in everyday processes. One of these improvements is precision. The motivation for our project relies on improving this level of accuracy that sometimes the human hand cannot achieve. Our project’s applications could be vast and not restricted to only one industry.
Societal Impact
Our “Animatronic Hand” project could positively impact different industries and serve various field applications (e.g., aerospace, medical, manufacturing, and automotive). We plan to merge this intelligent system with evolving technological advancement for the betterment of society. This project’s societal impact aligns with the IEEE Code of Ethics section I., which says, “To improve the understanding by individuals and society of the capabilities and societal implications of conventional and emerging technologies, including intelligent systems.”
As a team, we planned to adhere to OSHA Electrical Safety Standards to ensure that all humans used in the process of this project are held to a high safety standard to avoid injuring them or their property. As mentioned above, we could use flex sensors to sense signals from the human hand. This design implicates working with sensors that contain voltage.
High-Level Design
Our idea comes from two previous projects. The first project is the EMG Robotic Hand project done by Michael Haidar, Jason Hwang, and Srikrishnaa Vadivel in the Fall of 2016 (Haidar et al., n.d.). In this project, they tried to control the robotic hand by sensing the muscular contractions. They used electrodes on the arm to differentiate between signals from different fingers. Besides, they designed their instrumentation amplifier and bandpass filter to extract the small signal from the skin’s surface. The second project is the Tendon Flex Controlled Robot Hand project done by Caeli MacLennan, Cassandra Scarpa, and Parth Saraswat in the fall of 2019 (MacLennan et al., n.d.). In this project, they used a cuff on the user’s forearm to control the robotic arm. By reading the flex sensors, they could determine which finger the movement occurred on.
We wanted to improve the design and accuracy of the robotic hand based on their design. One major problem is that their project needed to be more accurate because the sensors were placed far away from the fingers. They tried to measure the muscular movement on the forearm to determine the finger movement, while the muscular movement was minor. The other problem is that a calibration process is necessary if someone else wants to use the system because of muscular differences from person to person.
To improve the system’s accuracy, we stitch the flex sensors directly onto a glove the user needs to wear. By doing so, the system’s accuracy is improved because of the apparent movement of fingers. Since everyone will have similar finger movements, we also eliminate the need for further calibration: we only need to perform one initial calibration.
Logical Structure
After the initial calibration, the user can wear the glove. Then the Pi Pico will try to read ADC input 0, 1, and 2 sequentially and determine whether a new counter-compare is needed for the corresponding servo to control the rotational position of the servo. Then the servo will try to pull or release the string attached to it and thus increase or decrease the curvature of the cardboard finger. The cardboard finger will rely on the restoring force of the cardboard to return to the initial position after the release of the string. The whole process will repeat forever. The logical structure is as follows:
Hardware/Software Tradeoffs
We wanted to control all five cardboard fingers independently. However, the Pi Pico only had three user-usable ADC inputs. We modified the hardware and software to accommodate the number of ADCs. We modified the hardware to use three servos to change the gesture of the five fingers. The software was modified to read only three ADCs as well.
Animatronic Hand Design
We used cardboard, straws, and strings to build the animatronic hand. We traced our hands on the cardboard, then cut out the pattern with scissors. We hinged the finger joints with the help of a knife to give a natural curl to the fingers. We attached one edge of the string to the tip of the finger and the other to the servo motors. This setup will enable the fingers to curl when the servo motor is activated. The straws helped us create a channel that would later be used to feed the strings through. The whole design comes from John Park with minor modifications to use three servos instead of four (Park, 2018). A better picture of the setup is illustrated below:
Circuit Design
We used three flex sensors, three 22 kOhm resistors, and three servo motors to construct our circuit in this project. The flex sensor is just like a potentiometer, whose resistance would change if one bends the sensor. From this idea, we decided to mount three flex sensors on three different fingers of a glove. And one flex sensor controls the thumb servo motor, and the other two individually control two other fingers of the mechatronic hand. We only use three flex sensors because our Pi Pico only has three usable ADC pins. One way to improve this project in the future is to use a microcontroller with five usable ADC pins.
Then, we use three 22 kOhm resistors with three flex sensors in series to create a voltage divider. We chose 22 kOhm resistors because our flex sensor is 25 kOhm resistance, and with a similar resistance voltage divider, the change in measured voltage is more significant. After that, we will measure the voltage change of the flex sensor and use a linear function to map the voltage to corresponding Duty cycles. We will explain this later in the Software Design section.
After measuring the voltage from three different flex sensors, we connect three servo motors to three PWM output pins on the Pi Pico. And these three servo motors are connected to five fingers directly using five strings. We also have a serial connection directly from the Pi Pico to our computer for debugging purposes. Appendix C is the circuit diagram for your reference.
Software Design
The main goal of the software design is to first read from the ADC of the Pi Pico to get the current voltage across the flex sensor. After that, we used a linear mapping from voltage to PWM compare value and then sent the PWM signal to the servo motor. Since the PWM signal controls the rotational position of the servos, we can adjust the servo position using the flex sensor and eliminate the need to use electrodes as in the initial design.
ADC Reading
The first step is to read from the ADC on Pi Pico. The original plan is to control five servos using five fingers. There are only 4 ADCs on the Pi Pico; one is connected directly to the temperature sensor and is not usable. Therefore, we decided to use three servos and flex sensors to implement the system. Flex sensors 0, 1, and 2 will control the thumb, index finger and middle finger, ring finger, and little finger.
We use ADC channels 0, 1, and 2 from GPIO pins 26, 27, and 28 to read the flex sensor voltage. Since we need to know the maximum and minimum voltage across each flex sensor for the later mapping, a serial protothread shows us the raw readings and the converted voltage across the flex sensor. We recorded these readings and found that each flex sensor has different resistance-curvature characteristics. For example, the maximum voltage across flex sensor zero is 3.145V, while the maximum voltage across flex sensor one is 2.933V. This behavior means we must design different voltage-counter compare mappings for each flex sensor-servo pair.
Set PWM Frequency
The second step is to set the proper PWM frequency. Since the required PWM frequency of the servo is 50 Hz, we first used a clock divider of 250 to lower the clock frequency of the PWM channel from 125 Mhz to 500 kHz. After that, we set the PWM wrap value to 10000 so that when the PWM counter reaches 10000, it will restart from 0. Since we used the same model of servos, all three PWM channels are set to the same frequency using the same clock divider and wrap value. Thus, the frequency of the PWM channel is 50 Hz after the configuration.
Voltage-PWM Mapping
To get an accurate mapping, we first need to know the maximum and minimum counter-compare values for the servos. Using a serial input thread, we found that the maximum counter-compare value for the servo is 1250 (max_CCV) while the minimum value is 275 (min_CCV). Any value beyond this range will make the servo produce a clicking sound.
After knowing the range of the counter compare value and the range of the voltage across the flex sensor, we can get the mapping by using the formula:
(CCV - min_PWM) * (max_volt - min_volt) = (max_CCV - min_CCV) * (volt-min_volt)
The CCV is the counter-compare value we need for the PWM channel. We are changing the duty cycle of the PWM channel by altering the counter-compare value. Since the duty cycle controls the servo’s position, the servo’s position will also change.
PWM Interrupt Service Routine
The PWM Interrupt Service Routine (ISR) is configured to be called when we reach the PWM wrap value on PWM channel 0. Since all three PWM channels have the same frequency, we can use a single IS
Technologies used
Hardware components
- servo motor
- IMU
- amplifier
- ADC
Software & tools
- C
- Arduino IDE
Project demo video
What you get
- Working project / hardware kit, tested before delivery
- Complete source code with explanation
- Project demo and guidance for your viva
- Project report, PPT and IEEE paper support (on request)
Related Embedded Systems projects

Gas Leakage Detector Using Arduino
A budget-friendly LPG gas leak detector built with an Arduino and MQ-5 gas sensor, triggering a buzzer and LED when unsafe gas levels are de...
View project
Simple Alarm System
A beginner-friendly home alarm with PIR motion sensing, keypad PIN entry, and separate entry/exit timing delays, built to be easy to expand.
View project
Ultrasonic Sensor Project with Arduino UNO Q
A beginner-friendly first Arduino UNO Q project: a servo-swept ultrasonic sensor that renders a live sweeping radar display in a web browser...
View project
3D Audio Localization
[Fall 2025] We designed a real-time embedded system that localizes sound sources in three dimensions and visualizes them live using a four-m...
View project