
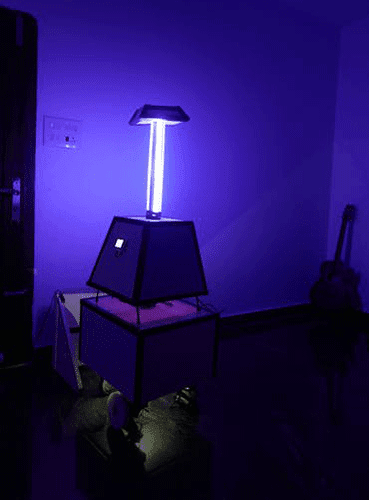

Raspberry Pi based Autonomous UV Robot with SLAM
In this Project, we made an autonomous UV robot using raspberry pi. The affordable autonomous and open-source robot provides localization and mapping facilities and safely navigates the robot through the environment.
- Suitable forB.Tech ECE students
- Build time5-7 weeks
- LevelAdvanced
- Available atAjvika Labs, Kakinada
About this project
Component Required for Autonomous UV Robot with SLAM
Project Used Hardware
Raspberry Pi 3 Model B,
ULTRAVIOLET UV DETECTION SENSOR,
4-CHANNEL RELAY CONTROLLER FOR I2C
12V to 5V buck converter
IB2 BTS7960 Monstor motor driver
DHT11 Temperature & Humidity Sensor (4 pins),
Arduino Mega 2560 TFT Touchscreen,
Project Used Software
AutoDesk fusion 360,
Project Hardware Software Selection
As we face a worldwide healthcare crisis caused by COVID-19, there's a large need for disinfection. This tutorial can be followed by anyone who is new to ROS all the instructions are mentioned so that you too can build an autonomous UV bot. UV-C in many parts of the globe for fighting the COVID-19. Currently, such units are either stationary or moved by humans. We improved upon that concept and built an autonomous, mobile unit that may move around lobbies and hallways to get into rooms for disinfection. Our aim is to provide a simple tutorial to help people to make an affordable autonomous solution. DETAILS Three Lamps mounted on the robot would emit intense UV light at 240 nm wavelength, as per current medical device standards. Our key innovation is in making this mobile with a state-of-the-art LIDAR-based SLAM technology that allows operation without exposing the workers to either the harmful UV light or infected rooms of patients. The mobility allows the disinfection of various corners and narrow alleys. We will be using a mobile app to communicate with the robot and the user can see the real-time status of the robot. The bottom side can be used for other autonomous applications for surveillance, for delivery, etc.
We are using the Wio terminal which has many inbuilt sensors. The Wio Terminal is a SAMD51-based microcontroller with Wireless Connectivity supported by Realtek RTL8720DN that’s compatible with Arduino and MicroPython. It runs at 120MHz (Boost up to 200MHz), 4MB External Flash, and 192KB RAM. It supports both Bluetooth and Wi-Fi providing the backbone for IoT projects. The Wio Terminal itself is equipped with a 2.4” LCD Screen, onboard IMU(LIS3DHTR), Microphone, Buzzer, microSD card slot, Light sensor, and Infrared Emitter(IR 940nm). Really cool features in one single device right. In our case, it acts as a wifi access point and we can connect the raspberry pi and our Virtual machine to a single access point. The inbuilt display will show the time and other messages. We are using the IMU sensor, inbuilt temperature sensor, and buzzer in the WIO terminal to detect a collision, overheating and it alerts through the buzzer as well as our mobile app. We are adding the UV light sensor to detect and get the feedback if UV light is ON or OFF. The WIO terminal is also connected to the relay to control the UV lights. The WIO terminal acts as an access point as well as a server. So that we can control the relay from UV SENSOR It uses a UV photodiode, which can detect the 240-370nm range of light. The signal from the photodiode is a very small level, in the nano-ampere level, hence an opamp to amplify the signal to a more Manageable voltage level. DHT sensor There is a thermistor. There is also a very basic chip inside that does some analog to digital conversion and shows a digital signal with the temperature and humidity. The digital signal is fairly easy to read using wio terminal. Here we are using it as a safety feature. The internal temperature of the robot is being measured here. If it is getting really high the complete system will shut down. UV light We are using 20w unit 2ft Sanyo Japan UVC lamp with a full assembly which provides an area coverage of 70 sqft which is sufficient for our application. You can refer to these articles to find out more regarding the disinfection properties of UVC light. PIR sensor PIR sensors allow you to sense motion, almost always used to detect whether a human has moved in or out of the sensor's range. They are small, inexpensive, low-power, easy to use, and don't wear out But it is a little inaccurate in our case we have to use Contact-less Infrared Thermopile Sensor with OpenCV to get more accurate data for human detection. We are working on the Thermopile sensor we will update in this tutorial really fast. MOTORS The initial plan was to use two NEMA 34 motors with 85KGCM Torque and use two DM860A2 motor drivers. But one of them was not working properly and so we changed our motors and drivers. So in this project, we will be using four wiper motors and two BTS7960 IBT2 motor divers instead. These motors can carry a sufficient load of our robot and control and coding is simple too. Charging circuit The robot identifies the charging port using path planning and comes and charges once every 5 hours. There are two rods on the robot and there are electrodes in the charging port which aligns properly. There is a magnetic reed switch that gets closed when the robot arrives.
Complete Project Code
Technologies used
Hardware components
- Arduino
- Servo Motor
- DC Motor
- L298N
- Ultrasonic Sensor
- ESP32
Software & tools
- Arduino IDE
- ROS
- Python
- OpenCV
- VS Code
Project demo video
What you get
- Working project / hardware kit, tested before delivery
- Complete source code with explanation
- Project demo and guidance for your viva
- Project report, PPT and IEEE paper support (on request)
Related ECE projects
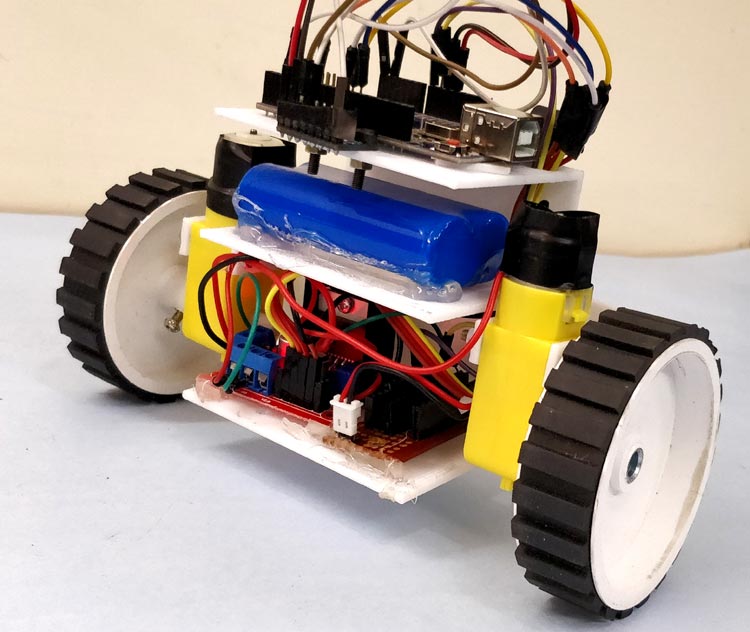
DIY Self Balancing Robot using Arduino
In this tutorial I will document my experience in building the self balancing robot. You might be an absolute beginner who is just getting s...
View project
Sustainable Battery Material For Electric Cars
Researchers have created eco-friendly batteries for EVs, matching cobalt-based batteries in cost-effectiveness with potential for lithium re...
View project
BorgWarner To Integrate STMicroelectronics SiC Technology In Viper Power Module For Volvo Cars Next-Generation EVs
STMicroelectronics will supply BorgWarner Inc. with the latest third generation 750V silicon carbide SiC power MOSFETs dice for their propri...
View project
Longer-Lasting Chips For Smartphones
New chips help users run apps faster, keep devices working longer, and handle more tasks on smartphones, computers, and cars.
View project