Programming ESP32 Over-the-air (OTA) using Arduino IDE
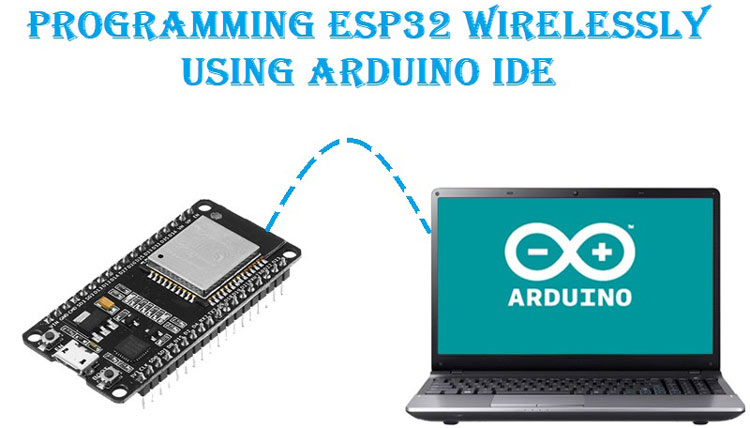
In this tutorial we are going to use over-the-air (OTA) programming with the ESP32 using the OTA Web Updater in Arduino IDE.
- Suitable forB.Tech IoT students
- Build time3-4 weeks
- LevelIntermediate
- Available atAjvika Labs, Kakinada
About this project
OTA (Over the Air) Programming is a feature of any WiFi-enabled microcontroller like ESP32 and ESP8266 that allows these devices to upgrade their firmware or software wirelessly without any physical access. This feature can be used to reprogram the devices that are fixed on a roof or any other place where connecting cable is difficult. Using OTA, you can send an update to multiple microcontrollers or devices that are on the same network. For example, this feature can be used to send updates for resolving the bugs, adding some features, etc. to multiple microcontrollers, cellphones, computers, set-top boxes, etc. The OTA updates are also playing an important role in IoT. It is used for remotely updating internet-connected devices with new settings, software, and firmware.
We previously learned to program ESP8266 NodeMCU using OTA. In this tutorial, we are going to use over-the-air (OTA) programming with the ESP32 using the OTA Web Updater in Arduino IDE.
How does OTA Programming Work?
To use the Over the Air (OTA) programming feature, first, you need to upload a sketch via serial port. This sketch contains the HTML code to create an OTA Web Updater so that you can upload code later using the browser. When the code is uploaded via serial port, it creates a web server where you can choose and upload a new sketch via a web browser.
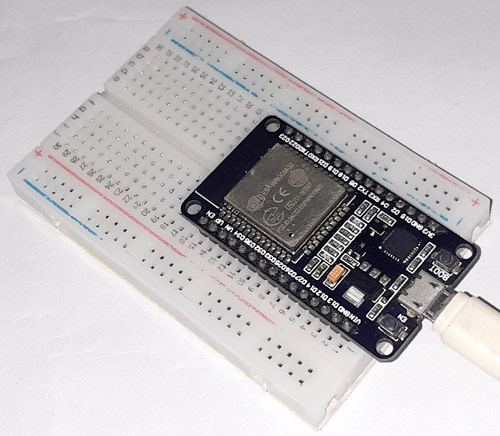
To upload the first code, connect the ESP32 to the laptop and open the Arduino IDE, select the Board Type as ESP32 Dev Kit, and select the correct serial port.
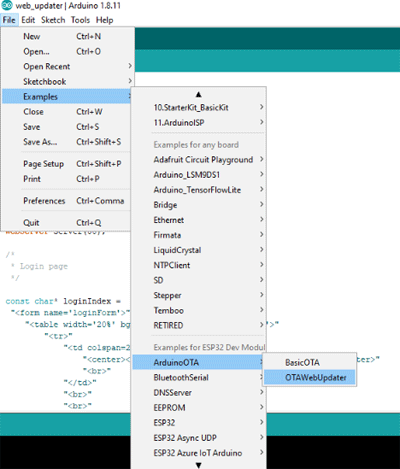
Then go to File > Examples >ArduinoOTA> OTAWebUpdater
Change the Wi-Fi name and password in the original code.
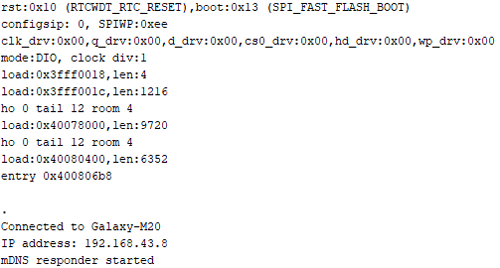
Upload the code to your ESP32 board. After uploading the code successfully, open serial monitor. Change the Baud Rate of 115200 on Serial Monitor and press the Reset button on ESP32 and it should print the ESP32 IP Address.
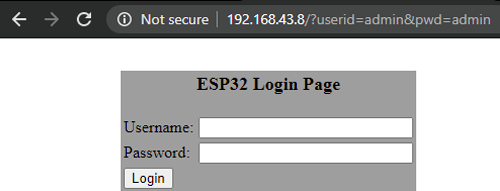
Now open the default browser and paste the ESP32 IP Address. It should open the Web server for Over the Air programming as shown in below image:
Default Username and Password is admin.
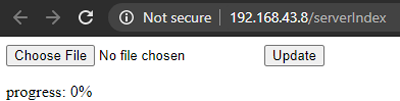
Then enter the username and password and click on the login page, a new tab opens. This is where you can upload the code.
Here we are going to upload a simple LED blinking code. Every code that you upload over the air should have an OTA code in it. So add the blink part in the original OTA code. The complete code is given at the end of the page.
Save your code with a new name and then go to S ketch > Export compiled Binary. This will create a new .bin file in your sketch folder.
Now go to the OTA web page and then click on the ‘ Choose File’ button and select the .bin file. After this, click on the ‘Update’ button to upload the sketch.
This is how ESP32 can be programmed using OTA without using serial communication.
Complete Project Code
We previously learned to program ESP8266 NodeMCU using OTA. In this tutorial, we are going to use over-the-air (OTA) programming with the ESP32 using the OTA Web Updater in Arduino IDE.
How does OTA Programming Work?
To use the Over the Air (OTA) programming feature, first, you need to upload a sketch via serial port. This sketch contains the HTML code to create an OTA Web Updater so that you can upload code later using the browser. When the code is uploaded via serial port, it creates a web server where you can choose and upload a new sketch via a web browser.
To upload the first code, connect the ESP32 to the laptop and open the Arduino IDE, select the Board Type as ESP32 Dev Kit, and select the correct serial port.
Then go to File > Examples >ArduinoOTA> OTAWebUpdater
Change the Wi-Fi name and password in the original code.
Upload the code to your ESP32 board. After uploading the code successfully, open serial monitor. Change the Baud Rate of 115200 on Serial Monitor and press the Reset button on ESP32 and it should print the ESP32 IP Address.
Now open the default browser and paste the ESP32 IP Address. It should open the Web server for Over the Air programming as shown in below image:
Default Username and Password is admin.
Then enter the username and password and click on the login page, a new tab opens. This is where you can upload the code.
Here we are going to upload a simple LED blinking code. Every code that you upload over the air should have an OTA code in it. So add the blink part in the original OTA code. The complete code is given at the end of the page.
Save your code with a new name and then go to S ketch > Export compiled Binary. This will create a new .bin file in your sketch folder.
Now go to the OTA web page and then click on the ‘ Choose File’ button and select the .bin file. After this, click on the ‘Update’ button to upload the sketch.
This is how ESP32 can be programmed using OTA without using serial communication.
Complete Project Code
Technologies used
Hardware components
- ESP32
- ESP8266
- Arduino
- DHT22
- Relay
- OLED
- NodeMCU
Software & tools
- Arduino IDE
- Blynk
- Firebase Console
- Node-RED
- MQTT Broker
What you get
- Working project / hardware kit, tested before delivery
- Complete source code with explanation
- Project demo and guidance for your viva
- Project report, PPT and IEEE paper support (on request)
Delivery & Payment
Delivery takes a minimum of two weeks from the date your inquiry is confirmed.
Payment is in two parts:
• 50% advance to start the project
• Remaining 50% before delivery
Note:
• Documentation and PPT are not included by default
• If you need documentation/PPT, it can be arranged for extra time and cost
We'll confirm the exact timeline and cost with you after reviewing your requirements.
Related IoT projects

IoT
DIY IoT Plant Watering System using Arduino
A remote plant-watering system that monitors soil moisture and lets you trigger a water pump from anywhere through the Blynk app, with LED-m...
View project
IoT
Build a smart mirror with an Arduino UNO Q
A wall-mounted smart mirror that shows the time, calendar, to-do list, room temperature/humidity and weather forecast behind a two-way glass...
View project
IoT
ESP32 Patient Health Monitor ECG SpO2 BPM Live Dashboard
Build a complete patient health monitoring system using ESP32 with AD8232 ECG sensor, MAX30102 pulse oximeter, BME280 and live web dashboard...
View project
IoT
IoT AC Energy Meter with PZEM-004T and ESP32 WebServer
Build an IoT-based AC energy meter using ESP32 and PZEM-004T to measure voltage, current, power, frequency and energy with live web dashboar...
View project