

How to Configure an ESP Mesh Network using Arduino IDE – Communicate among and between ESP32, ESP8266, and NodeMCU
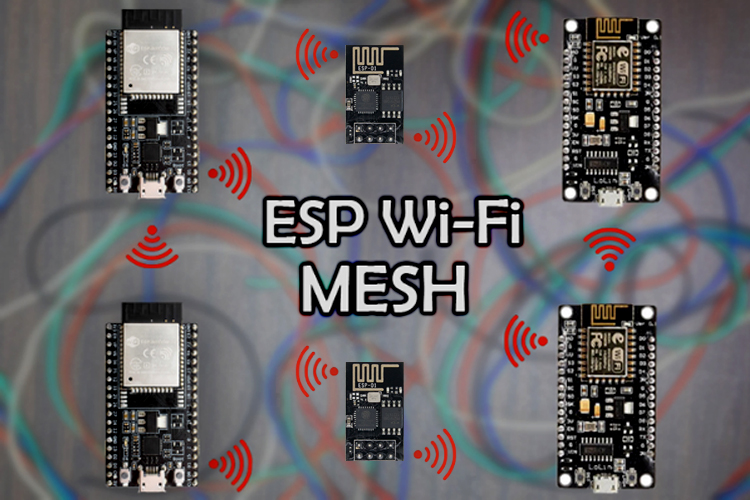
In this article, we are going to make a simple ESP Mesh network setup that consists of four ESP devices that will communicate with each other with the help of a Wi-Fi Mesh Network.
- Suitable forB.Tech IoT students
- Build time3-4 weeks
- LevelIntermediate
- Available atAjvika Labs, Kakinada
About this project
However, if we consider a common host (like a generic router), it can connect to a limited number of nodes, less than 32 to be exact. And with an increasing number of IoT devices that could be in our home or industry, this is not sufficient. Currently, there are two solutions to this problem: The first one is to use a Mesh Router that can handle a lot more connections compared to a generic one, or we can use a network protocol known as Mesh Network.
So in this article, we are going to make a simple ESP Mesh network setup that consists of four ESP devices that will communicate with each other with the help of a Wi-Fi Mesh Network. And finally, we are going to connect a single ESP to our laptop in order to get data from all the four sensors on the network. Note that we will be using both the ESP32 and ESP8266 boards in this tutorial so that you can create an ESP8266 Mesh network or ESP32 Mesh network using the same method.
What is ESP-MESH and How it Work?
According to the official documentation of ESP-MESH, it is a self-organizing and self-healing network meaning the network can be built and maintained autonomously. For more information, visit the ESP-MESH official documentation.
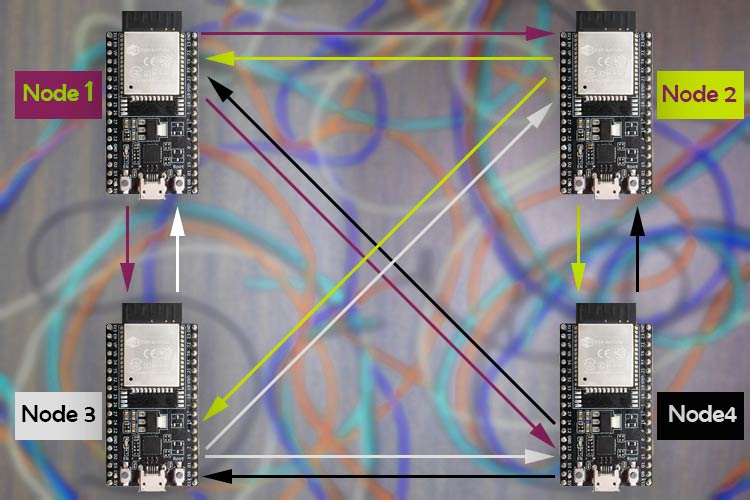
A mesh network is a group of connected devices on a network that is acting as a single network. ESP-Mesh is quite different from a traditional mesh setup. In an ESP-Mesh, the node or a single device can connect to its neighbor simultaneously. One single node can connect to multiple nodes and they can relay data from one node to another. This process is not only efficient but it’s also redundant. If one of any nodes fails; the data from other nodes can reach its destination without a problem. This also opens possibilities of achieving interconnection without needing a central node, which significantly extends the coverage area of the mesh-network. With these features, this network is less prone to conjunction because the total number of nodes in the network is not limited by a single central node.
For the sake of simplicity, we have decided to use four ESP modules; but if you are building this network, you can use as many ESPdevices as you can. To build the mesh network, we are going to use the painlessMesh library for Arduino which has support for both the ESP8266 and the ESP32 modules.
Components Required to build the Mesh Network with ESP
The list of components required for this project is given below. To build this project, I have used components that are pretty generic and you can find them in your local hobby store.
NodeMCU(ESP8266) - 2
USB Cable (for power and data)
ESP Wi-Fi Mesh - Circuit Diagram
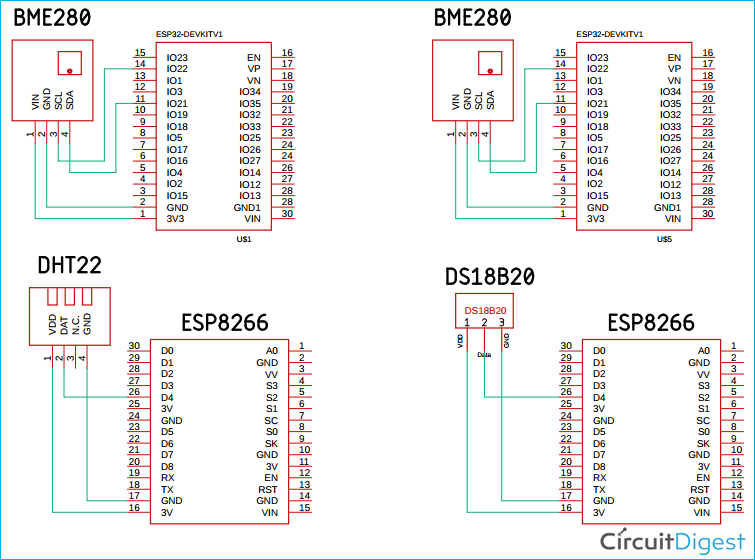
The schematic shown below is used to construct the hardware section for ESP8266 and ESP32 based Wi-Fi Mesh Network.
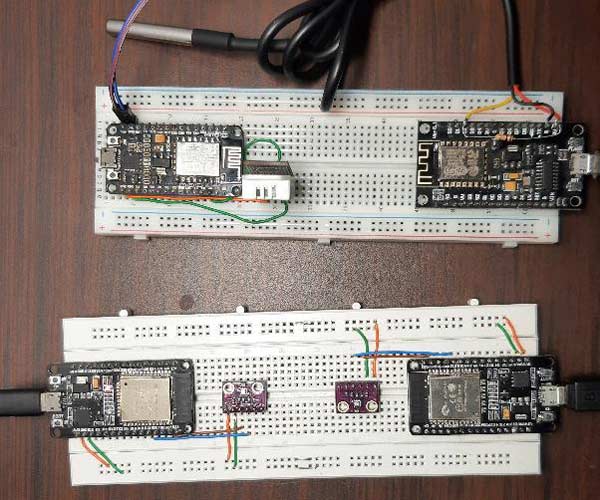
For this circuit, we have connected two BME280 sensors with the ESP32 board, we have connected a DHT22 sensor to one of the ESP8266 board, and we have connected the DS18B20 sensor with another ESP8266 board. We have previously used all these sensors in different projects individually. Here, we will be using them on different NodeMCU/ESP32 boards and then connect them all through an ESP Mesh network. An image for the hardware setup is shown below.
Programming the ESP8266 and ESP32 for Mesh Networking
For this article, we are going to use Arduino IDE to program the ESP32 and the ESP8266 boards. Here, we will use the Painless Mesh library to construct our mesh network. To install the library, go to Sketch->Include Library->Manage Libraries and search for the painlessMesh. O nce done, just click install and the library will be installed in the Arduino IDE. As you can see in the image below, once you click Install, this library asks you to install additional dependencies. You need to install those for the library to work.
As you already know from the hardware section, we are going to use a DS18B20 Sensor, A DHT22 sensor, and two BME 280 sensors. We need to install all of those, and it can be simply done with the board manager method.
You can also download these libraries from the link given below. Once we have downloaded and installed all the required libraries, we can move on to creating our code.
Download Painless Mesh Library
Download DHT Sensor Library
Download BME280 Library
Download DallasTemperature Library
Note: The code explanation you see next is the code used in all four boards. We designed the code so that we can tweak it a little and we can upload it to any of our ESP boards despite the fact that it’s an ESP32 or an ESP8266 board.
Upload the Code to ESP32 Board in which a BME280 Sensor is Connected:
As you can see in the hardware schematic, we have connected a BME280 sensor. For that, you need to uncomment the macro for the BME_280 sensor and give it a unique Node Name. In our case, we have used Node_1 and Node_2 for our two ESP32 boards to which we have attached the BME280 sensor
Upload the Code to ESP8266 Board in Which A DHT Sensor is Connected:
In one of our ESP8266 boards, we have a DHT22 sensor and in another one, we have a DS18B20 sensor. To upload the code to the DHT22 board, we have to follow the same process. First, we uncomment the macro for DHT22 and then comment out the macro for BME280 and upload the code to the board to which we have connected the DHT 22 sensor.
Upload the Code to ESP8266 Board in Which A DS18B20 Sensor is Connected:
The process stays exactly the same for this board also. We uncomment the macro for the DS18B20 sensor and we comment on other macros.
Finally, to enable or disable other log statements, you can uncomment the ENABLE_LOG macro. Now that we have an understanding of how the code works, we can move further and explain the code.
We will start our code by including the painlessMesh library and the Arduino_JSON library.
Next, we define some macros which we will use to enable or disable the parts of our code. This is needed because not all the nodes use the same sensor type and. So for including or excluding parts of our code, we can fit four different codes into a single file.
Next, we define a String type variable nodeName. This will be used to uniquely identify the nodes in the network. Along with that we also define the float type variable to store the temperature, humidity, and barometric pressure data.
From this step onwards, we will be using #ifdef and #endif macros to include or exclude parts of our code. The first section of the code is for the BME280 sensor. As said earlier, we will start by #ifdef BME_280 statement. Next, we define all the required libraries for the BME280 sensor. The BME sensor also uses the wire library, so we define that as well. Next, we make a BME280I2C object bme. Next, using the scope resolution operator, we access the variable of the class and we finish that off with the endif statement.
We do the same for the DHT library too. We start with the #ifdef DHT22 statement followed by including the DHT.h library. Next, we define the PIN for DHT, and add a prototype for DHT22. Thereafter, we create an object by passing the above-defined statements. And we finish off with the #endif statement.
We also do the same for the DS18B20 sensor. We start with the #ifdef DS18B20 statement.
As the DS18B20 sensor requires OneWire library, we include that along with the DallasTemperature library. Next, we define the pin for the sensor and create an OneWire object by passing the pin variable. Next, we pass the address of the OneWire object to the DallasTemperature object by making a new DallasTemperature object.
Next, we define the Wi-Fi credentials along with the port number. This credential and port number should stay the same for all nodes within the network.
Next, we make three instances. One is for the Scheduler, another is for the painlessMesh and the final one is for the JSON library JSONVar
Next, we have created a task that is like a thread that always runs and calls a function after some time. The defined task below will be used to send a broadcast message to all the nodes. The task instantly takes three parameters. First one defines how often the task will call the function, Next, it asks for the life of the task, and finally, it takes a pointer to the calling function.
Next, we have our calling function sendMessage(). This function calls another function that returns a string of JSON. As the name implies, the sendMessage task is used to send the message to all the nodes.
Next, we have our receivedCallback() function. Whenever a new message arrives, this function gets a call. If you want to do something with the received message, you need to tweak this function to get your job done. This function takes two arguments - the node id and message as a pointer.
Next, we have our newConnectionCallback( ) function. This function gets a call whenever there is a new device is added to the network, and it sends a print statement to the serial monitor.
Next, we have our nodeTimeAdjustedCallback() . This callback function takes care of all the timing necessities required by the painless mesh.
Next, we have our setup() function. In the setup, we initialize the serial and print the node name. This is helpful because once all the nodes are programed, we can identify the nodes easily with the serial monitor. We also have the setDebugMsgTypes( ) class of the mesh object that logs any ERROR | STARTUP messages. Next, we initialize the mesh by-passing the SSID, Password, and Port Number to the init() function. Please keep in mind that these functions also need the pointer to the Scheduler in order to work properly.
Now, we will initialize all the callback functions which we have discussed above. These callback functions will be called whenever a certain task is needed to be performed.
Now we add the task to the task scheduler, and enabled it with the help of the taskSendMessage.enable() method. when it's executed, different tasks start to run simultaneously in the background.
Next, in the setup section, we have all the necessary ifdef and endif macros which are used to initialize different sensors depending upon the requirement. First, we will config the BME280 sensor. The code below initializes the BME280 sensor and checks for the version of the sensor as the BME280 sensor comes with many different versions.
Finally, we have configured the DHT22 and the DS18B20 sensor with the help of the ifdef and #endif method. And this marks the end of the setup() function.
Next, we have our loop. In this code, the loop dose does not do much, it just updates the mesh with the help of mesh.update() method. It takes care of all the tasks. These tasks will not work if this update method is not present.
Next, we have our final function. This function constructs the JSON string and returns it to the calling function. In this function, we start by calling the bme.read() method and we pass all the predefined variables that get updated with new values. Next, we divide the pressure value by 100 because we want to convert it into millibar. Next, we define our JSON array and put the Sensor name, the node name, the temperature, pressure value, and return the values using the JSON.stringify() function. Finally, we define another ifdef and endif macros to enable or disable log parameters.
Finally, we do the same for the DHT22 and the DS18B20 sensor code.
Now, as the coding process is finished; we comment or uncomment the defined macros on top; according to our board which we are going to upload. Next, we give each node a unique name and we simply upload the code. If everything is all right, the code will compile and upload properly without any error.
ESP8266 and ESP32 based Mesh Network - Testing
The test setup for the ESp8266 and esp32 based mesh network is shown below. As you can see in the above image, I have connected power to all the esp modules and you can also see the output data on the screen of the laptop. A screenshot of the serial monitor windows is shown below.
In the above window, you can see that we are easily receiving the data from all four sensors.
The complete working of the project can also be found in the video linked below. Hope you enjoyed the project and found it interesting to build your own. If you have any questions, please leave them in the comment section below. You can also write all your technical questions on forums to get them answered or to start a discussion.
Complete Project Code
Very beautiful and interesting post, I'll try it as soon as possible! It would also be interesting to integrate sleep mode, when the task is not active; and an additional esp for only receiving data from all the others. Thanks and congratulations for the great job
Hi I'm having a problem in line
Technologies used
Hardware components
- ESP32
- ESP8266
- Arduino
- DHT22
- Relay
- OLED
- NodeMCU
Software & tools
- Arduino IDE
- Blynk
- Firebase Console
- Node-RED
- MQTT Broker
Project demo video
What you get
- Working project / hardware kit, tested before delivery
- Complete source code with explanation
- Project demo and guidance for your viva
- Project report, PPT and IEEE paper support (on request)
Related IoT projects

DIY IoT Plant Watering System using Arduino
A remote plant-watering system that monitors soil moisture and lets you trigger a water pump from anywhere through the Blynk app, with LED-m...
View project
Build a smart mirror with an Arduino UNO Q
A wall-mounted smart mirror that shows the time, calendar, to-do list, room temperature/humidity and weather forecast behind a two-way glass...
View project
ESP32 Patient Health Monitor ECG SpO2 BPM Live Dashboard
Build a complete patient health monitoring system using ESP32 with AD8232 ECG sensor, MAX30102 pulse oximeter, BME280 and live web dashboard...
View project
IoT AC Energy Meter with PZEM-004T and ESP32 WebServer
Build an IoT-based AC energy meter using ESP32 and PZEM-004T to measure voltage, current, power, frequency and energy with live web dashboar...
View project