

How to use nRF24L01 module with Arduino?
Learn how to use the Arduino nRF24L01 module for wireless communication. This beginner-friendly guide covers wiring, code, and troubleshooting to kickstart your Arduino RF projects.
- Suitable forB.Tech Embedded students
- Build time3-4 weeks
- LevelBeginner
- Available atAjvika Labs, Kakinada
About this project
If you're looking to add wireless communication to your project, the Arduino nRF24L01 module combo is one of the most reliable and cost-effective solutions available. Whether you're building a DIY spy bug, a long-range walkie-talkie, or just want to control stuff wirelessly, the Arduino nRF24L01 setup gives you the flexibility to send and receive data wirelessly over long distances using the 2.4GHz band.
In this article, we’ll walk you through everything you need to know to get started with Arduino and nRF24L01 modules. From wiring diagrams and library installation to example codes and troubleshooting tips, we’ll cover it all. By the end, you'll have a solid foundation to build your own wireless Arduino projects using the powerful nRF24L01 transceiver module.
└ Overview of nRF24L01 Module
└ Overview of nRF24L01 Module
└ nRF24L01 PA LNA Wireless Transceiver Module with External Antenna
└ nRF24L01 PA LNA Wireless Transceiver Module with External Antenna
└ 3.3V Adapter Board for nRF24L01
└ 3.3V Adapter Board for nRF24L01
Technical Specifications of nRF24L01
Technical Specifications of nRF24L01
How Does The nRF24L01+ Module Work?
How Does The nRF24L01+ Module Work?
nRF24L01 Module Pinouts
nRF24L01 Module Pinouts
Wiring nRF24L01 with Arduino Uno
Wiring nRF24L01 with Arduino Uno
└ Arduino Uno Connection with nRF24L01 as Transmitter
└ Arduino Uno Connection with nRF24L01 as Transmitter
└ Arduino Uno Connection with nRF24L01 as Receiver
└ Arduino Uno Connection with nRF24L01 as Receiver
Code for Arduino Uno With nRF24L01 As Transmitter
Code for Arduino Uno With nRF24L01 As Transmitter
└ nRF24L01 Code Explanation as Transmitter
└ nRF24L01 Code Explanation as Transmitter
Code for Arduino Uno with nRF24L01 As Receiver
Code for Arduino Uno with nRF24L01 As Receiver
└ nRF24L01 Code Explanation as Receiver
└ nRF24L01 Code Explanation as Receiver
└ OLED Display Settings
└ OLED Display Settings
Working of nRF24L01 Using Arduino
Working of nRF24L01 Using Arduino
Similar nRF24L01 and Arduino Wireless Projects
Similar nRF24L01 and Arduino Wireless Projects
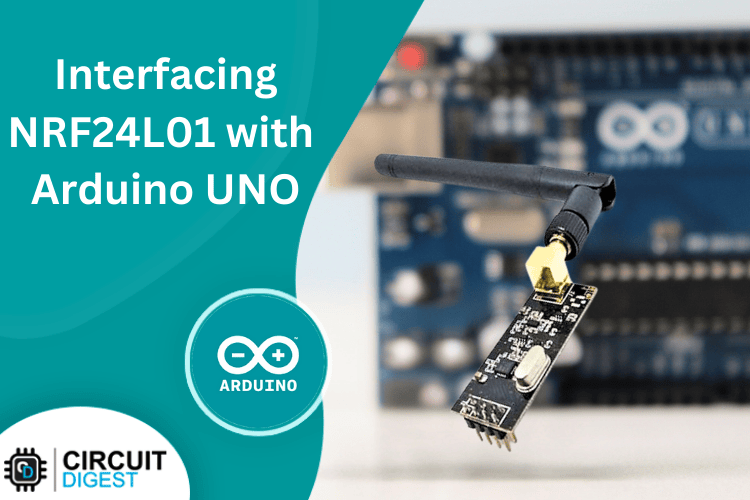
Before we get started it is important to understand that there two types of nRF24L01 modules available in the market one is called just nRF24L01 and the other is called nRF24L01+ PA+LN. While both the modules have the same pinout and work the same the nRF24L01+ PA+LN modules come with an antenna and claim to have a longer range. In this article, we have used the simple nRF24L01 module on the transmitter side and the nRF24L01+PA+LN module on the receiver side so that its easy for you to understand the working of both the modules. Also this article is limited only to sending data between two Arduino boards and nRF24L01 module, but you can also use the nRF24L01 module to send data wirelessly between Arduino and Raspberry Pi and use nRF24L01 as a BLE module to communicate between Arduino and smartphones.
1. Arduino Uno – x2 2. nRF24L01 – x2 3. 3.3V Adapter Board for nRF24L01 Wireless Module – x2 4. DHT11 5. OLED display 6. Jumper wires 7. Breadboard – x2
The nRF24L01 is a small, low-price Wi-Fi verbal exchange module that keeps records over short distances. It uses radio waves to switch information at 2.4GHz, just like Wi-Fi however with decreased electricity intake. The operating voltage is 3.3V. Don’t exceed this voltage limit.
nRF24L01 uses just 12mA current during transmission, which is quite low compared to some LEDs. It only utilizes 26µA current in standby mode and 900nA in power-down mode.
This module is generally used with microcontrollers like Arduino to create wireless connections between devices. It allows a range of as long as a hundred meters in open areas. This module can cover 100 meters if used effectively and it can also cover 1000 meters if you use it with an antenna.
The nRF24L01 is very suitable for projects like remote controls, home automation, and wireless sensors. It’s easy to use, because of its SPI interface, which allows it to communicate quickly with the Arduino. The module is lightweight, energy-efficient, and can work reliably with minimal interference, making it ideal for beginners and advanced users who want to explore wireless data transfer. People commonly use it to make a drone or an RC car.
This nRF24L01 module is the same as the one shown above but the main difference is that it has an antenna for an extended-range facility.
It includes an RFX2401C range extender chip that combines PA, LNA, and transmit-receive switching circuitry. Because of this onboard chip, we get a higher range of approximately 1000+ meters.
PA stands for Power Amplifier, and LNA stands for Low-Noise Amplifier. The PA amplifies the weak signals transmitted by the nRF24L01 chip, while the LNA amplifies an extremely weak signal received from the antenna.
This is a 3.3V adaptor Board for the nRF24L01 module. As you can see the pins of nRF24L01 are not compatible with the breadboard but now with this adapter board we can easily connect the nRF24L01 pins to Arduino.
The nRF24L01 module works properly on 3.3V, so this adapter module can provide a steady and smooth 3.3V for it to function properly. The adapter can take up to 15V input, but we recommend staying below 12V.
Technical Specifications of nRF24L01
Maximum Air Data Rate
Minimum Air Data Rate
Operating Supply Voltage
Max. Operating Current
Min. Current(Standby Mode)
700+ m (line of sight)
How Does The nRF24L01+ Module Work?
Only at a specific frequency, nRF24L01 works and that is called a channel. If we want two or more modules to exchange data between them then we must put them on the same channel which means between 2.400 and 2.525 GHz frequency.
This means we have 125 different possible channels, each taking up to 1MHz of bandwidth. This is one of the best features of the NRF24L01 module, as it provides 125 different channels to operate upon.
There is a gap of 1MHz between the two channels, which is required to transmit data over air between 250kbps and 1Mbps. Doing this doesn't cause problems, but what if we want to transfer 2Mbps data over air? So, to transfer 2Mbps data over the air, we need a 2MHz gap between the two channels. This ensures non-overlapping channels and establishes smooth communication between both parties.
nRF24L01 Module Pinouts
GND – It should be connected to the ground of the power source.
VCC - It supplies power to the module. The power input range should be between 1.9 volts and 3.9 volts but for your information it works best at 3.3V. You can connect it directly to the 3.3V output of your Arduino board. Make sure you don't supply more than 4 volts, you gonna kill it.
CE (Chip Enable)—This pin is usually an active-high pin. Depending on its mode, the NRF24L01 will either transmit or receive data over the air.
CSN (Chip Select Not) - This is an active-low pin that is held high. The NRF24L01 can only listen to data on its SPI port when this pin goes low.
SCK (Serial Clock) - When the SPI bus master sends the clock pulses then this pin comes into play to accept those clock pulses.
MOSI (Master Out Slave In) - This pin is the SPI input to the module. Through this pin module receives the data from the microcontroller.
MISO (Master In Slave Out) - This pin is the SPI output from the module. Through this pin, the module sends the data to the microcontroller.
IRQ - This is an interrupt pin and the job of this pin is to alert the master when the new data is available to process.
Wiring nRF24L01 with Arduino Uno
Now, we know many things about NRF24LO1 and its workings. So, let's start making a project with it and learn more about it.
Now, we gonna start first with GND and VCC. Connect the GND and VCC pin of this module to the GND and VCC of Arduino Uno.
Let's connect the SPI pins. Keep in mind that SPI pins are different in different versions of Arduino. In Our board which is Arduino Uno, the SPI pins are 13 (SCK), 12 (MISO), 11 (MOSI), AND 10 (SS).
Keep in mind that for both the transmitter and receiver the connections with the Arduino are the same.
You can also make connections with the help of the image given below. Connect the data pin of the DHT11 sensor to the digital PIN 3 of Arduino.
Connect the GND and VCC of the OLED to the GND and VCC of the Arduino, and connect SCK/SCL and SDA to the A5 and A4 of the Arduino.
Code for Arduino Uno With nRF24L01 As Transmitter
To make our code function properly first, we need to add some libraries. The libraries are SPI.h, nRF24L01.h, RF24.h, DHT.h. To download these libraries you need to follow these instructions.
Click on Sketch > Include Library > Manage Libraries and now search in the search bar the names of the libraries that I have mentioned above then install them one by one.
SPI.h, nRF24L01.h, and RF24.h: We need these libraries to communicate with the NRF24L01 module. DHT.H : This library is required to read the data from the DHT11 sensor.
So, what we are trying to do here is that we have included some libraries, declared some variables, created an object “dht” and “radio” and created a structure called “sensorData” which holds temperature and humidity.
address[6] = \"00001\": The address ensures the radio module sends data to the correct receiver.
dht.begin(), radio.begin(): Here, we are initializing the nRF24L01 radio module and DHT11 sensor.
radio.setPALevel(RF24_PA_LOW): sets the radio module's power level to low.
In this article, we’ll walk you through everything you need to know to get started with Arduino and nRF24L01 modules. From wiring diagrams and library installation to example codes and troubleshooting tips, we’ll cover it all. By the end, you'll have a solid foundation to build your own wireless Arduino projects using the powerful nRF24L01 transceiver module.
└ Overview of nRF24L01 Module
└ Overview of nRF24L01 Module
└ nRF24L01 PA LNA Wireless Transceiver Module with External Antenna
└ nRF24L01 PA LNA Wireless Transceiver Module with External Antenna
└ 3.3V Adapter Board for nRF24L01
└ 3.3V Adapter Board for nRF24L01
Technical Specifications of nRF24L01
Technical Specifications of nRF24L01
How Does The nRF24L01+ Module Work?
How Does The nRF24L01+ Module Work?
nRF24L01 Module Pinouts
nRF24L01 Module Pinouts
Wiring nRF24L01 with Arduino Uno
Wiring nRF24L01 with Arduino Uno
└ Arduino Uno Connection with nRF24L01 as Transmitter
└ Arduino Uno Connection with nRF24L01 as Transmitter
└ Arduino Uno Connection with nRF24L01 as Receiver
└ Arduino Uno Connection with nRF24L01 as Receiver
Code for Arduino Uno With nRF24L01 As Transmitter
Code for Arduino Uno With nRF24L01 As Transmitter
└ nRF24L01 Code Explanation as Transmitter
└ nRF24L01 Code Explanation as Transmitter
Code for Arduino Uno with nRF24L01 As Receiver
Code for Arduino Uno with nRF24L01 As Receiver
└ nRF24L01 Code Explanation as Receiver
└ nRF24L01 Code Explanation as Receiver
└ OLED Display Settings
└ OLED Display Settings
Working of nRF24L01 Using Arduino
Working of nRF24L01 Using Arduino
Similar nRF24L01 and Arduino Wireless Projects
Similar nRF24L01 and Arduino Wireless Projects
Before we get started it is important to understand that there two types of nRF24L01 modules available in the market one is called just nRF24L01 and the other is called nRF24L01+ PA+LN. While both the modules have the same pinout and work the same the nRF24L01+ PA+LN modules come with an antenna and claim to have a longer range. In this article, we have used the simple nRF24L01 module on the transmitter side and the nRF24L01+PA+LN module on the receiver side so that its easy for you to understand the working of both the modules. Also this article is limited only to sending data between two Arduino boards and nRF24L01 module, but you can also use the nRF24L01 module to send data wirelessly between Arduino and Raspberry Pi and use nRF24L01 as a BLE module to communicate between Arduino and smartphones.
1. Arduino Uno – x2 2. nRF24L01 – x2 3. 3.3V Adapter Board for nRF24L01 Wireless Module – x2 4. DHT11 5. OLED display 6. Jumper wires 7. Breadboard – x2
The nRF24L01 is a small, low-price Wi-Fi verbal exchange module that keeps records over short distances. It uses radio waves to switch information at 2.4GHz, just like Wi-Fi however with decreased electricity intake. The operating voltage is 3.3V. Don’t exceed this voltage limit.
nRF24L01 uses just 12mA current during transmission, which is quite low compared to some LEDs. It only utilizes 26µA current in standby mode and 900nA in power-down mode.
This module is generally used with microcontrollers like Arduino to create wireless connections between devices. It allows a range of as long as a hundred meters in open areas. This module can cover 100 meters if used effectively and it can also cover 1000 meters if you use it with an antenna.
The nRF24L01 is very suitable for projects like remote controls, home automation, and wireless sensors. It’s easy to use, because of its SPI interface, which allows it to communicate quickly with the Arduino. The module is lightweight, energy-efficient, and can work reliably with minimal interference, making it ideal for beginners and advanced users who want to explore wireless data transfer. People commonly use it to make a drone or an RC car.
This nRF24L01 module is the same as the one shown above but the main difference is that it has an antenna for an extended-range facility.
It includes an RFX2401C range extender chip that combines PA, LNA, and transmit-receive switching circuitry. Because of this onboard chip, we get a higher range of approximately 1000+ meters.
PA stands for Power Amplifier, and LNA stands for Low-Noise Amplifier. The PA amplifies the weak signals transmitted by the nRF24L01 chip, while the LNA amplifies an extremely weak signal received from the antenna.
This is a 3.3V adaptor Board for the nRF24L01 module. As you can see the pins of nRF24L01 are not compatible with the breadboard but now with this adapter board we can easily connect the nRF24L01 pins to Arduino.
The nRF24L01 module works properly on 3.3V, so this adapter module can provide a steady and smooth 3.3V for it to function properly. The adapter can take up to 15V input, but we recommend staying below 12V.
Technical Specifications of nRF24L01
Maximum Air Data Rate
Minimum Air Data Rate
Operating Supply Voltage
Max. Operating Current
Min. Current(Standby Mode)
700+ m (line of sight)
How Does The nRF24L01+ Module Work?
Only at a specific frequency, nRF24L01 works and that is called a channel. If we want two or more modules to exchange data between them then we must put them on the same channel which means between 2.400 and 2.525 GHz frequency.
This means we have 125 different possible channels, each taking up to 1MHz of bandwidth. This is one of the best features of the NRF24L01 module, as it provides 125 different channels to operate upon.
There is a gap of 1MHz between the two channels, which is required to transmit data over air between 250kbps and 1Mbps. Doing this doesn't cause problems, but what if we want to transfer 2Mbps data over air? So, to transfer 2Mbps data over the air, we need a 2MHz gap between the two channels. This ensures non-overlapping channels and establishes smooth communication between both parties.
nRF24L01 Module Pinouts
GND – It should be connected to the ground of the power source.
VCC - It supplies power to the module. The power input range should be between 1.9 volts and 3.9 volts but for your information it works best at 3.3V. You can connect it directly to the 3.3V output of your Arduino board. Make sure you don't supply more than 4 volts, you gonna kill it.
CE (Chip Enable)—This pin is usually an active-high pin. Depending on its mode, the NRF24L01 will either transmit or receive data over the air.
CSN (Chip Select Not) - This is an active-low pin that is held high. The NRF24L01 can only listen to data on its SPI port when this pin goes low.
SCK (Serial Clock) - When the SPI bus master sends the clock pulses then this pin comes into play to accept those clock pulses.
MOSI (Master Out Slave In) - This pin is the SPI input to the module. Through this pin module receives the data from the microcontroller.
MISO (Master In Slave Out) - This pin is the SPI output from the module. Through this pin, the module sends the data to the microcontroller.
IRQ - This is an interrupt pin and the job of this pin is to alert the master when the new data is available to process.
Wiring nRF24L01 with Arduino Uno
Now, we know many things about NRF24LO1 and its workings. So, let's start making a project with it and learn more about it.
Now, we gonna start first with GND and VCC. Connect the GND and VCC pin of this module to the GND and VCC of Arduino Uno.
Let's connect the SPI pins. Keep in mind that SPI pins are different in different versions of Arduino. In Our board which is Arduino Uno, the SPI pins are 13 (SCK), 12 (MISO), 11 (MOSI), AND 10 (SS).
Keep in mind that for both the transmitter and receiver the connections with the Arduino are the same.
You can also make connections with the help of the image given below. Connect the data pin of the DHT11 sensor to the digital PIN 3 of Arduino.
Connect the GND and VCC of the OLED to the GND and VCC of the Arduino, and connect SCK/SCL and SDA to the A5 and A4 of the Arduino.
Code for Arduino Uno With nRF24L01 As Transmitter
To make our code function properly first, we need to add some libraries. The libraries are SPI.h, nRF24L01.h, RF24.h, DHT.h. To download these libraries you need to follow these instructions.
Click on Sketch > Include Library > Manage Libraries and now search in the search bar the names of the libraries that I have mentioned above then install them one by one.
SPI.h, nRF24L01.h, and RF24.h: We need these libraries to communicate with the NRF24L01 module. DHT.H : This library is required to read the data from the DHT11 sensor.
So, what we are trying to do here is that we have included some libraries, declared some variables, created an object “dht” and “radio” and created a structure called “sensorData” which holds temperature and humidity.
address[6] = \"00001\": The address ensures the radio module sends data to the correct receiver.
dht.begin(), radio.begin(): Here, we are initializing the nRF24L01 radio module and DHT11 sensor.
radio.setPALevel(RF24_PA_LOW): sets the radio module's power level to low.
Technologies used
Hardware components
- Arduino
- Raspberry Pi
- DHT
- OLED
- LED
- Sensor
- Module
- Board
- NRF24
- Amplifier
What you get
- Working project / hardware kit, tested before delivery
- Complete source code with explanation
- Project demo and guidance for your viva
- Project report, PPT and IEEE paper support (on request)
Delivery & Payment
Delivery takes a minimum of two weeks from the date your inquiry is confirmed.
Payment is in two parts:
• 50% advance to start the project
• Remaining 50% before delivery
Note:
• Documentation and PPT are not included by default
• If you need documentation/PPT, it can be arranged for extra time and cost
We'll confirm the exact timeline and cost with you after reviewing your requirements.
Related Embedded projects

Embedded
ESP32 Fingerprint Attendance System with Live Web Dashboard
Build a biometric attendance system using ESP32 with AS608 fingerprint sensor that logs attendance with timestamp to web dashboard and Googl...
View project
Embedded
Mars Rover Robot Replica using ESP32 CAM and Arduino
Build a Mars Rover robot replica using ESP32-CAM and Arduino with a rocker-bogie suspension system, live video streaming, and smartphone app...
View project
Embedded
ESP32 CAN Bus Tutorial Interfacing MCP2515 with ESP32
Learn CAN bus communication with ESP32 and MCP2515 CAN controller to send and receive data in automotive and industrial applications.
View project
Embedded
ESP32 MP3 Music Player with SD Card and I2S Amplifier
Build a standalone ESP32 MP3 music player that reads audio from SD card and outputs high-quality audio via I2S DAC amplifier with web contro...
View project