

Hand Gesture Recognition using ESP32 and Python
Learn how to control LEDs using hand gestures with ESP32, Python, OpenCV, and MediaPipe. This interactive project demonstrates real-time gesture recognition and wireless LED control via WiFi. Makes it ideal for IoT and embedded systems applications.
- Suitable forB.Tech Embedded students
- Build time3-4 weeks
- LevelBeginner
- Available atAjvika Labs, Kakinada
About this project
ESP32 Arduino Code to Control LEDs with Hand Gesture
└ Complete ESP32 Code
Python Code using OpenCV and Media Pipe
└ Complete Python Code
└ Python Code Explanation
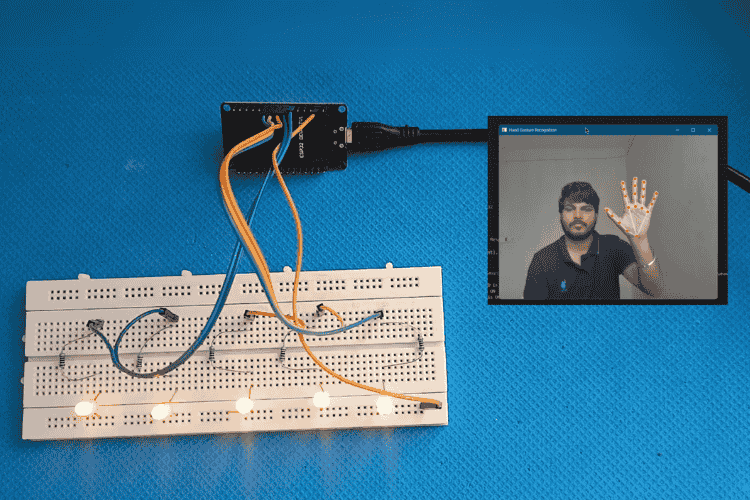
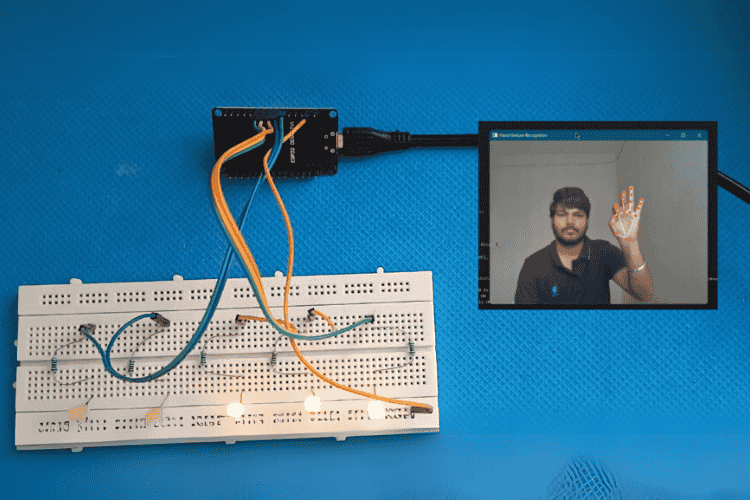
ESP32 Hand Gesture Project - Working Demo
Similar Projects Using Gesture Control Systems
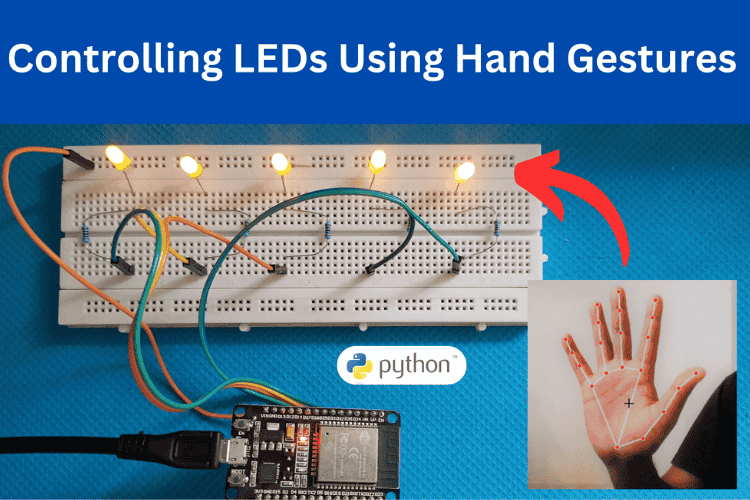
This project demonstrates how to control LEDs using hand gestures through a combination of Python, OpenCV, and the ESP32 microcontroller. Hand gestures are recognized via a webcam and processed with MediaPipe, a library designed for hand-tracking and gesture recognition. Each detected gesture is mapped to an LED control command, such as turning LEDs on or off. This allows for interactive control of the LEDs with simple hand movements.
The commands generated from hand gestures are sent wirelessly to the ESP32 over Wi-Fi using HTTP requests. Acting as a server, the ESP32 receives these commands and controls the LEDs connected to its GPIO pins. This project integrates computer vision, embedded systems, and networking, offering an excellent starting point for beginners interested in gesture-based control systems, IoT, and hardware-software integration.
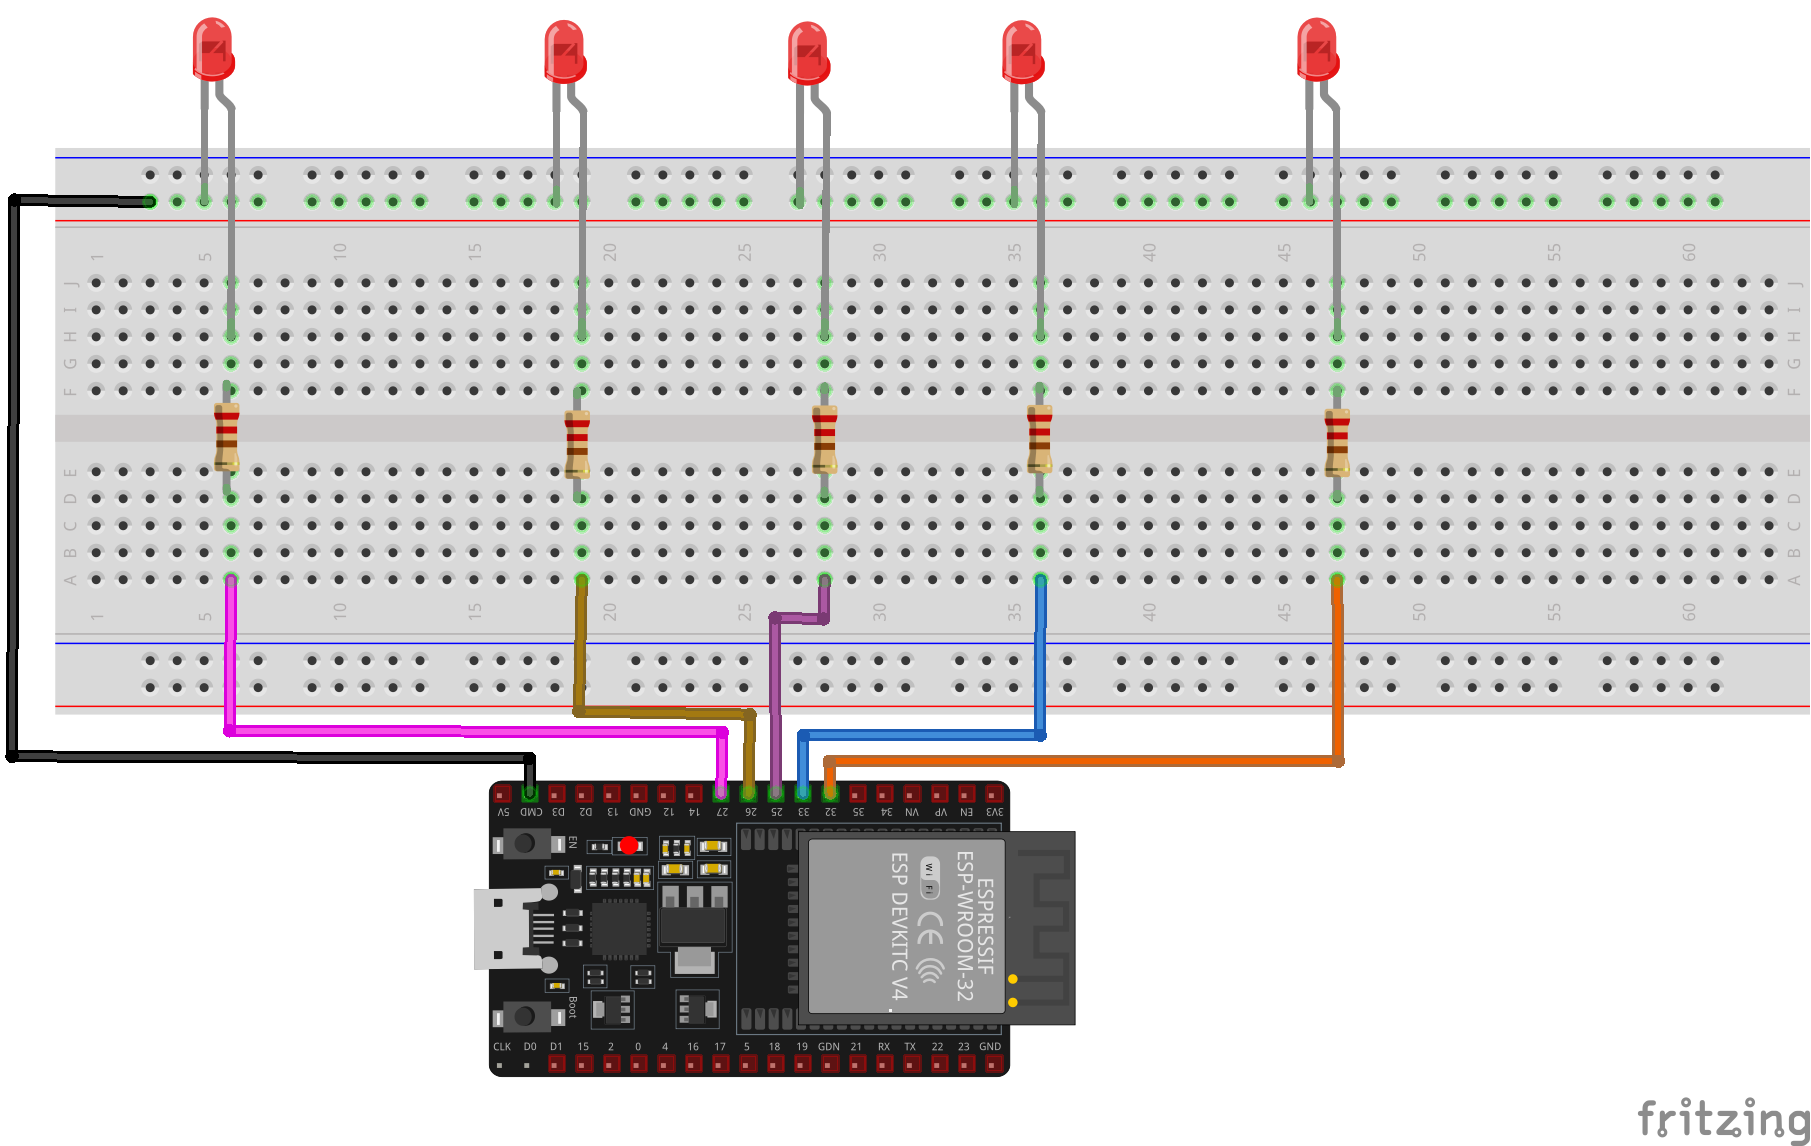
1. ESP32 Board - 1 ( ESP32 is used as the controller for handling commands sent based on the hand gestures recognized by the camera ) 2. LEDs (5 pieces) for each finger (Thumb, Index, Middle, Ring, Pinky) 3. Resistors (Five 220 Ohms for each LEDs ) 4. Jumper wires ( Male to Female ) 5. Breadboard
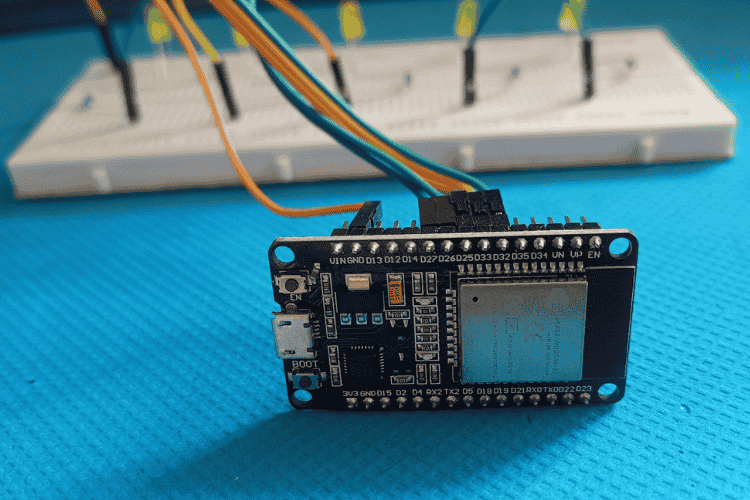
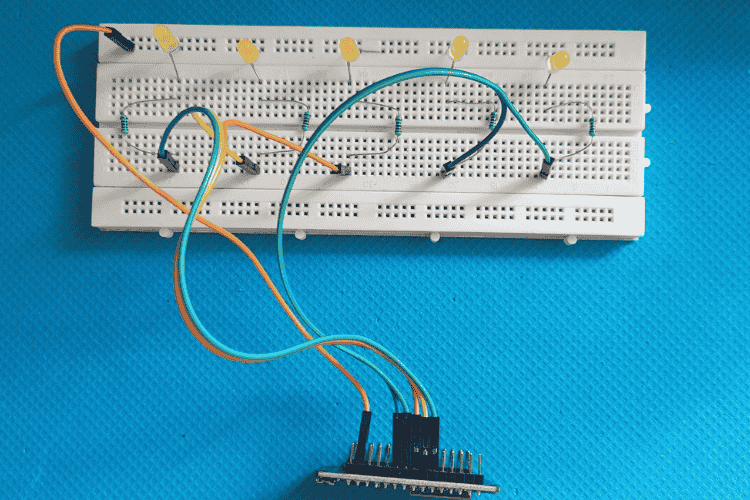
To control 5 LEDs using an ESP32, the LEDs are connected to specific GPIO pins on the ESP32, with each LED corresponding to a unique hand gesture. The positive terminal (anode) of each LED is connected to a dedicated GPIO pin, such as GPIO pins 14, 27, 26, 25, and 33, which will control the LEDs. These GPIO pins provide the necessary voltage to turn on each LED. To prevent excess current from damaging the LEDs or the ESP32, a 220Ω or 330Ω resistor is connected in series with each LED. The resistors are crucial because they limit the current flowing through the LEDs, ensuring safe operation.
The negative terminal (cathode) of each LED is then connected to the ground (GND) of the ESP32. This establishes a complete electrical circuit for each LED. When a GPIO pin is set to HIGH, it sends a voltage to the anode of the LED, causing the LED to light up. Conversely, setting the GPIO pin to LOW turns the LED off. With the right connections, the hand gesture control system can effectively turn each LED on or off based on the detected gesture, making the setup interactive and useful for various applications.
ESP32 Arduino Code to Control LEDs with Hand Gesture
Now, let’s break down the code logic and functionality for this sound localization project.
This code sets up an ESP32 as a web server that controls 5 LEDs corresponding to the thumb, index, middle, ring, and pinky fingers. Each LED is connected to a specific GPIO pin and can be turned on or off via HTTP requests. The ESP32 connects to WiFi using the provided credentials, and once connected, it serves endpoints for controlling each LED. When a user accesses the URL corresponding to an LED (e.g., "/led/thumb/on"), the respective LED turns on and responds with a message. The server operates on port 80 and handles requests to control the LEDs.
Now let's break down the code, starting from the utilized library.
ESPAsyncWebServer - Available in Library Manager Wire - default library
Initialization: The ESP32 initializes the serial communication at 115200 baud and sets up GPIO pins (27, 26, 25, 33, 32) for the LEDs.
LED Setup: All LEDs are initially turned off by setting their GPIO pins to LOW.
WiFi Connection: The ESP32 attempts to connect to the specified WiFi network using the provided SSID and password.
WiFi Status Check: If the connection is successful, it prints the IP address; if not, it tries for up to 20 seconds.
Server Setup: Once connected to WiFi, the ESP32 starts an HTTP server on port 80.
Endpoint Definitions: HTTP GET request handlers are defined for each LED, with URLs for turning each LED on or off (e.g., "/led/thumb/on").
LED Control: When a request is received at a specific endpoint (e.g., "/led/thumb/on"), the corresponding LED is turned on or off.
Response: Each HTTP request sends a response back with a confirmation message, such as "Thumb LED is ON" or "Price - 300".
Server Start: The server starts listening for incoming requests and provides LED control via web endpoints.
Loop: The loop() function is empty, as the server runs asynchronously, handling requests without needing continuous checks in the loop.
Python Code using OpenCV and Media Pipe
This code uses OpenCV and MediaPipe to recognize hand gestures through a webcam. It detects the state of each finger (up or down) and sends corresponding control commands to an ESP32, like turning LEDs on/off. The ESP32 IP address is set, and it communicates with the server to send and receive commands using HTTP requests. The code checks if all fingers are down and sends a special command in that case. The hand gesture recognition is displayed on the screen, and the ESP32 command is shown in real-time.
pip install opencv-python pip install mediapipe pip install requests
Initialize Libraries: OpenCV and MediaPipe are imported to handle video capture and hand gesture recognition.
Set ESP32 IP: The ESP32 IP address is defined, which will be used for sending and receiving HTTP requests. Initialize MediaPipe Hands: MediaPipe’s hand tracking model is initialized to detect and process hand landmarks in the video feed.
Define control_led Function: This function sends a command to the ESP32 to control LEDs based on the hand gesture (e.g., turn LEDs on or off).
Define fetch_esp32_command Function: This function fetches commands from the ESP32 by sending an HTTP GET request to a specific URL.
Define count_fingers Function: This function analyzes the hand landmarks to determine if each finger is up or down and sends corresponding LED control commands to ESP32.
Capture Video: The code opens the video feed (camera) and captures frames for processing.
Process Hand Landmarks: MediaPipe processes each frame to detect hand landmarks and identify the state of each finger (up or down).
Send Commands to ESP32: Based on the detected finger states, commands are sent to the ESP32 to control the LEDs (e.g., turning on or off specific LEDs).
Display Results: The hand gesture and the ESP32 command are displayed in real-time on the screen using OpenCV, and the program continues to process video until the user presses the "Esc" key.
Key Points to Remember: Make sure to replace " http://192.168.x.x " with the actual IP address from the Arduino IDE Serial Monitor.
ESP32 Hand Gesture Project - Working Demo
The system enables intuitive control of LEDs using hand gestures. By detecting the positions of the fingers using MediaPipe, the project identifies which fingers are raised and sends corresponding commands to the ESP32. Each finger (thumb, index, middle, ring, and pinky) is mapped to a specific LED. When a finger is raised, the related LED turns on, and when lowered, the LED turns off. The project sends these control commands to the ESP32 via HTTP requests, making it easy to control multiple LEDs in real-time. Additionally, if all fingers are down, the system triggers a predefined action, such as turning off all LEDs. This solution integrates hand gesture recognition with IoT, allowing seamless interaction between the user and the ESP32 hardware.
Here is the link to our GitHub repo, where you'll find the source code for this project.
Similar Projects Using Gesture Control Systems
Gesture control makes interacting with devices easier and more accessible without any touch. In these projects, you'll learn how to use sensors to track hand movements and create interactive systems. If you want to know more about those topics, links are given below.
Gesture Controlled Robot Using Arduino
Discover how to build a gesture-controlled robot using Arduino, allowing you to control its movements with simple hand gestures. This project demonstrates the integration of sensors and wireless communication for an interactive and innovative robotic system.
Hand Gesture Controlled Robotic Arm using Arduino Nano
Discover how to build a robotic arm that operates through hand gestures using an Arduino Nano and an MPU6050 sensor. This project provides a step-by-step guide to implementing gesture-based control, making robotics more interactive and intuitive.
IoT Gesture controlled Home Automation using ESP12 and AI Vision
Control your home appliances effortlessly with AI-based hand gesture recognition using an ESP12 microcontroller. Discover how this smart automation system works and build your own.
Accelerometer Based Hand Gesture Controlled Robot using Arduino
Discover how to build an accelerometer-based hand gesture-controlled robot using Arduino. This project demonstrates how hand movements can wirelessly control a robot, offering an intuitive and interactive way to navigate and operate robotic systems.
Arduino based Gesture controlled Robot using Accelerometer
Learn how to build a gesture-controlled robot designed to assist individuals with disabilities. This project uses hand movements to control the robot, providing an intuitive and accessible solution for mobility assistance.
Complete Project Code
Technologies used
Hardware components
- ESP32
- Arduino
- MPU
- LED
- Sensor
- Board
- Camera
Software & tools
- Arduino IDE
Project demo video
What you get
- Working project / hardware kit, tested before delivery
- Complete source code with explanation
- Project demo and guidance for your viva
- Project report, PPT and IEEE paper support (on request)
Related Embedded projects

ESP32 Fingerprint Attendance System with Live Web Dashboard
Build a biometric attendance system using ESP32 with AS608 fingerprint sensor that logs attendance with timestamp to web dashboard and Googl...
View project
Mars Rover Robot Replica using ESP32 CAM and Arduino
Build a Mars Rover robot replica using ESP32-CAM and Arduino with a rocker-bogie suspension system, live video streaming, and smartphone app...
View project
ESP32 CAN Bus Tutorial Interfacing MCP2515 with ESP32
Learn CAN bus communication with ESP32 and MCP2515 CAN controller to send and receive data in automotive and industrial applications.
View project
ESP32 MP3 Music Player with SD Card and I2S Amplifier
Build a standalone ESP32 MP3 music player that reads audio from SD card and outputs high-quality audio via I2S DAC amplifier with web contro...
View project