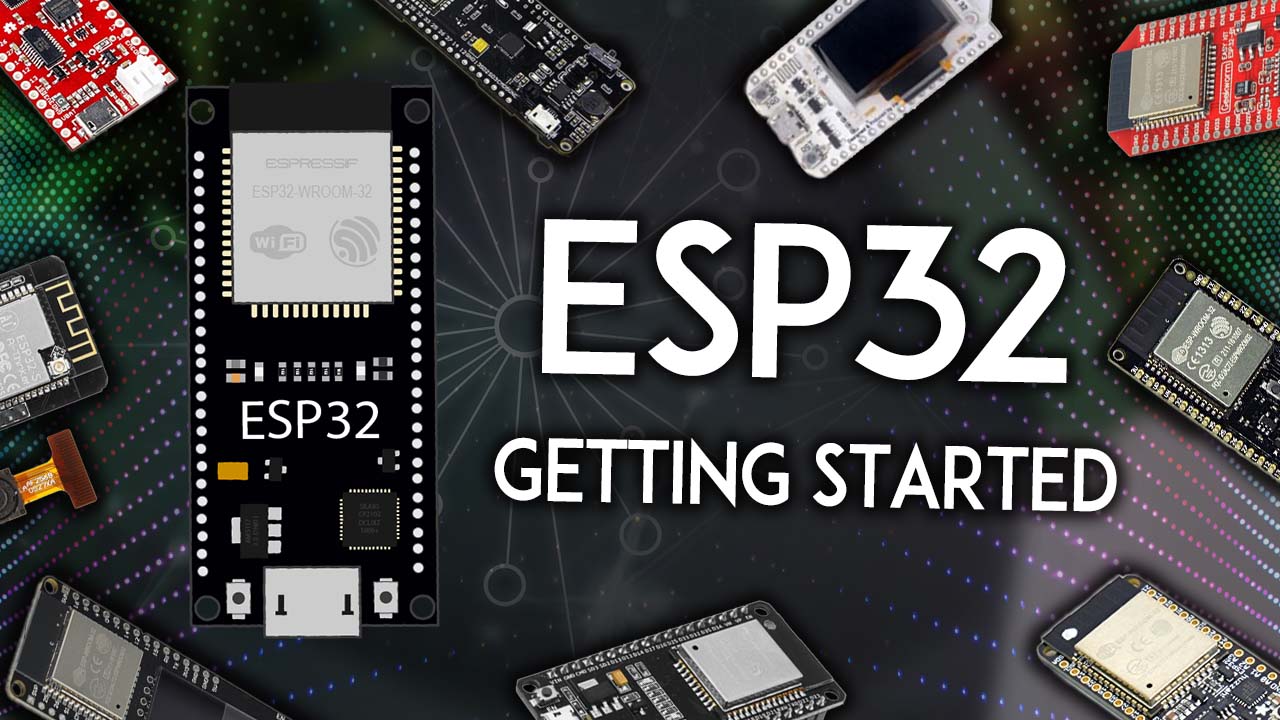
Getting Started with the ESP32 Development Board
This is a getting started guide for the ESP32 Development board. The ESP32 is the ESP8266 sucessor. Loaded with new features: WiFi, Bluetooth, dual core, ...
- Suitable forB.Tech/Diploma IoT/ESP32 students
- Build time1-2 weeks
- LevelBeginner
- Available atAjvika Labs, Kakinada
About this project
New to ESP32? Start here! The ESP32 is a series of low-cost and low-power System on a Chip (SoC) microcontrollers developed by Espressif that include Wi-Fi and Bluetooth wireless capabilities and dual-core processor. If you’re familiar with the ESP8266, the ESP32 is its successor, loaded with lots of new features.
New to the ESP32? You’re in the right place. This guide contains all the information you need to get started with the ESP32. Learn what is an ESP32, how to select an ESP32 board, how to get your first program working, and much more. Here’s what we’ll cover in this guide:
Table of Contents
Introducing the ESP32
ESP32 Specifications
ESP32 vs ESP8266
ESP32 Development Boards
How to choose an ESP32 development board?
What is the best ESP32 development board for beginners?
ESP32 DEVKIT DOIT
ESP32 GPIOs Pinout Guide
How to program the ESP32?
ESP32 with Arduino IDE
Introducing the ESP32
First, to get started,
what is an ESP32
? The ESP32 is a series of chip microcontrollers developed by Espressif.
Why are they so popular? Mainly because of the following features:
Low-cost
: you can get an ESP32 starting at $6, which makes it easily accessible to the general public;
Low-power
: the ESP32 consumes very little power compared with other microcontrollers, and it supports low-power mode states like
deep sleep
to save power;
Wi-Fi capabilities
: the ESP32 can easily connect to a Wi-Fi network to connect to the internet (station mode), or create its own Wi-Fi wireless network (
access point mode
) so other devices can connect to it—this is essential for IoT and Home Automation projects—you can have multiple devices communicating with each other using their Wi-Fi capabilities;
Bluetooth
: the ESP32 supports
Bluetooth classic
and
Bluetooth Low Energy (BLE)
—which is useful for a wide variety of IoT applications;
Dual-core
: most ESP32 are dual-core— they come with 2 Xtensa 32-bit LX6 microprocessors: core 0 and core 1.
Rich peripheral input/output interface
—the ESP32 supports a wide variety of input (read data from the outside world) and output (to send commands/signals to the outside world) peripherals like
capacitive touch
ADCs
, DACs, UART,
SPI
I2C
PWM
, and much more.
Compatible with the Arduino “programming language”
: those that are already familiar with programming the Arduino board, you’ll be happy to know that they can program the ESP32 in the Arduino style.
Compatible with MicroPython
: you can program the ESP32 with MicroPython firmware, which is a re-implementation of Python 3 targeted for microcontrollers and embedded systems.
ESP32 Specifications
If you want to get a bit more technical and specific, you can take a look at the following detailed specifications of the ESP32 (source: http://esp32.net/)—for more details,
check the datasheet)
:
ESP32 module: ESP-WROOM-32
Wireless connectivity
WiFi
:
150.0 Mbps data rate with HT40
Bluetooth:
BLE (Bluetooth Low Energy)
and
Bluetooth Classic
Processor:
Tensilica Xtensa Dual-Core 32-bit LX6 microprocessor, running at 160 or 240 MHz
Memory
:
ROM:
448 KB (for booting and core functions)
SRAM:
520 KB (for data and instructions)
RTC fast SRAM
: 8 KB (for data storage and main CPU during RTC Boot from the deep-sleep mode)
RTC slow SRAM
: 8KB (for co-processor accessing during deep-sleep mode)
eFuse
: 1 Kbit (of which 256 bits are used for the system (MAC address and chip configuration) and the remaining 768 bits are reserved for customer applications, including Flash-Encryption and Chip-ID)
Embedded flash
: flash connected internally via IO16, IO17, SD_CMD, SD_CLK, SD_DATA_0 and SD_DATA_1 on ESP32-D2WD and ESP32-PICO-D4.
0 MiB (ESP32-D0WDQ6, ESP32-D0WD, and ESP32-S0WD chips)
2 MiB (ESP32-D2WD chip)
4 MiB (ESP32-PICO-D4 SiP module)
Low Power:
ensures that you can still use ADC conversions, for example, during
deep sleep
Peripheral Input/Output:
peripheral interface with DMA that includes
capacitive touch
ADCs (Analog-to-Digital Converter)
DACs (Digital-to-Analog Converter)
I²C (Inter-Integrated Circuit)
UART (Universal Asynchronous Receiver/Transmitter)
SPI (Serial Peripheral Interface)
I²S (Integrated Interchip Sound)
RMII (Reduced Media-Independent Interface)
PWM (Pulse-Width Modulation)
Security:
hardware accelerators for AES and SSL/TLS
Main Differences Between ESP32 and ESP8266
Previously, we mentioned that the ESP32 is the ESP8266 successor.
What are the main differences between ESP32 and ESP8266 boards?
The ESP32 adds an
extra CPU core
, faster
Wi-Fi
more GPIOs
, and supports
Bluetooth 4.2
and
Bluetooth low energy
. Additionally, the ESP32 comes with
touch-sensitive pins
that can be used to
wake up the ESP32 from deep sleep
, and
built-in hall effect sensor
Both boards are cheap, but the ESP32 costs slightly more. While the ESP32 can cost around $6 to $12, the ESP8266 can cost $4 to $6 (but it really depends on where you get them and what model you’re buying).
So, in summary:
The ESP32 is faster than the ESP8266;
The ESP32 comes with more GPIOs with multiple functions;
The ESP32 supports analog measurements on 18 channels (analog-enabled pins) versus just one 10-bit ADC pin on the ESP8266;
The ESP32 supports Bluetooth while the ESP8266 doesn’t;
The ESP32 is dual-core (most models), and the ESP8266 is single core;
The ESP32 is a bit more expensive than the ESP8266.
For a more detailed analysis of the differences between those boards, we recommend reading the following article:
ESP32 vs ESP8266 – Pros and Cons
ESP32 Development Boards
ESP32 refers to the bare ESP32 chip. However, the “ESP32” term is also used to refer to ESP32 development boards. Using ESP32 bare chips is not easy or practical, especially when learning, testing, and prototyping. Most of the time, you’ll want to use an ESP32 development board.
These development boards come with all the needed circuitry to power and program the chip, connect it to your computer, pins to connect peripherals, built-in power and control LEDs, an antenna for wi-fi signal, and other useful features. Others even come with extra hardware like specific sensors or modules, displays, or a camera in the case of the ESP32-CAM.
How to Choose an ESP32 Development Board?
Once you start searching for ESP32 boards online, you’ll find there is a wide variety of boards from different vendors. While they all work in a similar way, some boards may be more suitable for some projects than others. When looking for an ESP32 development board there are several aspects you need to take into account:
USB-to-UART interface and voltage regulator circuit
. Most full-featured development boards have these two features. This is important to easily connect the ESP32 to your computer to upload code and apply power.
BOOT and RESET/EN buttons
to put the board in flashing mode or reset (restart) the board. Some boards don’t have the BOOT button. Usually, these boards go into flashing mode automatically.
Pin configuration and the number of pins.
To properly use the ESP32 in your projects, you need to have access to the board pinout (like a map that shows which pin corresponds to which GPIO and its features). So make sure you have access to the pinout of the board you’re getting. Otherwise, you may end up using the ESP32 incorrectly.
Antenna connector
. Most boards come with an onboard antenna for Wi-Fi signal. Some boards come with an antenna connector to optionally connect an external antenna. Adding an external antenna increases your Wi-Fi range.
Battery connector
. If you want to power your ESP32 using batteries, there are development boards that come with connectors for LiPo batteries—this can be handier. You can also power a “regular” ESP32 with batteries through the power pins.
Extra hardware features
. There are ESP32 development boards with extra hardware features. For example, some may come with a built-in OLED display, a LoRa module, a SIM800 module (for GSM and GPRS), a battery holder, a camera, or others.
What is the
New to the ESP32? You’re in the right place. This guide contains all the information you need to get started with the ESP32. Learn what is an ESP32, how to select an ESP32 board, how to get your first program working, and much more. Here’s what we’ll cover in this guide:
Table of Contents
Introducing the ESP32
ESP32 Specifications
ESP32 vs ESP8266
ESP32 Development Boards
How to choose an ESP32 development board?
What is the best ESP32 development board for beginners?
ESP32 DEVKIT DOIT
ESP32 GPIOs Pinout Guide
How to program the ESP32?
ESP32 with Arduino IDE
Introducing the ESP32
First, to get started,
what is an ESP32
? The ESP32 is a series of chip microcontrollers developed by Espressif.
Why are they so popular? Mainly because of the following features:
Low-cost
: you can get an ESP32 starting at $6, which makes it easily accessible to the general public;
Low-power
: the ESP32 consumes very little power compared with other microcontrollers, and it supports low-power mode states like
deep sleep
to save power;
Wi-Fi capabilities
: the ESP32 can easily connect to a Wi-Fi network to connect to the internet (station mode), or create its own Wi-Fi wireless network (
access point mode
) so other devices can connect to it—this is essential for IoT and Home Automation projects—you can have multiple devices communicating with each other using their Wi-Fi capabilities;
Bluetooth
: the ESP32 supports
Bluetooth classic
and
Bluetooth Low Energy (BLE)
—which is useful for a wide variety of IoT applications;
Dual-core
: most ESP32 are dual-core— they come with 2 Xtensa 32-bit LX6 microprocessors: core 0 and core 1.
Rich peripheral input/output interface
—the ESP32 supports a wide variety of input (read data from the outside world) and output (to send commands/signals to the outside world) peripherals like
capacitive touch
ADCs
, DACs, UART,
SPI
I2C
PWM
, and much more.
Compatible with the Arduino “programming language”
: those that are already familiar with programming the Arduino board, you’ll be happy to know that they can program the ESP32 in the Arduino style.
Compatible with MicroPython
: you can program the ESP32 with MicroPython firmware, which is a re-implementation of Python 3 targeted for microcontrollers and embedded systems.
ESP32 Specifications
If you want to get a bit more technical and specific, you can take a look at the following detailed specifications of the ESP32 (source: http://esp32.net/)—for more details,
check the datasheet)
:
ESP32 module: ESP-WROOM-32
Wireless connectivity
WiFi
:
150.0 Mbps data rate with HT40
Bluetooth:
BLE (Bluetooth Low Energy)
and
Bluetooth Classic
Processor:
Tensilica Xtensa Dual-Core 32-bit LX6 microprocessor, running at 160 or 240 MHz
Memory
:
ROM:
448 KB (for booting and core functions)
SRAM:
520 KB (for data and instructions)
RTC fast SRAM
: 8 KB (for data storage and main CPU during RTC Boot from the deep-sleep mode)
RTC slow SRAM
: 8KB (for co-processor accessing during deep-sleep mode)
eFuse
: 1 Kbit (of which 256 bits are used for the system (MAC address and chip configuration) and the remaining 768 bits are reserved for customer applications, including Flash-Encryption and Chip-ID)
Embedded flash
: flash connected internally via IO16, IO17, SD_CMD, SD_CLK, SD_DATA_0 and SD_DATA_1 on ESP32-D2WD and ESP32-PICO-D4.
0 MiB (ESP32-D0WDQ6, ESP32-D0WD, and ESP32-S0WD chips)
2 MiB (ESP32-D2WD chip)
4 MiB (ESP32-PICO-D4 SiP module)
Low Power:
ensures that you can still use ADC conversions, for example, during
deep sleep
Peripheral Input/Output:
peripheral interface with DMA that includes
capacitive touch
ADCs (Analog-to-Digital Converter)
DACs (Digital-to-Analog Converter)
I²C (Inter-Integrated Circuit)
UART (Universal Asynchronous Receiver/Transmitter)
SPI (Serial Peripheral Interface)
I²S (Integrated Interchip Sound)
RMII (Reduced Media-Independent Interface)
PWM (Pulse-Width Modulation)
Security:
hardware accelerators for AES and SSL/TLS
Main Differences Between ESP32 and ESP8266
Previously, we mentioned that the ESP32 is the ESP8266 successor.
What are the main differences between ESP32 and ESP8266 boards?
The ESP32 adds an
extra CPU core
, faster
Wi-Fi
more GPIOs
, and supports
Bluetooth 4.2
and
Bluetooth low energy
. Additionally, the ESP32 comes with
touch-sensitive pins
that can be used to
wake up the ESP32 from deep sleep
, and
built-in hall effect sensor
Both boards are cheap, but the ESP32 costs slightly more. While the ESP32 can cost around $6 to $12, the ESP8266 can cost $4 to $6 (but it really depends on where you get them and what model you’re buying).
So, in summary:
The ESP32 is faster than the ESP8266;
The ESP32 comes with more GPIOs with multiple functions;
The ESP32 supports analog measurements on 18 channels (analog-enabled pins) versus just one 10-bit ADC pin on the ESP8266;
The ESP32 supports Bluetooth while the ESP8266 doesn’t;
The ESP32 is dual-core (most models), and the ESP8266 is single core;
The ESP32 is a bit more expensive than the ESP8266.
For a more detailed analysis of the differences between those boards, we recommend reading the following article:
ESP32 vs ESP8266 – Pros and Cons
ESP32 Development Boards
ESP32 refers to the bare ESP32 chip. However, the “ESP32” term is also used to refer to ESP32 development boards. Using ESP32 bare chips is not easy or practical, especially when learning, testing, and prototyping. Most of the time, you’ll want to use an ESP32 development board.
These development boards come with all the needed circuitry to power and program the chip, connect it to your computer, pins to connect peripherals, built-in power and control LEDs, an antenna for wi-fi signal, and other useful features. Others even come with extra hardware like specific sensors or modules, displays, or a camera in the case of the ESP32-CAM.
How to Choose an ESP32 Development Board?
Once you start searching for ESP32 boards online, you’ll find there is a wide variety of boards from different vendors. While they all work in a similar way, some boards may be more suitable for some projects than others. When looking for an ESP32 development board there are several aspects you need to take into account:
USB-to-UART interface and voltage regulator circuit
. Most full-featured development boards have these two features. This is important to easily connect the ESP32 to your computer to upload code and apply power.
BOOT and RESET/EN buttons
to put the board in flashing mode or reset (restart) the board. Some boards don’t have the BOOT button. Usually, these boards go into flashing mode automatically.
Pin configuration and the number of pins.
To properly use the ESP32 in your projects, you need to have access to the board pinout (like a map that shows which pin corresponds to which GPIO and its features). So make sure you have access to the pinout of the board you’re getting. Otherwise, you may end up using the ESP32 incorrectly.
Antenna connector
. Most boards come with an onboard antenna for Wi-Fi signal. Some boards come with an antenna connector to optionally connect an external antenna. Adding an external antenna increases your Wi-Fi range.
Battery connector
. If you want to power your ESP32 using batteries, there are development boards that come with connectors for LiPo batteries—this can be handier. You can also power a “regular” ESP32 with batteries through the power pins.
Extra hardware features
. There are ESP32 development boards with extra hardware features. For example, some may come with a built-in OLED display, a LoRa module, a SIM800 module (for GSM and GPRS), a battery holder, a camera, or others.
What is the
Technologies used
Hardware components
- ESP32
- ESP32-CAM
- ESP8266
- Arduino
- OLED
- SIM800
Software & tools
- Arduino IDE
- MicroPython
What you get
- Working project / hardware kit, tested before delivery
- Complete source code with explanation
- Project demo and guidance for your viva
- Project report, PPT and IEEE paper support (on request)
Delivery & Payment
Delivery takes a minimum of two weeks from the date your inquiry is confirmed.
Payment is in two parts:
• 50% advance to start the project
• Remaining 50% before delivery
Note:
• Documentation and PPT are not included by default
• If you need documentation/PPT, it can be arranged for extra time and cost
We'll confirm the exact timeline and cost with you after reviewing your requirements.
Related IoT/ESP32 projects

IoT/ESP32
ESP32 External Wake Up from Deep Sleep
This article shows how to put the ESP32 in deep sleep mode and wake it with an external wake up like a button press. We'll cover how to use...
View project
IoT/ESP32
ESP32: Upload Files to LittleFS using Arduino IDE
Upload files to the ESP32 Filesystem (LittleFS) by using a plugin for Arduino IDE (1.8.X). The plugin lets you use three different filesyste...
View project
IoT/ESP32
ESP32: Guide for MicroSD Card Module using Arduino IDE
Use a microSD card with the ESP32: you'll learn how to read and write files to the microSD card. To interface a microSD card with an ESP32 b...
View project
IoT/ESP32
ESP32 Save Data Permanently using Preferences Library
Save data permanently on the ESP32 flash memory using Preferences.h library. The data held in the flash memory persists across resets or pow...
View project