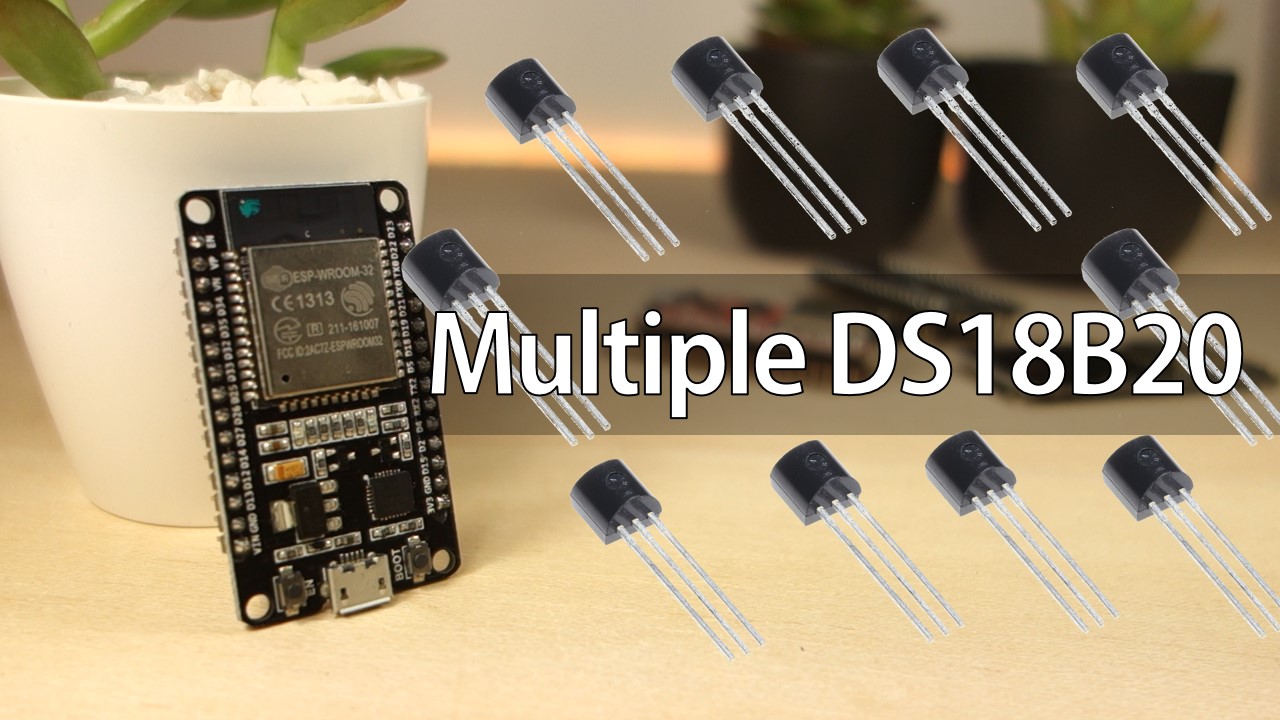
ESP32 with Multiple DS18B20 Temperature Sensors
This guide reads temperature from multiple DS18B20 temperature sensors with ESP32 using Arduino IDE. We’ll wire the sensors on the same data bus to the ESP32
- Suitable forB.Tech/Diploma IoT/ESP32 students
- Build time1-2 weeks
- LevelBeginner
- Available atAjvika Labs, Kakinada
About this project
This guide shows how to read temperature from multiple DS18B20 temperature sensors with the ESP32 using Arduino IDE. We’ll show you how to wire the sensors on the same data bus to the ESP32, install the needed libraries, and a sketch example you can use in your own projects. This tutorial is also compatible with the ESP8266 and the Arduino boards.
If you would like to build a web server displaying readings from multiple sensors, follow the next tutorial:
ESP32 Plot Sensor Readings in Charts (Multiple DS18B20 Sensors)
You might also like reading other DS18B20 guides:
ESP32 DS18B20 Temperature Sensor with Arduino IDE
ESP8266 DS18B20 Temperature Sensor with Arduino IDE
ESP32/ESP8266 DS18B20 Temperature Sensor with MicroPython
DS18B20 Temperature Sensor with Arduino
Introducing the DS18B20 Temperature Sensor
The DS18B20 temperature sensor is a 1-wire digital temperature sensor. Each sensor has a unique 64-bit serial number, which means you can use many sensors on the same data bus (this means many sensors connected to the same GPIO). This is specially useful for data logging and temperature control projects. The DS18B20 is a great sensor because it is cheap, accurate and very easy to use.
The following figure shows the DS18B20 temperature.
Note: there’s also a
waterproof version of the DS18B20 temperature sensor
Here’s the main specifications of the DS18B20 temperature sensor:
Comunicates over 1-wire bus communication
Operating range temperature: -55ºC to 125ºC
Accuracy +/-0.5 ºC (between the range -10ºC to 85ºC)
From left to right: the first pin is
GND
, the second is data, and the rightmost pin is
VCC
Where to Buy the DS18B20 Temperature Sensor?
Check the links below to compare the DS18B20 temperature sensor price on different stores:
DS18B20 digital temperature sensor
DS18B20 digital temperature sensor (waterproof version)
Wiring Multiple DS18B20 Sensors
Here’s a list of the parts you need to follow this example:
ESP32 DOIT DEVKIT V1 Board
–
read ESP32 Development Boards Review and Comparison
DS18B20 temperature sensor
(we’re using 3 sensors in this example)
4.7k Ohm resistor
Jumper wires
Breadboard
You can use the preceding links or go directly to
MakerAdvisor.com/tools
to find all the parts for your projects at the best price!
When wiring the DS18B20 temperature sensor you need to add a 4.7k Ohm resistor between VCC and the data line. The following schematic shows an example for three sensors (you can add more sensors if needed).
In the previous schematic, the round side of the sensor is facing backwards. The flat part is facing forward.
Preparing the Arduino IDE
There’s an add-on for the Arduino IDE that allows you to program the ESP32 using the Arduino IDE and its programming language. Follow one of the next tutorials to prepare your Arduino IDE to work with the ESP32, if you haven’t already.
Windows
instructions – ESP32 Board in Arduino IDE
Mac and Linux
instructions – ESP32 Board in Arduino IDE
Installing Libraries
Before uploading the code, you need to install two libraries in your Arduino IDE. The
OneWire library by Paul Stoffregen
and the
Dallas Temperature library
. Follow the next steps to install those libraries.
OneWire library
Click here to download the OneWire library
. You should have a .zip folder in your Downloads
Unzip the
.zip
folder and you should get
OneWire-master
folder
Rename your folder from
OneWire-master
to
OneWire
Move the
OneWire
folder to your Arduino IDE installation
libraries
folder
Finally, re-open your Arduino IDE
Dallas Temperature library
Click here to download the DallasTemperature library
. You should have a .zip folder in your Downloads
Unzip the
.zip
folder and you should get
Arduino-Temperature-Control-Library-master
folder
Rename your folder from
Arduino-Temperature-Control-Library-master
to
DallasTemperature
Move the
DallasTemperature
folder to your Arduino IDE installation
libraries
folder
Finally, re-open your Arduino IDE
Getting the DS18B20 Sensor Address
Each DS18B20 temperature sensor has a serial number assigned to it. First, you need to find that number to label each sensor accordingly. You need to do this, so that later you know from which sensor you’re reading the temperature from.
Upload the following code to the ESP32. Make sure you have the right board and COM port selected.
/*
*/
#include `OneWire.h`
// Based on the OneWire library example
OneWire ds(4); //data wire connected to GPIO 4
void setup(void) {
Serial.begin(115200);
}
void loop(void) {
byte i;
byte addr[8];
if (!ds.search(addr)) {
Serial.println(\" No more addresses.\");
Serial.println();
ds.reset_search();
delay(250);
return;
}
Serial.print(\" ROM =\");
for (i = 0; i < 8; i++) {
Serial.write(' ');
Serial.print(addr[i], HEX);
}
}
Wire just one sensor at a time to find its address (or successively add a new sensor) so that you’re able to identify each one by its address. Then, you can add a physical label to each sensor. Open the Serial Monitor at a baud rate of 9600 and you should get something as follows (but with different addresses):
Untick the “
Autoscroll
” option so that you’re able to copy the addresses. In our case we’ve got the following addresses:
Sensor 1:
28 FF 77 62 40 17 4 31
Sensor 2:
28 FF B4 6 33 17 3 4B
Sensor 3:
28 FF A0 11 33 17 3 96
Getting Temperature From Multiple Sensors
Getting the temperature from multiple sensors on the same common data bus is very straightforward.
The example code below reads temperature in Celsius and Fahrenheit from each sensor and prints the results in the Serial Monitor.
/*
*/
// Include the libraries we need
#include `OneWire.h`
#include `DallasTemperature.h`
// Data wire is connected to GPIO15
#define ONE_WIRE_BUS 15
// Setup a oneWire instance to communicate with a OneWire device
OneWire oneWire(ONE_WIRE_BUS);
// Pass our oneWire reference to Dallas Temperature sensor
DallasTemperature sensors(&oneWire);
DeviceAddress sensor1 = { 0x28, 0xFF, 0x77, 0x62, 0x40, 0x17, 0x4, 0x31 };
DeviceAddress sensor2 = { 0x28, 0xFF, 0xB4, 0x6, 0x33, 0x17, 0x3, 0x4B };
DeviceAddress sensor3= { 0x28, 0xFF, 0xA0, 0x11, 0x33, 0x17, 0x3, 0x96 };
void setup(void){
Serial.begin(115200);
sensors.begin();
}
void loop(void){
Serial.print(\"Requesting temperatures...\");
sensors.requestTemperatures(); // Send the command to get temperatures
Serial.println(\"DONE\");
Serial.print(\"Sensor 1(*C): \");
Serial.print(sensors.getTempC(sensor1));
Serial.print(\" Sensor 1(*F): \");
Serial.println(sensors.getTempF(sensor1));
Serial.print(\"Sensor 2(*C): \");
Serial.print(sensors.getTempC(sensor2));
Serial.print(\" Sensor 2(*F): \");
Serial.println(sensors.getTempF(sensor2));
Serial.print(\"Sensor 3(*C): \");
Serial.print(sensors.getTempC(sensor3));
Serial.print(\" Sensor 3(*F): \");
Serial.println(sensors.getTempF(sensor3));
delay(2000);
}
Open the Serial Monitor at a baud rate of 115200 and you should get something similar.
How the Code Works
First, include the needed libraries:
#include `OneWire.h`
#include `DallasTemperature.h`
Create the instances needed for the temperature sensor. The temperature sensor is connected to
GPIO 15
// Data wire is connected to ESP32 GPIO15
#define ONE_WIRE_BUS 15
// Setup a oneWire instance to communicate with a OneWire device
OneWire oneWire(ONE_WIRE_BUS);
// Pass our oneWire reference to Dallas Temperature sensor
DallasTemperature sensors(&oneWire);
Start the Dallas temperature library for the DS18B20 sensor.
sensors.begin();
Then, enter the addresses you’ve found previously for each temperature sensor. In our case, we have the following:
DeviceAddress sensor1 = { 0x28, 0xFF, 0x77, 0x62, 0x40, 0x17, 0x4, 0x31 };
DeviceAddress sensor2 = { 0x28, 0xFF, 0xB4, 0x6, 0x
If you would like to build a web server displaying readings from multiple sensors, follow the next tutorial:
ESP32 Plot Sensor Readings in Charts (Multiple DS18B20 Sensors)
You might also like reading other DS18B20 guides:
ESP32 DS18B20 Temperature Sensor with Arduino IDE
ESP8266 DS18B20 Temperature Sensor with Arduino IDE
ESP32/ESP8266 DS18B20 Temperature Sensor with MicroPython
DS18B20 Temperature Sensor with Arduino
Introducing the DS18B20 Temperature Sensor
The DS18B20 temperature sensor is a 1-wire digital temperature sensor. Each sensor has a unique 64-bit serial number, which means you can use many sensors on the same data bus (this means many sensors connected to the same GPIO). This is specially useful for data logging and temperature control projects. The DS18B20 is a great sensor because it is cheap, accurate and very easy to use.
The following figure shows the DS18B20 temperature.
Note: there’s also a
waterproof version of the DS18B20 temperature sensor
Here’s the main specifications of the DS18B20 temperature sensor:
Comunicates over 1-wire bus communication
Operating range temperature: -55ºC to 125ºC
Accuracy +/-0.5 ºC (between the range -10ºC to 85ºC)
From left to right: the first pin is
GND
, the second is data, and the rightmost pin is
VCC
Where to Buy the DS18B20 Temperature Sensor?
Check the links below to compare the DS18B20 temperature sensor price on different stores:
DS18B20 digital temperature sensor
DS18B20 digital temperature sensor (waterproof version)
Wiring Multiple DS18B20 Sensors
Here’s a list of the parts you need to follow this example:
ESP32 DOIT DEVKIT V1 Board
–
read ESP32 Development Boards Review and Comparison
DS18B20 temperature sensor
(we’re using 3 sensors in this example)
4.7k Ohm resistor
Jumper wires
Breadboard
You can use the preceding links or go directly to
MakerAdvisor.com/tools
to find all the parts for your projects at the best price!
When wiring the DS18B20 temperature sensor you need to add a 4.7k Ohm resistor between VCC and the data line. The following schematic shows an example for three sensors (you can add more sensors if needed).
In the previous schematic, the round side of the sensor is facing backwards. The flat part is facing forward.
Preparing the Arduino IDE
There’s an add-on for the Arduino IDE that allows you to program the ESP32 using the Arduino IDE and its programming language. Follow one of the next tutorials to prepare your Arduino IDE to work with the ESP32, if you haven’t already.
Windows
instructions – ESP32 Board in Arduino IDE
Mac and Linux
instructions – ESP32 Board in Arduino IDE
Installing Libraries
Before uploading the code, you need to install two libraries in your Arduino IDE. The
OneWire library by Paul Stoffregen
and the
Dallas Temperature library
. Follow the next steps to install those libraries.
OneWire library
Click here to download the OneWire library
. You should have a .zip folder in your Downloads
Unzip the
.zip
folder and you should get
OneWire-master
folder
Rename your folder from
OneWire-master
to
OneWire
Move the
OneWire
folder to your Arduino IDE installation
libraries
folder
Finally, re-open your Arduino IDE
Dallas Temperature library
Click here to download the DallasTemperature library
. You should have a .zip folder in your Downloads
Unzip the
.zip
folder and you should get
Arduino-Temperature-Control-Library-master
folder
Rename your folder from
Arduino-Temperature-Control-Library-master
to
DallasTemperature
Move the
DallasTemperature
folder to your Arduino IDE installation
libraries
folder
Finally, re-open your Arduino IDE
Getting the DS18B20 Sensor Address
Each DS18B20 temperature sensor has a serial number assigned to it. First, you need to find that number to label each sensor accordingly. You need to do this, so that later you know from which sensor you’re reading the temperature from.
Upload the following code to the ESP32. Make sure you have the right board and COM port selected.
/*
*/
#include `OneWire.h`
// Based on the OneWire library example
OneWire ds(4); //data wire connected to GPIO 4
void setup(void) {
Serial.begin(115200);
}
void loop(void) {
byte i;
byte addr[8];
if (!ds.search(addr)) {
Serial.println(\" No more addresses.\");
Serial.println();
ds.reset_search();
delay(250);
return;
}
Serial.print(\" ROM =\");
for (i = 0; i < 8; i++) {
Serial.write(' ');
Serial.print(addr[i], HEX);
}
}
Wire just one sensor at a time to find its address (or successively add a new sensor) so that you’re able to identify each one by its address. Then, you can add a physical label to each sensor. Open the Serial Monitor at a baud rate of 9600 and you should get something as follows (but with different addresses):
Untick the “
Autoscroll
” option so that you’re able to copy the addresses. In our case we’ve got the following addresses:
Sensor 1:
28 FF 77 62 40 17 4 31
Sensor 2:
28 FF B4 6 33 17 3 4B
Sensor 3:
28 FF A0 11 33 17 3 96
Getting Temperature From Multiple Sensors
Getting the temperature from multiple sensors on the same common data bus is very straightforward.
The example code below reads temperature in Celsius and Fahrenheit from each sensor and prints the results in the Serial Monitor.
/*
*/
// Include the libraries we need
#include `OneWire.h`
#include `DallasTemperature.h`
// Data wire is connected to GPIO15
#define ONE_WIRE_BUS 15
// Setup a oneWire instance to communicate with a OneWire device
OneWire oneWire(ONE_WIRE_BUS);
// Pass our oneWire reference to Dallas Temperature sensor
DallasTemperature sensors(&oneWire);
DeviceAddress sensor1 = { 0x28, 0xFF, 0x77, 0x62, 0x40, 0x17, 0x4, 0x31 };
DeviceAddress sensor2 = { 0x28, 0xFF, 0xB4, 0x6, 0x33, 0x17, 0x3, 0x4B };
DeviceAddress sensor3= { 0x28, 0xFF, 0xA0, 0x11, 0x33, 0x17, 0x3, 0x96 };
void setup(void){
Serial.begin(115200);
sensors.begin();
}
void loop(void){
Serial.print(\"Requesting temperatures...\");
sensors.requestTemperatures(); // Send the command to get temperatures
Serial.println(\"DONE\");
Serial.print(\"Sensor 1(*C): \");
Serial.print(sensors.getTempC(sensor1));
Serial.print(\" Sensor 1(*F): \");
Serial.println(sensors.getTempF(sensor1));
Serial.print(\"Sensor 2(*C): \");
Serial.print(sensors.getTempC(sensor2));
Serial.print(\" Sensor 2(*F): \");
Serial.println(sensors.getTempF(sensor2));
Serial.print(\"Sensor 3(*C): \");
Serial.print(sensors.getTempC(sensor3));
Serial.print(\" Sensor 3(*F): \");
Serial.println(sensors.getTempF(sensor3));
delay(2000);
}
Open the Serial Monitor at a baud rate of 115200 and you should get something similar.
How the Code Works
First, include the needed libraries:
#include `OneWire.h`
#include `DallasTemperature.h`
Create the instances needed for the temperature sensor. The temperature sensor is connected to
GPIO 15
// Data wire is connected to ESP32 GPIO15
#define ONE_WIRE_BUS 15
// Setup a oneWire instance to communicate with a OneWire device
OneWire oneWire(ONE_WIRE_BUS);
// Pass our oneWire reference to Dallas Temperature sensor
DallasTemperature sensors(&oneWire);
Start the Dallas temperature library for the DS18B20 sensor.
sensors.begin();
Then, enter the addresses you’ve found previously for each temperature sensor. In our case, we have the following:
DeviceAddress sensor1 = { 0x28, 0xFF, 0x77, 0x62, 0x40, 0x17, 0x4, 0x31 };
DeviceAddress sensor2 = { 0x28, 0xFF, 0xB4, 0x6, 0x
Technologies used
Hardware components
- ESP32
- ESP8266
- Arduino
- DS18B20
Software & tools
- Arduino IDE
- MicroPython
What you get
- Working project / hardware kit, tested before delivery
- Complete source code with explanation
- Project demo and guidance for your viva
- Project report, PPT and IEEE paper support (on request)
Delivery & Payment
Delivery takes a minimum of two weeks from the date your inquiry is confirmed.
Payment is in two parts:
• 50% advance to start the project
• Remaining 50% before delivery
Note:
• Documentation and PPT are not included by default
• If you need documentation/PPT, it can be arranged for extra time and cost
We'll confirm the exact timeline and cost with you after reviewing your requirements.
Related IoT/ESP32 projects

IoT/ESP32
ESP32 External Wake Up from Deep Sleep
This article shows how to put the ESP32 in deep sleep mode and wake it with an external wake up like a button press. We'll cover how to use...
View project
IoT/ESP32
ESP32: Upload Files to LittleFS using Arduino IDE
Upload files to the ESP32 Filesystem (LittleFS) by using a plugin for Arduino IDE (1.8.X). The plugin lets you use three different filesyste...
View project
IoT/ESP32
ESP32: Guide for MicroSD Card Module using Arduino IDE
Use a microSD card with the ESP32: you'll learn how to read and write files to the microSD card. To interface a microSD card with an ESP32 b...
View project
IoT/ESP32
ESP32 Save Data Permanently using Preferences Library
Save data permanently on the ESP32 flash memory using Preferences.h library. The data held in the flash memory persists across resets or pow...
View project