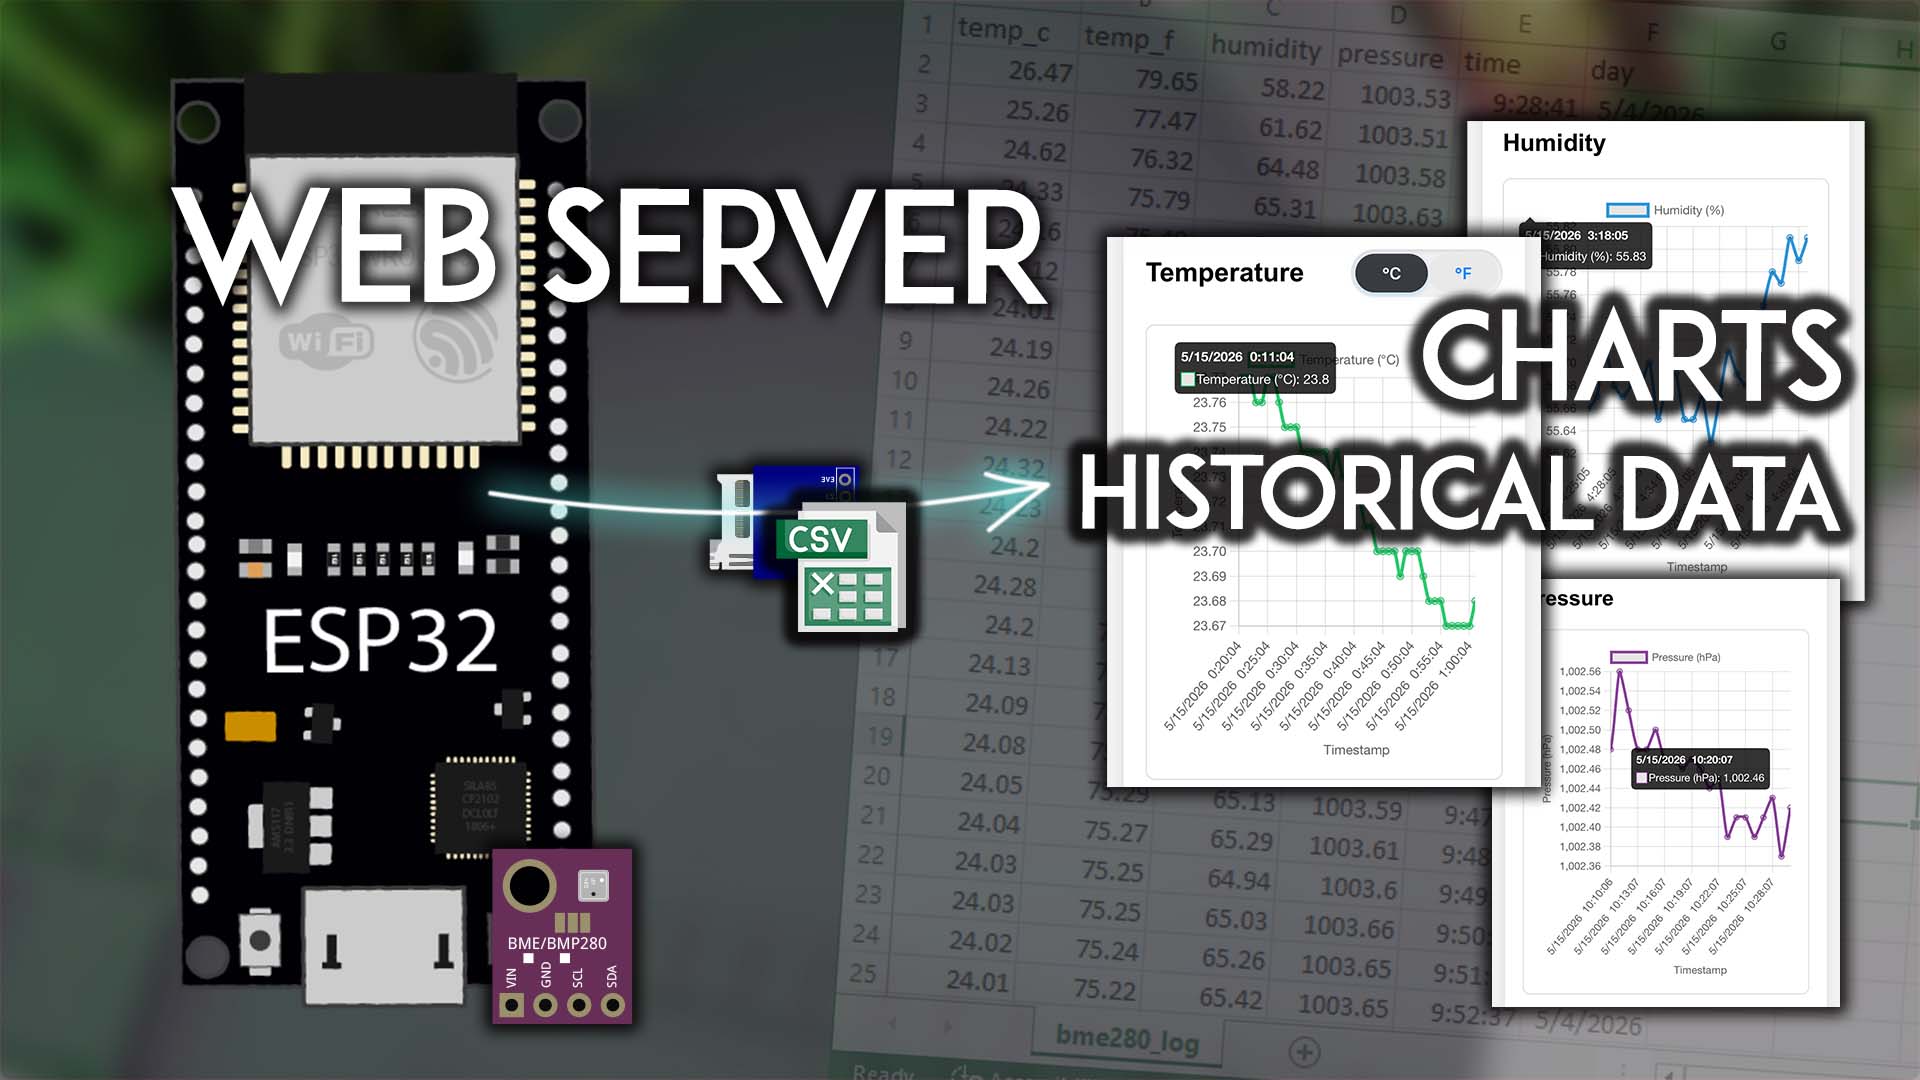
ESP32 Web Server: Charts with Historical Data (load .csv file)
Learn how to create an ESP32 web server that displays charts with sensor data loaded from a .csv file saved on a microSD card using Arduino IDE programming.
- Suitable forB.Tech/Diploma IoT/ESP32 students
- Build time1-2 weeks
- LevelBeginner
- Available atAjvika Labs, Kakinada
About this project
Learn how to create an ESP32 web server that displays charts with data loaded from a
.csv
file saved on a microSD card.
In this project, we’ll build an ESP32 data logger using a BME280 sensor. It takes temperature, humidity, and pressure readings and logs those values with a timestamp to a .
csv
file on a microSD card. The ESP32 also hosts a web server with real-time charts that loads the data stored in the .
csv
file. The ESP32 board will be programmed using Arduino IDE.
You might like reading:
Building an ESP32 Web Server: The Complete Guide for Beginners (Arduino IDE)
Project Overview
The following image shows the web page you’ll build for this project.
Here are the key features of this project:
The ESP32 has a BME280 sensor attached that takes readings every 60 seconds and stores them on a microSD card in a .
csv
file;
The ESP32 hosts a web page that displays 3 real-time charts: temperature, humidity, and pressure;
On the web page, you can download or delete the
.csv
file to your device;
The charts can be zoomed in and highlight each value;
The web page is fully web responsive, so it runs on any screen size.
For simplicity, we’ll
store the HTML and CSS for the web page in a variable in th
e Arduino sketch, but you can use the
LittleFS Filesystem
if you want separate files.
Prerequisites
Before proceeding with this tutorial, you should have the ESP32 add-on installed in your Arduino IDE:
Installing ESP32 Board in Arduino IDE 2
You might also find helpful reading these other guides:
ESP32: BME280 Sensor using Arduino IDE
ESP32: MicroSD Card Module using Arduino IDE
ESP32 Async Web Server (ESPAsyncWebServer library)
ESP32 Datalogger: Download Data File via Web Server (Arduino IDE)
Parts Required
For this tutorial, you need the following parts:
ESP32 development board
(read:
Best ESP32 development boards
)
MicroSD card module
MicroSD card
BME280 sensor module
Jumper wires
Breadboard
You can use the preceding links or go directly to
MakerAdvisor.com/tools
to find all the parts for your projects at the best price!
Schematic Diagram – ESP32 with BME280 and MicroSD Card
We’re going to use
I2C communication
with the BME280 sensor module and
SPI
for the microSD card.
Wire the sensor and microSD card module using the following schematic (or use the tables below to verify the pin assignments).
Connect the BME280 sensor to the ESP32 default I2C pins:
BME280
ESP32
SCK (SCL Pin)
GPIO 22
SDI (SDA pin)
GPIO 21
The microSD card module communicates using SPI communication protocol. You can connect it to the ESP32 using the default SPI pins.
MicroSD card module
ESP32
3V3
3.3V
CS
GPIO 5
MOSI
GPIO 23
CLK
GPIO 18
MISO
GPIO 19
GND
GND
The final circuit should look similar to this:
Before proceeding with the tutorial, make sure you
format your microSD card as FAT32
(learn more on our
microSD card guide
). Then, insert the microSD card into the module.
Install Required Libraries in Arduino IDE
For this project, you need to install the following libraries:
ESPAsyncWebServer by ESP32Async
AsyncTCP by ESP32Async
Adafruit_BME280 library
Adafruit_Sensor library
You can install these libraries in the Arduino Library Manager. Open the Library Manager by clicking the Library icon in the left sidebar.
ESPAsyncWebServer
and install the
ESPAsyncWebServer by ESP32Async
AsyncTCP
and install the
AsyncTCP by ESP32Async
Adafruit BME280
and install the library:
Finally, search for
Adafruit Unified Sensor
and install this library.
Arduino Sketch – ESP32 Web Server Charts with Historical Data (load .csv file)
The following code creates a web server that serves a web page that loads the sensor data stored in the microSD card
.csv
file to real-time charts.
/*
Permission is hereby granted, free of charge, to any person obtaining a copy of this software and associated documentation files.
The above copyright notice and this permission notice shall be included in all copies or substantial portions of the Software.
*/
#include `WiFi.h`
#include `ESPAsyncWebServer.h`
#include `AsyncTCP.h`
#include `Adafruit_Sensor.h`
#include `Adafruit_BME280.h`
#include `SD.h`
#include `SPI.h`
#include `time.h`
// REPLACE WITH YOUR NETWORK CREDENTIALS
const char* ssid = \"REPLACE_WITH_YOUR_SSID\";
const char* password = \"REPLACE_WITH_YOUR_PASSWORD\";
// BME280 GPIOs
#define SDA_PIN 21
#define SCL_PIN 22
// MicroSD Card Module GPIOs
#define SD_CS 5
#define SD_MOSI 23
#define SD_MISO 19
#define SD_SCK 18
// NTP server
const char* ntpServer = \"pool.ntp.org\";
const long gmtOffset_sec = 3600; // Change to your timezone
const int daylightOffset_sec = 0;
// Timer to take new readings
unsigned long previousMillis = 0;
const long interval = 60000; // 60 seconds
// CSV filename
const char* dataFile = \"/bme280_log.csv\";
// AsyncWebServer Web Server
AsyncWebServer server(80);
// BME280
Adafruit_BME280 bme;
// Get Time
String getTimeStr() {
struct tm timeinfo;
if (!getLocalTime(&timeinfo)) return \"00:00:00\";
char buf[9]; sprintf(buf, \"%02d:%02d:%02d\", timeinfo.tm_hour, timeinfo.tm_min, timeinfo.tm_sec);
return String(buf);
}
// Get Date
String getDateStr() {
struct tm timeinfo;
if (!getLocalTime(&timeinfo)) return \"1970-01-01\";
char buf[11]; sprintf(buf, \"%04d-%02d-%02d\", timeinfo.tm_year+1900, timeinfo.tm_mon+1, timeinfo.tm_mday);
return String(buf);
}
// Initialize MicroSD Card and create the .csv file
void initSD() {
SPI.begin(SD_SCK, SD_MISO, SD_MOSI, SD_CS);
if (!SD.begin(SD_CS)) { Serial.println(\"SD Card Failed\"); return; }
if (!SD.exists(dataFile)) {
File f = SD.open(dataFile, FILE_WRITE);
if (f) { f.println(\"temp_c,temp_f,humidity,pressure,time,day\"); f.close(); }
}
}
// Log BME280 data on the MicroSD Card
void logData() {
float tempC = bme.readTemperature();
float tempF = tempC * 9.0 / 5.0 + 32.0;
float hum = bme.readHumidity();
float press = bme.readPressure() / 100.0F;
File file = SD.open(dataFile, FILE_APPEND);
if (file) {
file.printf(\"%.2f,%.2f,%.2f,%.2f,%s,%s\
\",
tempC, tempF, hum, press, getTimeStr().c_str(), getDateStr().c_str());
file.close();
}
}
void setup() {
Serial.begin(115200);
// Initialize BME280 Sensor
Wire.begin(SDA_PIN, SCL_PIN);
if (!bme.begin(0x76)) {
Serial.println(\"BME280 not found!\");
while(1);
}
// Start the Wi-Fi connection
WiFi.begin(ssid, password);
Serial.print(\"Connecting to Wi-Fi\");
while (WiFi.status() != WL_CONNECTED) {
delay(500);
Serial.print(\".\");
}
Serial.println(\"\
Wi-Fi Connected!\");
// Print the ESP32 IP Address
Serial.print(\"Access ESP32 IP Address: http://\");
Serial.println(WiFi.localIP());
// Configure NTP time
configTime(gmtOffset_sec, daylightOffset_sec, ntpServer);
delay(2000);
// Initialize MicroSD Card
initSD();
// Root URL handler for the main HTML web page
server.on(\"/\", HTTP_GET, [](AsyncWebServerRequest *request){
String html = R\"rawliteral(
<!DOCTYPE html>
<html>
<head>
<title>ESP32 Charts with Data Logger</title>
<meta charset=\"UTF-8\">
<meta name=\"viewport\" content=\"width=device-width, initial-scale=1.0, user-scalable=yes\">
<script src=\"https://cdn.jsdelivr.net/npm/
[email protected]
/dist/chart.umd.min.js\"></script>
<script src=\"https://cdn.jsdelivr.net/npm/
[email protected]
/hammer.min.js\"></script>
<script src=\"https://cdn.jsdelivr.net/npm/
[email protected]
/dist/chartjs-plugin-zoom.min.js\"></script>
<style>
body {font-family: Arial, sans-serif; background:#f4f4f4; margin:0; padding:15px;}
.container {max-width:1300px; margin:auto; background:white; padding:20px; border-radius:10px; box-shadow:0 4px 15px rgba(0,0,0,0.1);}
h1 {text-align:center;}
.controls { text-align:center; margin:20px 0; display:flex; flex-wr
.csv
file saved on a microSD card.
In this project, we’ll build an ESP32 data logger using a BME280 sensor. It takes temperature, humidity, and pressure readings and logs those values with a timestamp to a .
csv
file on a microSD card. The ESP32 also hosts a web server with real-time charts that loads the data stored in the .
csv
file. The ESP32 board will be programmed using Arduino IDE.
You might like reading:
Building an ESP32 Web Server: The Complete Guide for Beginners (Arduino IDE)
Project Overview
The following image shows the web page you’ll build for this project.
Here are the key features of this project:
The ESP32 has a BME280 sensor attached that takes readings every 60 seconds and stores them on a microSD card in a .
csv
file;
The ESP32 hosts a web page that displays 3 real-time charts: temperature, humidity, and pressure;
On the web page, you can download or delete the
.csv
file to your device;
The charts can be zoomed in and highlight each value;
The web page is fully web responsive, so it runs on any screen size.
For simplicity, we’ll
store the HTML and CSS for the web page in a variable in th
e Arduino sketch, but you can use the
LittleFS Filesystem
if you want separate files.
Prerequisites
Before proceeding with this tutorial, you should have the ESP32 add-on installed in your Arduino IDE:
Installing ESP32 Board in Arduino IDE 2
You might also find helpful reading these other guides:
ESP32: BME280 Sensor using Arduino IDE
ESP32: MicroSD Card Module using Arduino IDE
ESP32 Async Web Server (ESPAsyncWebServer library)
ESP32 Datalogger: Download Data File via Web Server (Arduino IDE)
Parts Required
For this tutorial, you need the following parts:
ESP32 development board
(read:
Best ESP32 development boards
)
MicroSD card module
MicroSD card
BME280 sensor module
Jumper wires
Breadboard
You can use the preceding links or go directly to
MakerAdvisor.com/tools
to find all the parts for your projects at the best price!
Schematic Diagram – ESP32 with BME280 and MicroSD Card
We’re going to use
I2C communication
with the BME280 sensor module and
SPI
for the microSD card.
Wire the sensor and microSD card module using the following schematic (or use the tables below to verify the pin assignments).
Connect the BME280 sensor to the ESP32 default I2C pins:
BME280
ESP32
SCK (SCL Pin)
GPIO 22
SDI (SDA pin)
GPIO 21
The microSD card module communicates using SPI communication protocol. You can connect it to the ESP32 using the default SPI pins.
MicroSD card module
ESP32
3V3
3.3V
CS
GPIO 5
MOSI
GPIO 23
CLK
GPIO 18
MISO
GPIO 19
GND
GND
The final circuit should look similar to this:
Before proceeding with the tutorial, make sure you
format your microSD card as FAT32
(learn more on our
microSD card guide
). Then, insert the microSD card into the module.
Install Required Libraries in Arduino IDE
For this project, you need to install the following libraries:
ESPAsyncWebServer by ESP32Async
AsyncTCP by ESP32Async
Adafruit_BME280 library
Adafruit_Sensor library
You can install these libraries in the Arduino Library Manager. Open the Library Manager by clicking the Library icon in the left sidebar.
ESPAsyncWebServer
and install the
ESPAsyncWebServer by ESP32Async
AsyncTCP
and install the
AsyncTCP by ESP32Async
Adafruit BME280
and install the library:
Finally, search for
Adafruit Unified Sensor
and install this library.
Arduino Sketch – ESP32 Web Server Charts with Historical Data (load .csv file)
The following code creates a web server that serves a web page that loads the sensor data stored in the microSD card
.csv
file to real-time charts.
/*
Permission is hereby granted, free of charge, to any person obtaining a copy of this software and associated documentation files.
The above copyright notice and this permission notice shall be included in all copies or substantial portions of the Software.
*/
#include `WiFi.h`
#include `ESPAsyncWebServer.h`
#include `AsyncTCP.h`
#include `Adafruit_Sensor.h`
#include `Adafruit_BME280.h`
#include `SD.h`
#include `SPI.h`
#include `time.h`
// REPLACE WITH YOUR NETWORK CREDENTIALS
const char* ssid = \"REPLACE_WITH_YOUR_SSID\";
const char* password = \"REPLACE_WITH_YOUR_PASSWORD\";
// BME280 GPIOs
#define SDA_PIN 21
#define SCL_PIN 22
// MicroSD Card Module GPIOs
#define SD_CS 5
#define SD_MOSI 23
#define SD_MISO 19
#define SD_SCK 18
// NTP server
const char* ntpServer = \"pool.ntp.org\";
const long gmtOffset_sec = 3600; // Change to your timezone
const int daylightOffset_sec = 0;
// Timer to take new readings
unsigned long previousMillis = 0;
const long interval = 60000; // 60 seconds
// CSV filename
const char* dataFile = \"/bme280_log.csv\";
// AsyncWebServer Web Server
AsyncWebServer server(80);
// BME280
Adafruit_BME280 bme;
// Get Time
String getTimeStr() {
struct tm timeinfo;
if (!getLocalTime(&timeinfo)) return \"00:00:00\";
char buf[9]; sprintf(buf, \"%02d:%02d:%02d\", timeinfo.tm_hour, timeinfo.tm_min, timeinfo.tm_sec);
return String(buf);
}
// Get Date
String getDateStr() {
struct tm timeinfo;
if (!getLocalTime(&timeinfo)) return \"1970-01-01\";
char buf[11]; sprintf(buf, \"%04d-%02d-%02d\", timeinfo.tm_year+1900, timeinfo.tm_mon+1, timeinfo.tm_mday);
return String(buf);
}
// Initialize MicroSD Card and create the .csv file
void initSD() {
SPI.begin(SD_SCK, SD_MISO, SD_MOSI, SD_CS);
if (!SD.begin(SD_CS)) { Serial.println(\"SD Card Failed\"); return; }
if (!SD.exists(dataFile)) {
File f = SD.open(dataFile, FILE_WRITE);
if (f) { f.println(\"temp_c,temp_f,humidity,pressure,time,day\"); f.close(); }
}
}
// Log BME280 data on the MicroSD Card
void logData() {
float tempC = bme.readTemperature();
float tempF = tempC * 9.0 / 5.0 + 32.0;
float hum = bme.readHumidity();
float press = bme.readPressure() / 100.0F;
File file = SD.open(dataFile, FILE_APPEND);
if (file) {
file.printf(\"%.2f,%.2f,%.2f,%.2f,%s,%s\
\",
tempC, tempF, hum, press, getTimeStr().c_str(), getDateStr().c_str());
file.close();
}
}
void setup() {
Serial.begin(115200);
// Initialize BME280 Sensor
Wire.begin(SDA_PIN, SCL_PIN);
if (!bme.begin(0x76)) {
Serial.println(\"BME280 not found!\");
while(1);
}
// Start the Wi-Fi connection
WiFi.begin(ssid, password);
Serial.print(\"Connecting to Wi-Fi\");
while (WiFi.status() != WL_CONNECTED) {
delay(500);
Serial.print(\".\");
}
Serial.println(\"\
Wi-Fi Connected!\");
// Print the ESP32 IP Address
Serial.print(\"Access ESP32 IP Address: http://\");
Serial.println(WiFi.localIP());
// Configure NTP time
configTime(gmtOffset_sec, daylightOffset_sec, ntpServer);
delay(2000);
// Initialize MicroSD Card
initSD();
// Root URL handler for the main HTML web page
server.on(\"/\", HTTP_GET, [](AsyncWebServerRequest *request){
String html = R\"rawliteral(
<!DOCTYPE html>
<html>
<head>
<title>ESP32 Charts with Data Logger</title>
<meta charset=\"UTF-8\">
<meta name=\"viewport\" content=\"width=device-width, initial-scale=1.0, user-scalable=yes\">
<script src=\"https://cdn.jsdelivr.net/npm/
[email protected]
/dist/chart.umd.min.js\"></script>
<script src=\"https://cdn.jsdelivr.net/npm/
[email protected]
/hammer.min.js\"></script>
<script src=\"https://cdn.jsdelivr.net/npm/
[email protected]
/dist/chartjs-plugin-zoom.min.js\"></script>
<style>
body {font-family: Arial, sans-serif; background:#f4f4f4; margin:0; padding:15px;}
.container {max-width:1300px; margin:auto; background:white; padding:20px; border-radius:10px; box-shadow:0 4px 15px rgba(0,0,0,0.1);}
h1 {text-align:center;}
.controls { text-align:center; margin:20px 0; display:flex; flex-wr
Technologies used
Hardware components
- ESP32
- Arduino
- BME280
- SD Card
Software & tools
- Arduino IDE
What you get
- Working project / hardware kit, tested before delivery
- Complete source code with explanation
- Project demo and guidance for your viva
- Project report, PPT and IEEE paper support (on request)
Delivery & Payment
Delivery takes a minimum of two weeks from the date your inquiry is confirmed.
Payment is in two parts:
• 50% advance to start the project
• Remaining 50% before delivery
Note:
• Documentation and PPT are not included by default
• If you need documentation/PPT, it can be arranged for extra time and cost
We'll confirm the exact timeline and cost with you after reviewing your requirements.
Related IoT/ESP32 projects

IoT/ESP32
ESP32 External Wake Up from Deep Sleep
This article shows how to put the ESP32 in deep sleep mode and wake it with an external wake up like a button press. We'll cover how to use...
View project
IoT/ESP32
ESP32: Upload Files to LittleFS using Arduino IDE
Upload files to the ESP32 Filesystem (LittleFS) by using a plugin for Arduino IDE (1.8.X). The plugin lets you use three different filesyste...
View project
IoT/ESP32
ESP32: Guide for MicroSD Card Module using Arduino IDE
Use a microSD card with the ESP32: you'll learn how to read and write files to the microSD card. To interface a microSD card with an ESP32 b...
View project
IoT/ESP32
ESP32 Save Data Permanently using Preferences Library
Save data permanently on the ESP32 flash memory using Preferences.h library. The data held in the flash memory persists across resets or pow...
View project