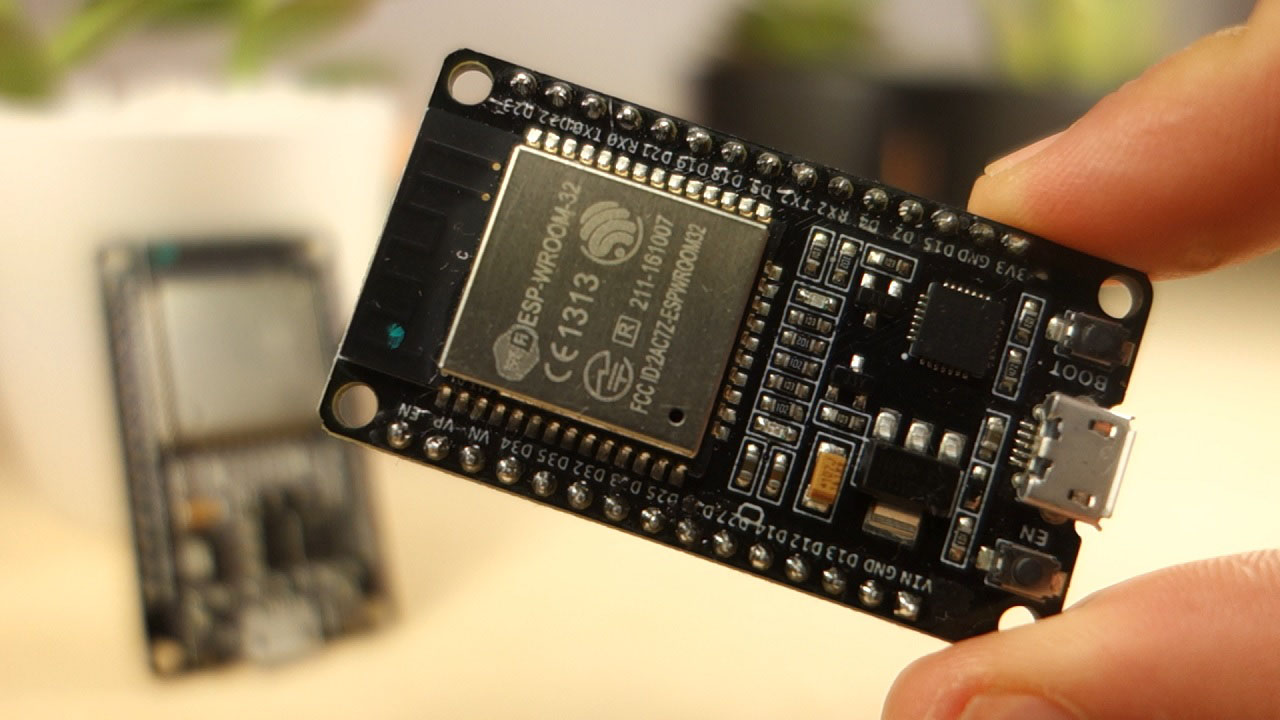
ESP32 Pinout Reference: Which GPIO pins should you use?
The ESP32 comes with 48 GPIOs with multiple functions. This article intends to be a simple and easy to follow reference guide for the ESP32 GPIOs.
- Suitable forB.Tech/Diploma IoT/ESP32 students
- Build time1-2 weeks
- LevelBeginner
- Available atAjvika Labs, Kakinada
About this project
The ESP32 chip comes with 48 pins with multiple functions. Not all pins are exposed in all ESP32 development boards, and some pins cannot be used.
There are many questions on how to use the ESP32 GPIOs. What pins should you use? What pins should you avoid using in your projects? This post aims to be a simple and easy-to-follow reference guide for the ESP32 GPIOs.
The figure below illustrates the ESP-WROOM-32 pinout. You can use it as a reference if you’re using an
ESP32 bare chip
to build a custom board:
Note:
not all GPIOs are accessible in all development boards, but each specific GPIO works in the same way regardless of the development board you’re using. If you’re just getting started with the ESP32, we recommend reading our guide:
Getting Started with the ESP32 Development Board
ESP32 Peripherals
The ESP32 peripherals include:
18 Analog-to-Digital Converter (ADC) channels
3 SPI interfaces
3 UART interfaces
2 I2C interfaces
16 PWM output channels
2 Digital-to-Analog Converters (DAC)
2 I2S interfaces
10 Capacitive sensing GPIOs
The ADC (analog to digital converter) and DAC (digital to analog converter) features are assigned to specific static pins. However, you can decide which pins are UART, I2C, SPI, PWM, etc – you just need to assign them in the code. This is possible due to the ESP32 chip’s multiplexing feature.
Although you can define the pins properties on the software, there are pins assigned by default as shown in the following figure (this is an example for the
ESP32 DEVKIT V1 DOIT board
with 36 pins – the pin location can change depending on the manufacturer).
Additionally, there are pins with specific features that make them suitable or not for a particular project. The following table shows what pins are best to use as inputs, outputs and which ones you need to be cautious.
The pins highlighted in green are OK to use. The ones highlighted in yellow are OK to use, but you need to pay attention because they may have an unexpected behavior mainly at boot. The pins highlighted in red are not recommended to use as inputs or outputs.
GPIO
Input
Output
Notes
0. pulled up
OK
outputs PWM signal at boot, must be LOW to enter flashing mode
1. TX pin
OK
debug output at boot
2. OK
OK
connected to on-board LED, must be left floating or LOW to enter flashing mode
3. OK
RX pin
HIGH at boot
4. OK
OK
5. OK
OK
outputs PWM signal at boot, strapping pin
6. x
connected to the integrated SPI flash
7. x
connected to the integrated SPI flash
8. x
connected to the integrated SPI flash
9. x
connected to the integrated SPI flash
10. x
connected to the integrated SPI flash
11. x
connected to the integrated SPI flash
12. OK
OK
boot fails if pulled high, strapping pin
13. OK
OK
14. OK
OK
outputs PWM signal at boot
15. OK
OK
outputs PWM signal at boot, strapping pin
16. OK
OK
17. OK
OK
18. OK
OK
19. OK
OK
21. OK
OK
22. OK
OK
23. OK
OK
25. OK
OK
26. OK
OK
27. OK
OK
32. OK
OK
33. OK
OK
34. OK
input only
35. OK
input only
36. OK
input only
39. OK
input only
Continue reading for a more detail and in-depth analysis of the ESP32 GPIOs and its functions.
Input only pins
GPIOs 34 to 39 are GPIs – input only pins. These pins don’t have internal pull-up or pull-down resistors. They can’t be used as outputs, so use these pins only as inputs:
GPIO 34
GPIO 35
GPIO 36
GPIO 39
SPI flash integrated on the ESP-WROOM-32
GPIO 6 to GPIO 11 are exposed in some ESP32 development boards. However, these pins are connected to the integrated SPI flash on the ESP-WROOM-32 chip and are not recommended for other uses. So, don’t use these pins in your projects:
GPIO 6 (SCK/CLK)
GPIO 7 (SDO/SD0)
GPIO 8 (SDI/SD1)
GPIO 9 (SHD/SD2)
GPIO 10 (SWP/SD3)
GPIO 11 (CSC/CMD)
Capacitive touch GPIOs
The ESP32 has 10 internal capacitive touch sensors. These can sense variations in anything that holds an electrical charge, like the human skin. So they can detect variations induced when touching the GPIOs with a finger. These pins can be easily integrated into capacitive pads and replace mechanical buttons. The capacitive touch pins can also be used to
wake up the ESP32 from deep sleep
Those internal touch sensors are connected to these GPIOs:
T0 (GPIO 4)
T1 (GPIO 0)
T2 (GPIO 2)
T3 (GPIO 15)
T4 (GPIO 13)
T5 (GPIO 12)
T6 (GPIO 14)
T7 (GPIO 27)
T8 (GPIO 33)
T9 (GPIO 32)
Learn how to use the touch pins with Arduino IDE:
ESP32 Touch Pins with Arduino IDE
Analog to Digital Converter (ADC)
The ESP32 has 18 x 12 bits ADC input channels (while the
ESP8266 only has 1x 10 bits ADC
). These are the GPIOs that can be used as ADC and respective channels:
ADC1_CH0 (GPIO 36)
ADC1_CH1 (GPIO 37)
ADC1_CH2 (GPIO 38)
ADC1_CH3 (GPIO 39)
ADC1_CH4 (GPIO 32)
ADC1_CH5 (GPIO 33)
ADC1_CH6 (GPIO 34)
ADC1_CH7 (GPIO 35)
ADC2_CH0 (GPIO 4)
ADC2_CH1 (GPIO 0)
ADC2_CH2 (GPIO 2)
ADC2_CH3 (GPIO 15)
ADC2_CH4 (GPIO 13)
ADC2_CH5 (GPIO 12)
ADC2_CH6 (GPIO 14)
ADC2_CH7 (GPIO 27)
ADC2_CH8 (GPIO 25)
ADC2_CH9 (GPIO 26)
Learn how to use the ESP32 ADC pins:
ESP32 ADC Pins with Arduino IDE
ESP32 ADC Pins with MicroPython
Note:
ADC2 pins cannot be used when Wi-Fi is used. So, if you’re using Wi-Fi and you’re having trouble getting the value from an ADC2 GPIO, you may consider using an ADC1 GPIO instead. That should solve your problem.
The ADC input channels have a 12-bit resolution. This means that you can get analog readings ranging from 0 to 4095, in which 0 corresponds to 0V and 4095 to 3.3V. You can also set the resolution of your channels on the code and the ADC range.
The ESP32 ADC pins don’t have a linear behavior. You’ll probably won’t be able to distinguish between 0 and 0.1V, or between 3.2 and 3.3V. You need to keep that in mind when using the ADC pins. You’ll get a behavior similar to the one shown in the following figure.
View source
Digital to Analog Converter (DAC)
There are 2 x 8 bits DAC channels on the ESP32 to convert digital signals into analog voltage signal outputs. These are the DAC channels:
DAC1 (GPIO25)
DAC2 (GPIO26)
RTC GPIOs
There is RTC GPIO support on the ESP32. The GPIOs routed to the RTC low-power subsystem can be used when the ESP32 is in deep sleep. These RTC GPIOs can be used to wake up the ESP32 from deep sleep when the Ultra Low Power (ULP) co-processor is running. The following GPIOs can be used as an
external wake up source
RTC_GPIO0 (GPIO36)
RTC_GPIO3 (GPIO39)
RTC_GPIO4 (GPIO34)
RTC_GPIO5 (GPIO35)
RTC_GPIO6 (GPIO25)
RTC_GPIO7 (GPIO26)
RTC_GPIO8 (GPIO33)
RTC_GPIO9 (GPIO32)
RTC_GPIO10 (GPIO4)
RTC_GPIO11 (GPIO0)
RTC_GPIO12 (GPIO2)
RTC_GPIO13 (GPIO15)
RTC_GPIO14 (GPIO13)
RTC_GPIO15 (GPIO12)
RTC_GPIO16 (GPIO14)
RTC_GPIO17 (GPIO27)
Learn how to use the RTC GPIOs to wake up the ESP32 from deep sleep:
ESP32 Deep Sleep with Arduino IDE and Wake Up Sources
PWM
The ESP32 LED PWM controller has 16 independent channels that can be configured to generate PWM signals with different properties. All pins that can act as outputs can be used as PWM pins (GPIOs 34 to 39 can’t generate PWM).
To set a PWM signal, you need to define these parameters in the code:
Signal’s frequency;
Duty cycle;
PWM channel;
GPIO where you want to output the signal.
Learn how to use ESP32 PWM with Arduino IDE:
ESP32 PWM with Arduino IDE
I2C
The ESP32 has two I2C channels and any pin can be set as SDA or SCL. When using the ESP32 with the Arduino IDE, the default I2C pins are:
GPIO 21 (SDA)
GPIO 22 (SCL)
If you want to use other pins when using the wire library, you just need to call:
Wire.begin(SDA, SCL);
Learn more about I2C communication protocol with the ESP32 using Arduino IDE:
ESP32 I2C Communication (Set Pins, Multiple Bus Interfaces and Peripherals)
More I2C Tutorials with the ESP32:
ESP32 I2C Master and Slave (I2C Communication Between Two ESP32) – Arduino IDE
ESP32: I2C Scanner (Arduino IDE) – Finding the Address of I2C Devices
Guide for TCA9548A I2C Multiplexer with the ESP32
SPI
By default, the pin mapping for SPI is:
SPI
MOSI
MISO
CLK
CS
VSPI
GPIO 23
GPIO 19
GPIO 18
GPIO 5
HSPI
GPIO 13
GPIO 12
GPIO 14
GPIO 15
There are many questions on how to use the ESP32 GPIOs. What pins should you use? What pins should you avoid using in your projects? This post aims to be a simple and easy-to-follow reference guide for the ESP32 GPIOs.
The figure below illustrates the ESP-WROOM-32 pinout. You can use it as a reference if you’re using an
ESP32 bare chip
to build a custom board:
Note:
not all GPIOs are accessible in all development boards, but each specific GPIO works in the same way regardless of the development board you’re using. If you’re just getting started with the ESP32, we recommend reading our guide:
Getting Started with the ESP32 Development Board
ESP32 Peripherals
The ESP32 peripherals include:
18 Analog-to-Digital Converter (ADC) channels
3 SPI interfaces
3 UART interfaces
2 I2C interfaces
16 PWM output channels
2 Digital-to-Analog Converters (DAC)
2 I2S interfaces
10 Capacitive sensing GPIOs
The ADC (analog to digital converter) and DAC (digital to analog converter) features are assigned to specific static pins. However, you can decide which pins are UART, I2C, SPI, PWM, etc – you just need to assign them in the code. This is possible due to the ESP32 chip’s multiplexing feature.
Although you can define the pins properties on the software, there are pins assigned by default as shown in the following figure (this is an example for the
ESP32 DEVKIT V1 DOIT board
with 36 pins – the pin location can change depending on the manufacturer).
Additionally, there are pins with specific features that make them suitable or not for a particular project. The following table shows what pins are best to use as inputs, outputs and which ones you need to be cautious.
The pins highlighted in green are OK to use. The ones highlighted in yellow are OK to use, but you need to pay attention because they may have an unexpected behavior mainly at boot. The pins highlighted in red are not recommended to use as inputs or outputs.
GPIO
Input
Output
Notes
0. pulled up
OK
outputs PWM signal at boot, must be LOW to enter flashing mode
1. TX pin
OK
debug output at boot
2. OK
OK
connected to on-board LED, must be left floating or LOW to enter flashing mode
3. OK
RX pin
HIGH at boot
4. OK
OK
5. OK
OK
outputs PWM signal at boot, strapping pin
6. x
connected to the integrated SPI flash
7. x
connected to the integrated SPI flash
8. x
connected to the integrated SPI flash
9. x
connected to the integrated SPI flash
10. x
connected to the integrated SPI flash
11. x
connected to the integrated SPI flash
12. OK
OK
boot fails if pulled high, strapping pin
13. OK
OK
14. OK
OK
outputs PWM signal at boot
15. OK
OK
outputs PWM signal at boot, strapping pin
16. OK
OK
17. OK
OK
18. OK
OK
19. OK
OK
21. OK
OK
22. OK
OK
23. OK
OK
25. OK
OK
26. OK
OK
27. OK
OK
32. OK
OK
33. OK
OK
34. OK
input only
35. OK
input only
36. OK
input only
39. OK
input only
Continue reading for a more detail and in-depth analysis of the ESP32 GPIOs and its functions.
Input only pins
GPIOs 34 to 39 are GPIs – input only pins. These pins don’t have internal pull-up or pull-down resistors. They can’t be used as outputs, so use these pins only as inputs:
GPIO 34
GPIO 35
GPIO 36
GPIO 39
SPI flash integrated on the ESP-WROOM-32
GPIO 6 to GPIO 11 are exposed in some ESP32 development boards. However, these pins are connected to the integrated SPI flash on the ESP-WROOM-32 chip and are not recommended for other uses. So, don’t use these pins in your projects:
GPIO 6 (SCK/CLK)
GPIO 7 (SDO/SD0)
GPIO 8 (SDI/SD1)
GPIO 9 (SHD/SD2)
GPIO 10 (SWP/SD3)
GPIO 11 (CSC/CMD)
Capacitive touch GPIOs
The ESP32 has 10 internal capacitive touch sensors. These can sense variations in anything that holds an electrical charge, like the human skin. So they can detect variations induced when touching the GPIOs with a finger. These pins can be easily integrated into capacitive pads and replace mechanical buttons. The capacitive touch pins can also be used to
wake up the ESP32 from deep sleep
Those internal touch sensors are connected to these GPIOs:
T0 (GPIO 4)
T1 (GPIO 0)
T2 (GPIO 2)
T3 (GPIO 15)
T4 (GPIO 13)
T5 (GPIO 12)
T6 (GPIO 14)
T7 (GPIO 27)
T8 (GPIO 33)
T9 (GPIO 32)
Learn how to use the touch pins with Arduino IDE:
ESP32 Touch Pins with Arduino IDE
Analog to Digital Converter (ADC)
The ESP32 has 18 x 12 bits ADC input channels (while the
ESP8266 only has 1x 10 bits ADC
). These are the GPIOs that can be used as ADC and respective channels:
ADC1_CH0 (GPIO 36)
ADC1_CH1 (GPIO 37)
ADC1_CH2 (GPIO 38)
ADC1_CH3 (GPIO 39)
ADC1_CH4 (GPIO 32)
ADC1_CH5 (GPIO 33)
ADC1_CH6 (GPIO 34)
ADC1_CH7 (GPIO 35)
ADC2_CH0 (GPIO 4)
ADC2_CH1 (GPIO 0)
ADC2_CH2 (GPIO 2)
ADC2_CH3 (GPIO 15)
ADC2_CH4 (GPIO 13)
ADC2_CH5 (GPIO 12)
ADC2_CH6 (GPIO 14)
ADC2_CH7 (GPIO 27)
ADC2_CH8 (GPIO 25)
ADC2_CH9 (GPIO 26)
Learn how to use the ESP32 ADC pins:
ESP32 ADC Pins with Arduino IDE
ESP32 ADC Pins with MicroPython
Note:
ADC2 pins cannot be used when Wi-Fi is used. So, if you’re using Wi-Fi and you’re having trouble getting the value from an ADC2 GPIO, you may consider using an ADC1 GPIO instead. That should solve your problem.
The ADC input channels have a 12-bit resolution. This means that you can get analog readings ranging from 0 to 4095, in which 0 corresponds to 0V and 4095 to 3.3V. You can also set the resolution of your channels on the code and the ADC range.
The ESP32 ADC pins don’t have a linear behavior. You’ll probably won’t be able to distinguish between 0 and 0.1V, or between 3.2 and 3.3V. You need to keep that in mind when using the ADC pins. You’ll get a behavior similar to the one shown in the following figure.
View source
Digital to Analog Converter (DAC)
There are 2 x 8 bits DAC channels on the ESP32 to convert digital signals into analog voltage signal outputs. These are the DAC channels:
DAC1 (GPIO25)
DAC2 (GPIO26)
RTC GPIOs
There is RTC GPIO support on the ESP32. The GPIOs routed to the RTC low-power subsystem can be used when the ESP32 is in deep sleep. These RTC GPIOs can be used to wake up the ESP32 from deep sleep when the Ultra Low Power (ULP) co-processor is running. The following GPIOs can be used as an
external wake up source
RTC_GPIO0 (GPIO36)
RTC_GPIO3 (GPIO39)
RTC_GPIO4 (GPIO34)
RTC_GPIO5 (GPIO35)
RTC_GPIO6 (GPIO25)
RTC_GPIO7 (GPIO26)
RTC_GPIO8 (GPIO33)
RTC_GPIO9 (GPIO32)
RTC_GPIO10 (GPIO4)
RTC_GPIO11 (GPIO0)
RTC_GPIO12 (GPIO2)
RTC_GPIO13 (GPIO15)
RTC_GPIO14 (GPIO13)
RTC_GPIO15 (GPIO12)
RTC_GPIO16 (GPIO14)
RTC_GPIO17 (GPIO27)
Learn how to use the RTC GPIOs to wake up the ESP32 from deep sleep:
ESP32 Deep Sleep with Arduino IDE and Wake Up Sources
PWM
The ESP32 LED PWM controller has 16 independent channels that can be configured to generate PWM signals with different properties. All pins that can act as outputs can be used as PWM pins (GPIOs 34 to 39 can’t generate PWM).
To set a PWM signal, you need to define these parameters in the code:
Signal’s frequency;
Duty cycle;
PWM channel;
GPIO where you want to output the signal.
Learn how to use ESP32 PWM with Arduino IDE:
ESP32 PWM with Arduino IDE
I2C
The ESP32 has two I2C channels and any pin can be set as SDA or SCL. When using the ESP32 with the Arduino IDE, the default I2C pins are:
GPIO 21 (SDA)
GPIO 22 (SCL)
If you want to use other pins when using the wire library, you just need to call:
Wire.begin(SDA, SCL);
Learn more about I2C communication protocol with the ESP32 using Arduino IDE:
ESP32 I2C Communication (Set Pins, Multiple Bus Interfaces and Peripherals)
More I2C Tutorials with the ESP32:
ESP32 I2C Master and Slave (I2C Communication Between Two ESP32) – Arduino IDE
ESP32: I2C Scanner (Arduino IDE) – Finding the Address of I2C Devices
Guide for TCA9548A I2C Multiplexer with the ESP32
SPI
By default, the pin mapping for SPI is:
SPI
MOSI
MISO
CLK
CS
VSPI
GPIO 23
GPIO 19
GPIO 18
GPIO 5
HSPI
GPIO 13
GPIO 12
GPIO 14
GPIO 15
Technologies used
Hardware components
- ESP32
- ESP8266
- Arduino
Software & tools
- Arduino IDE
- MicroPython
What you get
- Working project / hardware kit, tested before delivery
- Complete source code with explanation
- Project demo and guidance for your viva
- Project report, PPT and IEEE paper support (on request)
Delivery & Payment
Delivery takes a minimum of two weeks from the date your inquiry is confirmed.
Payment is in two parts:
• 50% advance to start the project
• Remaining 50% before delivery
Note:
• Documentation and PPT are not included by default
• If you need documentation/PPT, it can be arranged for extra time and cost
We'll confirm the exact timeline and cost with you after reviewing your requirements.
Related IoT/ESP32 projects

IoT/ESP32
ESP32 External Wake Up from Deep Sleep
This article shows how to put the ESP32 in deep sleep mode and wake it with an external wake up like a button press. We'll cover how to use...
View project
IoT/ESP32
ESP32: Upload Files to LittleFS using Arduino IDE
Upload files to the ESP32 Filesystem (LittleFS) by using a plugin for Arduino IDE (1.8.X). The plugin lets you use three different filesyste...
View project
IoT/ESP32
ESP32: Guide for MicroSD Card Module using Arduino IDE
Use a microSD card with the ESP32: you'll learn how to read and write files to the microSD card. To interface a microSD card with an ESP32 b...
View project
IoT/ESP32
ESP32 Save Data Permanently using Preferences Library
Save data permanently on the ESP32 flash memory using Preferences.h library. The data held in the flash memory persists across resets or pow...
View project