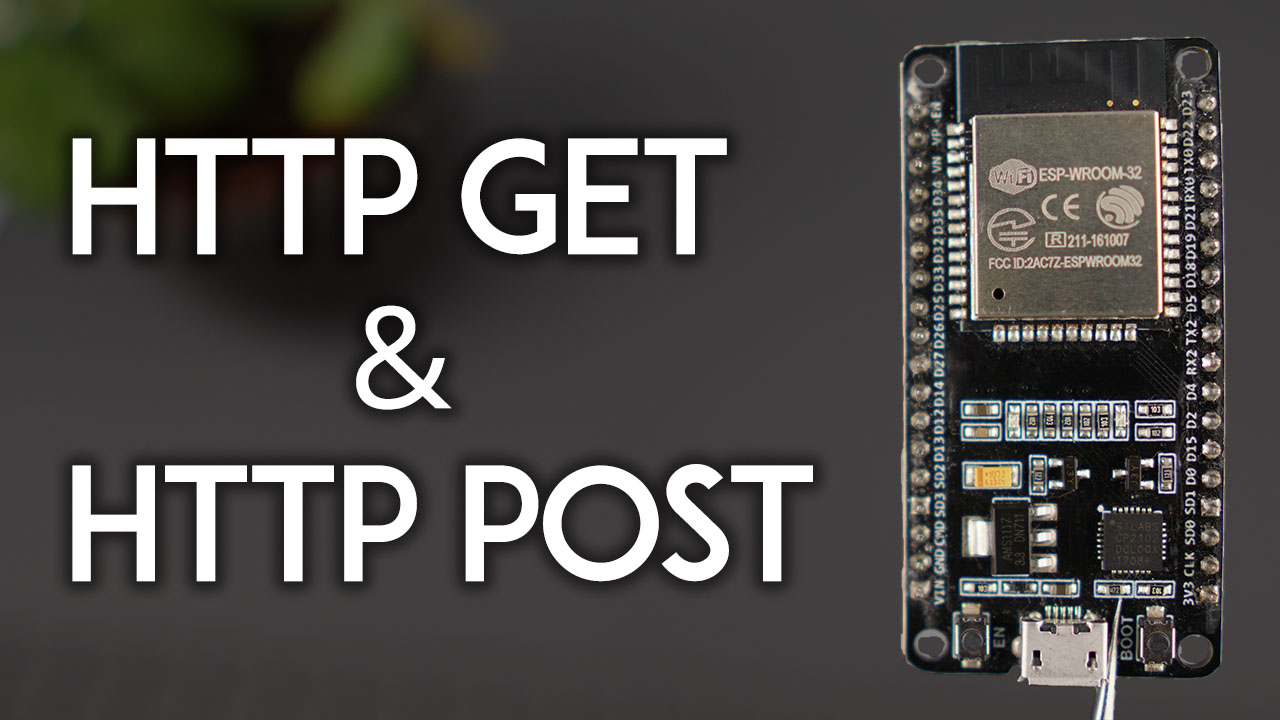
ESP32 HTTP GET and HTTP POST with Arduino IDE (JSON, URL Encoded, Text)
Learn how to make HTTP GET and HTTP POST Requests with the ESP32 board with Arduino IDE. How to get values, post JSON data objects, URL encoded requests, etc.
- Suitable forB.Tech/Diploma IoT/ESP32 students
- Build time1-2 weeks
- LevelBeginner
- Available atAjvika Labs, Kakinada
About this project
In this guide, you’ll learn how to make HTTP GET and HTTP POST requests with the ESP32 board with Arduino IDE. We’ll cover examples on how to get values, post JSON objects, URL encoded requests, and more.
Recommended:
ESP8266 NodeMCU HTTP GET and HTTP POST with Arduino IDE (JSON, URL Encoded, Text)
HTTP Request Methods: GET vs POST
The Hypertext Transfer Protocol (HTTP) works as a request-response protocol between a client and server. Here’s an example:
The ESP32 (client) submits an HTTP request to a Raspberry Pi running Node-RED (server);
The server returns a response to the ESP32 (client);
Finally, the response contains status information about the request and may also contain the requested content.
HTTP GET
GET
is used to request data from a specified resource. It is often used to get values from APIs.
For example, you can have:
GET /update-sensor?temperature=value1
Note that the query string (
name = temperature
and
value = value1
) is sent in the URL of the HTTP GET request.
Or you can use a simple request to return a value or JSON object, for example:
GET /get-sensor
(With HTTP GET, data is visible to everyone in the URL request.)
HTTP POST
POST
is used to send data to a server to create/update a resource. For example, publish sensor readings to a server.
The data sent to the server with POST is stored in the request body of the HTTP request:
POST /update-sensor HTTP/1.1
Host: example.com
api_key=api&sensor_name=name&temperature=value1&humidity=value2&pressure=value3
Content-Type: application/x-www-form-urlencoded
In the body request, you can also send a JSON object:
POST /update-sensor HTTP/1.1
Host: example.com
{api_key: "api", sensor_name: "name", temperature: value1, humidity: value2, pressure: value3}
Content-Type: application/json
(With HTTP POST, data is not visible in the URL request. However, if it’s not encrypted, it’s still visible in the request body.)
HTTP GET/POST with ESP32
In this guide, we’ll explore the following scenarios:
ESP32 HTTP GET: Value or Query in URL
ESP32 HTTP GET: JSON Data Object or Plain Text
ESP32 HTTP POST: URL Encoded, JSON Data Object, Plain Text
Prerequisites
Before proceeding with this tutorial, make sure you complete the following prerequisites.
Arduino IDE
We’ll program the ESP32 using Arduino IDE, so make sure you have the ESP32 add-on installed.
Installing the ESP32 Board in Arduino IDE (Windows, Mac OS X, Linux)
Arduino_JSON Library
You also need to install the
Arduino_JSON library
. You can install this library in the Arduino IDE Library Manager. Just go to
Sketch
>
Include Library
>
Manage Libraries
and search for the library name as follows:
Parts Required
For this tutorial you need the following parts:
ESP32
(read
Best ESP32 development boards
)
Raspberry Pi board
(read
Best Raspberry Pi Starter Kits
)
MicroSD Card – 16GB Class10
Raspberry Pi Power Supply (5V 2.5A)
Jumper wires
Breadboard
You can use the preceding links or go directly to
MakerAdvisor.com/tools
to find all the parts for your projects at the best price!
Preparing Node-RED (optional)
As an example, we’ll create a web service with a Raspberry Pi and Node-RED to act as a web service (like an API). Basically, you’ll make HTTP GET and HTTP POST requests to your Raspberry Pi to get values or update them. You can use any other web service.
If you don’t have Node-RED installed, follow the next tutorials:
Getting Started with Node-RED on Raspberry Pi
Installing and Getting Started with Node-RED Dashboard
Having Node-RED running on your Raspberry Pi, go to your Raspberry Pi IP address followed by :1880.
http://raspberry-pi-ip-address:1880
The Node-RED interface should open. You can simply import the final flow:
Go to
Menu
>
Import
and copy the following to your Clipboard to create your Node-RED flow.
[{"id":"599740b7.efde9","type":"http response","z":"b01416d3.f69f38","name":"","statusCode":"200","headers":{},"x":420,"y":689,"wires":[]},{"id":"1618a829.76f638","type":"json","z":"b01416d3.f69f38","name":"","property":"payload","action":"obj","pretty":true,"x":410,"y":809,"wires":[["d0089cc7.d25ac"]]},{"id":"c7410fa2.1c2fa","type":"debug","z":"b01416d3.f69f38","name":"","active":true,"tosidebar":true,"console":false,"tostatus":false,"complete":"false","x":850,"y":709,"wires":[]},{"id":"75a22f74.f1aba","type":"ui_text","z":"b01416d3.f69f38","group":"2b7ac01b.fc984","order":1,"width":0,"height":0,"name":"","label":"Sensor Name","format":"{{msg.payload}}","layout":"row-spread","x":860,"y":769,"wires":[]},{"id":"1c8f9093.8bc2bf","type":"ui_gauge","z":"b01416d3.f69f38","name":"","group":"2b7ac01b.fc984","order":2,"width":0,"height":0,"gtype":"gage","title":"Temperature","label":"ºC","format":"{{value}}","min":0,"max":"38","colors":["#00b500","#e6e600","#ca3838"],"seg1":"","seg2":"","x":850,"y":829,"wires":[]},{"id":"a5bd2706.54e108","type":"ui_gauge","z":"b01416d3.f69f38","name":"","group":"2b7ac01b.fc984","order":3,"width":0,"height":0,"gtype":"gage","title":"Humidity","label":"%","format":"{{value}}","min":0,"max":"100","colors":["#0080ff","#0062c4","#002f5e"],"seg1":"","seg2":"","x":840,"y":889,"wires":[]},{"id":"105ac2cc.7b3cfd","type":"ui_gauge","z":"b01416d3.f69f38","name":"","group":"2b7ac01b.fc984","order":4,"width":0,"height":0,"gtype":"gage","title":"Pressure","label":"hPa","format":"{{value}}","min":0,"max":"1200","colors":["#b366ff","#8000ff","#440088"],"seg1":"","seg2":"","x":840,"y":949,"wires":[]},{"id":"d0089cc7.d25ac","type":"function","z":"b01416d3.f69f38","name":"JSON or URL Encoded","func":"var msg0 = { payload: msg.payload.api_key };\nvar msg1 = { payload: msg.payload.sensor };\nvar msg2 = { payload: msg.payload.value1 };\nvar msg3 = { payload: msg.payload.value2 };\nvar msg4 = { payload: msg.payload.value3 };\n\nreturn [msg0, msg1, msg2, msg3, msg4];","outputs":5,"noerr":0,"x":610,"y":809,"wires":[["c7410fa2.1c2fa"],["75a22f74.f1aba"],["1c8f9093.8bc2bf"],["a5bd2706.54e108"],["105ac2cc.7b3cfd"]]},{"id":"5d9ab0d2.66b92","type":"http in","z":"b01416d3.f69f38","name":"","url":"update-sensor","method":"post","upload":false,"swaggerDoc":"","x":200,"y":740,"wires":[["599740b7.efde9","c7410fa2.1c2fa","1618a829.76f638"]]},{"id":"7f5cf345.63f56c","type":"http response","z":"b01416d3.f69f38","name":"","statusCode":"200","headers":{},"x":540,"y":420,"wires":[]},{"id":"6530621.95b429c","type":"http in","z":"b01416d3.f69f38","name":"","url":"/get-sensor","method":"get","upload":false,"swaggerDoc":"","x":180,"y":600,"wires":[["9471d1a0.68588"]]},{"id":"5ddc9f47.4b555","type":"http response","z":"b01416d3.f69f38","name":"","statusCode":"200","headers":{},"x":540,"y":560,"wires":[]},{"id":"9471d1a0.68588","type":"function","z":"b01416d3.f69f38","name":"","func":"msg.payload = {\"value1\":24.25, \"value2\":49.54, \"value3\":1005.14};\nreturn msg;","outputs":1,"noerr":0,"x":350,"y":600,"wires":[["5ddc9f47.4b555","13aea59.7430e5a"]]},{"id":"13aea59.7430e5a","type":"debug","z":"b01416d3.f69f38","name":"","active":true,"tosidebar":true,"console":false,"tostatus":false,"complete":"false","x":550,"y":628,"wires":[]},{"id":"e71c7a7d.e7c598","type":"debug","z":"b01416d3.f69f38","name":"","active":true,"tosidebar":true,"console":false,"tostatus":false,"complete":"false","x":550,"y":500,"wires":[]},{"id":"c7807102.3f433","type":"http in","z":"b01416d3.f69f38","name":"","url":"/update-sensor","method":"get","upload":false,"swaggerDoc":"","x":190,"y":460,"wires":[["60410cde.562a34"]]},{"id":"60410cde.562a34","type":"function","z":"b01416d3.f69f38","name":"","func":"msg.payload = msg.payload.temperature;\nreturn msg;","outputs":1,"noerr":0,"x":390,"y":460,"wires":[["e71c7a7d.e7c598","7f5cf345.63f56c"]]},{"id":"2b7ac01b.fc984","type":"ui_group","z":"","name":"SENSORS","tab":"99ab8dc5.f435c","disp":true,"width":"6","collapse":false},{"id":"99ab8dc5.f435c","type":"ui_tab","z":"","name":"HTTP","icon":"dashboard","order":1,"disabled":false,"hidden":false}]
Other Web Services o
Recommended:
ESP8266 NodeMCU HTTP GET and HTTP POST with Arduino IDE (JSON, URL Encoded, Text)
HTTP Request Methods: GET vs POST
The Hypertext Transfer Protocol (HTTP) works as a request-response protocol between a client and server. Here’s an example:
The ESP32 (client) submits an HTTP request to a Raspberry Pi running Node-RED (server);
The server returns a response to the ESP32 (client);
Finally, the response contains status information about the request and may also contain the requested content.
HTTP GET
GET
is used to request data from a specified resource. It is often used to get values from APIs.
For example, you can have:
GET /update-sensor?temperature=value1
Note that the query string (
name = temperature
and
value = value1
) is sent in the URL of the HTTP GET request.
Or you can use a simple request to return a value or JSON object, for example:
GET /get-sensor
(With HTTP GET, data is visible to everyone in the URL request.)
HTTP POST
POST
is used to send data to a server to create/update a resource. For example, publish sensor readings to a server.
The data sent to the server with POST is stored in the request body of the HTTP request:
POST /update-sensor HTTP/1.1
Host: example.com
api_key=api&sensor_name=name&temperature=value1&humidity=value2&pressure=value3
Content-Type: application/x-www-form-urlencoded
In the body request, you can also send a JSON object:
POST /update-sensor HTTP/1.1
Host: example.com
{api_key: "api", sensor_name: "name", temperature: value1, humidity: value2, pressure: value3}
Content-Type: application/json
(With HTTP POST, data is not visible in the URL request. However, if it’s not encrypted, it’s still visible in the request body.)
HTTP GET/POST with ESP32
In this guide, we’ll explore the following scenarios:
ESP32 HTTP GET: Value or Query in URL
ESP32 HTTP GET: JSON Data Object or Plain Text
ESP32 HTTP POST: URL Encoded, JSON Data Object, Plain Text
Prerequisites
Before proceeding with this tutorial, make sure you complete the following prerequisites.
Arduino IDE
We’ll program the ESP32 using Arduino IDE, so make sure you have the ESP32 add-on installed.
Installing the ESP32 Board in Arduino IDE (Windows, Mac OS X, Linux)
Arduino_JSON Library
You also need to install the
Arduino_JSON library
. You can install this library in the Arduino IDE Library Manager. Just go to
Sketch
>
Include Library
>
Manage Libraries
and search for the library name as follows:
Parts Required
For this tutorial you need the following parts:
ESP32
(read
Best ESP32 development boards
)
Raspberry Pi board
(read
Best Raspberry Pi Starter Kits
)
MicroSD Card – 16GB Class10
Raspberry Pi Power Supply (5V 2.5A)
Jumper wires
Breadboard
You can use the preceding links or go directly to
MakerAdvisor.com/tools
to find all the parts for your projects at the best price!
Preparing Node-RED (optional)
As an example, we’ll create a web service with a Raspberry Pi and Node-RED to act as a web service (like an API). Basically, you’ll make HTTP GET and HTTP POST requests to your Raspberry Pi to get values or update them. You can use any other web service.
If you don’t have Node-RED installed, follow the next tutorials:
Getting Started with Node-RED on Raspberry Pi
Installing and Getting Started with Node-RED Dashboard
Having Node-RED running on your Raspberry Pi, go to your Raspberry Pi IP address followed by :1880.
http://raspberry-pi-ip-address:1880
The Node-RED interface should open. You can simply import the final flow:
Go to
Menu
>
Import
and copy the following to your Clipboard to create your Node-RED flow.
[{"id":"599740b7.efde9","type":"http response","z":"b01416d3.f69f38","name":"","statusCode":"200","headers":{},"x":420,"y":689,"wires":[]},{"id":"1618a829.76f638","type":"json","z":"b01416d3.f69f38","name":"","property":"payload","action":"obj","pretty":true,"x":410,"y":809,"wires":[["d0089cc7.d25ac"]]},{"id":"c7410fa2.1c2fa","type":"debug","z":"b01416d3.f69f38","name":"","active":true,"tosidebar":true,"console":false,"tostatus":false,"complete":"false","x":850,"y":709,"wires":[]},{"id":"75a22f74.f1aba","type":"ui_text","z":"b01416d3.f69f38","group":"2b7ac01b.fc984","order":1,"width":0,"height":0,"name":"","label":"Sensor Name","format":"{{msg.payload}}","layout":"row-spread","x":860,"y":769,"wires":[]},{"id":"1c8f9093.8bc2bf","type":"ui_gauge","z":"b01416d3.f69f38","name":"","group":"2b7ac01b.fc984","order":2,"width":0,"height":0,"gtype":"gage","title":"Temperature","label":"ºC","format":"{{value}}","min":0,"max":"38","colors":["#00b500","#e6e600","#ca3838"],"seg1":"","seg2":"","x":850,"y":829,"wires":[]},{"id":"a5bd2706.54e108","type":"ui_gauge","z":"b01416d3.f69f38","name":"","group":"2b7ac01b.fc984","order":3,"width":0,"height":0,"gtype":"gage","title":"Humidity","label":"%","format":"{{value}}","min":0,"max":"100","colors":["#0080ff","#0062c4","#002f5e"],"seg1":"","seg2":"","x":840,"y":889,"wires":[]},{"id":"105ac2cc.7b3cfd","type":"ui_gauge","z":"b01416d3.f69f38","name":"","group":"2b7ac01b.fc984","order":4,"width":0,"height":0,"gtype":"gage","title":"Pressure","label":"hPa","format":"{{value}}","min":0,"max":"1200","colors":["#b366ff","#8000ff","#440088"],"seg1":"","seg2":"","x":840,"y":949,"wires":[]},{"id":"d0089cc7.d25ac","type":"function","z":"b01416d3.f69f38","name":"JSON or URL Encoded","func":"var msg0 = { payload: msg.payload.api_key };\nvar msg1 = { payload: msg.payload.sensor };\nvar msg2 = { payload: msg.payload.value1 };\nvar msg3 = { payload: msg.payload.value2 };\nvar msg4 = { payload: msg.payload.value3 };\n\nreturn [msg0, msg1, msg2, msg3, msg4];","outputs":5,"noerr":0,"x":610,"y":809,"wires":[["c7410fa2.1c2fa"],["75a22f74.f1aba"],["1c8f9093.8bc2bf"],["a5bd2706.54e108"],["105ac2cc.7b3cfd"]]},{"id":"5d9ab0d2.66b92","type":"http in","z":"b01416d3.f69f38","name":"","url":"update-sensor","method":"post","upload":false,"swaggerDoc":"","x":200,"y":740,"wires":[["599740b7.efde9","c7410fa2.1c2fa","1618a829.76f638"]]},{"id":"7f5cf345.63f56c","type":"http response","z":"b01416d3.f69f38","name":"","statusCode":"200","headers":{},"x":540,"y":420,"wires":[]},{"id":"6530621.95b429c","type":"http in","z":"b01416d3.f69f38","name":"","url":"/get-sensor","method":"get","upload":false,"swaggerDoc":"","x":180,"y":600,"wires":[["9471d1a0.68588"]]},{"id":"5ddc9f47.4b555","type":"http response","z":"b01416d3.f69f38","name":"","statusCode":"200","headers":{},"x":540,"y":560,"wires":[]},{"id":"9471d1a0.68588","type":"function","z":"b01416d3.f69f38","name":"","func":"msg.payload = {\"value1\":24.25, \"value2\":49.54, \"value3\":1005.14};\nreturn msg;","outputs":1,"noerr":0,"x":350,"y":600,"wires":[["5ddc9f47.4b555","13aea59.7430e5a"]]},{"id":"13aea59.7430e5a","type":"debug","z":"b01416d3.f69f38","name":"","active":true,"tosidebar":true,"console":false,"tostatus":false,"complete":"false","x":550,"y":628,"wires":[]},{"id":"e71c7a7d.e7c598","type":"debug","z":"b01416d3.f69f38","name":"","active":true,"tosidebar":true,"console":false,"tostatus":false,"complete":"false","x":550,"y":500,"wires":[]},{"id":"c7807102.3f433","type":"http in","z":"b01416d3.f69f38","name":"","url":"/update-sensor","method":"get","upload":false,"swaggerDoc":"","x":190,"y":460,"wires":[["60410cde.562a34"]]},{"id":"60410cde.562a34","type":"function","z":"b01416d3.f69f38","name":"","func":"msg.payload = msg.payload.temperature;\nreturn msg;","outputs":1,"noerr":0,"x":390,"y":460,"wires":[["e71c7a7d.e7c598","7f5cf345.63f56c"]]},{"id":"2b7ac01b.fc984","type":"ui_group","z":"","name":"SENSORS","tab":"99ab8dc5.f435c","disp":true,"width":"6","collapse":false},{"id":"99ab8dc5.f435c","type":"ui_tab","z":"","name":"HTTP","icon":"dashboard","order":1,"disabled":false,"hidden":false}]
Other Web Services o
Technologies used
Hardware components
- ESP32
- ESP8266
- Arduino
- Raspberry Pi
- SD Card
Software & tools
- Arduino IDE
- Node-RED
What you get
- Working project / hardware kit, tested before delivery
- Complete source code with explanation
- Project demo and guidance for your viva
- Project report, PPT and IEEE paper support (on request)
Delivery & Payment
Delivery takes a minimum of two weeks from the date your inquiry is confirmed.
Payment is in two parts:
• 50% advance to start the project
• Remaining 50% before delivery
Note:
• Documentation and PPT are not included by default
• If you need documentation/PPT, it can be arranged for extra time and cost
We'll confirm the exact timeline and cost with you after reviewing your requirements.
Related IoT/ESP32 projects

IoT/ESP32
ESP32 External Wake Up from Deep Sleep
This article shows how to put the ESP32 in deep sleep mode and wake it with an external wake up like a button press. We'll cover how to use...
View project
IoT/ESP32
ESP32: Upload Files to LittleFS using Arduino IDE
Upload files to the ESP32 Filesystem (LittleFS) by using a plugin for Arduino IDE (1.8.X). The plugin lets you use three different filesyste...
View project
IoT/ESP32
ESP32: Guide for MicroSD Card Module using Arduino IDE
Use a microSD card with the ESP32: you'll learn how to read and write files to the microSD card. To interface a microSD card with an ESP32 b...
View project
IoT/ESP32
ESP32 Save Data Permanently using Preferences Library
Save data permanently on the ESP32 flash memory using Preferences.h library. The data held in the flash memory persists across resets or pow...
View project