DIY Cloud Weather Station with ESP32/ESP8266 (MySQL Database and PHP)
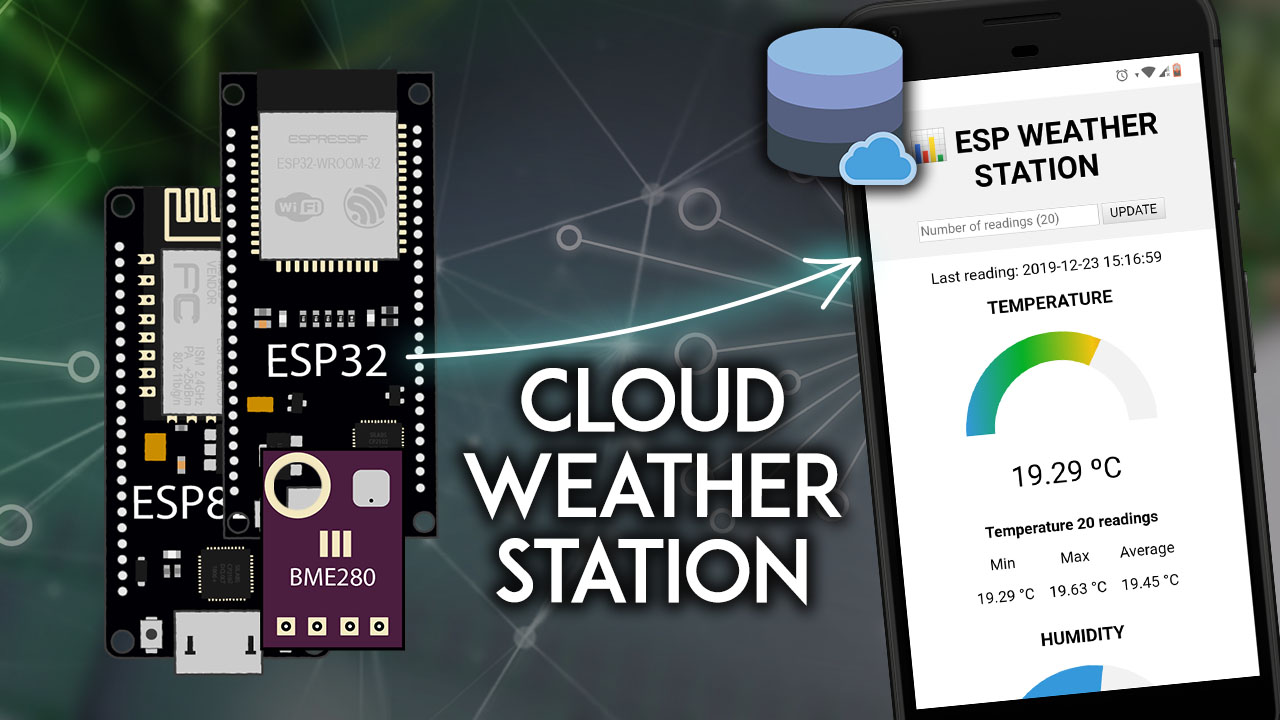
Build a Cloud Weather Station dashboard to visualize your ESP32 or ESP8266 sensor readings from anywhere in the world. You'll see your data displayed on gauges and on a table.
- Suitable forB.Tech/Diploma IoT/ESP32 students
- Build time1-2 weeks
- LevelAdvanced
- Available atAjvika Labs, Kakinada
About this project
Build a cloud weather station dashboard to visualize your ESP32 or ESP8266 sensor readings from anywhere in the world. You’ll visualize your sensor data displayed on gauges and on a table. The ESP32 or ESP8266 will make an HTTP POST request to a PHP script to insert your data into a MySQL database.
Previously, we’ve stored sensor readings in a database and displayed
them on a table
or
charts that you can access from anywhere
using your own server. Now, I’ve decided to take a few steps further and add some more information to the web page.
I’ve added two gauges to display the latest temperature and humidity readings as well as some statistics about the minimum, maximum and average readings from a number of readings that you can define. You can also visualize all the latest readings on a table and you can select how many readings you want to show.
To build this project, you’ll use these technologies:
ESP32 or ESP8266 programmed with Arduino IDE
Hosting server and domain name
PHP script to insert data into MySQL and display it on a web page
MySQL database to store readings
Table of Contents
This project is divided into the following main sections:
Hosting Your PHP Application and MySQL Database
Preparing Your MySQL Database
PHP Script HTTP POST – Receive and Insert Data in MySQL Database
PHP Script for Database Functions
PHP Script – Display Database Readings on Gauges and Table
Setting Up the ESP32 or ESP8266
0. Download Source Code
For this project, you’ll need these files:
SQL query to create your table:
SensorData_Table.sql
Insert and access database readings:
esp-database.php
Handle HTTP Post requests:
esp-post-data.php
CSS file to style your web page:
esp-style.css
Display your sensor readings:
esp-weather-station.php
Arduino Sketch for
ESP32
:
HTTPS_ESP32_Cloud_Weather_Station.ino
Arduino Sketch for
ESP8266 :
HTTPS_ESP8266_Cloud_Weather_Station.ino
If your server doesn’t support HTTPS, use this Arduino Sketch (compatible with the ESP32 and ESP8266:
ESP_HTTP_POST_MySQL.ino
1. Hosting Your PHP Application and MySQL Database
The goal of this project is to have your own domain name and hosting account that allows you to store sensor readings from the ESP32 or ESP8266. You can visualize the readings from anywhere in the world by accessing your own server domain.
Here’s a high-level overview of how the project works:
You have an ESP32 or ESP8266 that sends sensor readings to your own server. For this, you have your board connected to your router;
In your server, there’s a PHP script that allows you to store your readings in a MySQL database;
Then, another PHP script will display the web page with the gauges, table, and all the other information;
Finally, you can visualize the readings from anywhere in the world by accessing your own domain name.
Hosting Services
I recommend using one of the following hosting services that can handle all the project requirements:
: free domain name when you sign up for the 3-year plan. I recommend choosing the unlimited websites option;
Digital Ocean
: Linux server that you manage through a command line. I only recommended this option for advanced users.
Those two services are the ones that I use and personally recommend, but you can use any other hosting service. Any hosting service that offers PHP and MySQL will work with this tutorial. If you don’t have a hosting account, I recommend
When buying a hosting account, you’ll also have to purchase a domain name. This is what makes this project interesting: you’ll be able to go to your domain name (https://example.com) and see your ESP readings.
Note:
you can also run a
LAMP (Linux, Apache, MySQL, PHP) server
on a Raspberry Pi to
access data in your local network
. However, the purpose of this tutorial is to publish readings in your own domain name that you can access from anywhere in the world. This allows you to easily access your ESP readings without relying on a third-party IoT platform.
2. Preparing Your MySQL Database
After signing up for a
hosting account and setting up a domain name
, you can login to your cPanel or similar dashboard. After that, follow the next steps to create your database, username, password, and SQL table.
Creating a database and user
Open the “
Advanced
” tab:
1.
Type “database” in the search bar and select “MySQL Database Wizard”.
2.
Enter your desired Database name. In my case, the database name is
esp_data
. Then, press the “Next Step” button:
Note:
later you’ll have to use the database name with the prefix that your host gives you (my database prefix in the screenshot above is blurred). I’ll refer to it as
example_esp_data
from now on.
3.
Type your Database username and set a password. You must save all those details because you’ll need them later to establish a database connection with your PHP code.
That’s it! Your new database and user were created successfully. Now, save all your details because you’ll need them later:
Database name
: example_esp_data
Username
: example_esp_board
Password
: your password
Creating a SQL table
After creating your database and user, go back to cPanel dashboard and search for “phpMyAdmin”.
In the left sidebar, select your database name
example_esp_data
and open the “SQL” tab.
Important:
make sure you’ve opened the
example_esp_data
database. Then, click the SQL tab. If you don’t follow these exact steps and run the SQL query, you might create a table in the wrong database.
Copy the SQL query in the following snippet:
CREATE TABLE SensorData (
id INT(6) UNSIGNED AUTO_INCREMENT PRIMARY KEY,
sensor VARCHAR(30) NOT NULL,
location VARCHAR(30) NOT NULL,
value1 VARCHAR(10),
value2 VARCHAR(10),
value3 VARCHAR(10),
reading_time TIMESTAMP DEFAULT CURRENT_TIMESTAMP ON UPDATE CURRENT_TIMESTAMP
)
Paste it in the SQL query field (highlighted with a red rectangle) and press the “Go” button to create your table:
After that, you should see your newly created table called
SensorData
in the
example_esp_data
database as shown in the figure below:
3. PHP Script HTTP POST – Receive and Insert Data in MySQL Database
In this section, we’re going to create a PHP script that is responsible for receiving incoming requests from the ESP32 or ESP8266 and inserting the data into a MySQL database.
If you’re using a hosting provider with cPanel, you can search for “File Manager”:
Then, select the
public_html
option and press the “+ File” button to create a new
.php
file.
Note:
if you’re following this tutorial and you’re not familiar with PHP or MySQL, I recommend creating these exact files. Otherwise, you’ll need to modify the ESP sketch provided with different URL paths.
Create a new file in
/public_html
with this exact name and extension:
esp-post-data.php
Edit the newly created file (
esp-post-data.php
) and copy the following snippet:
<!--
Permission is hereby granted, free of charge, to any person obtaining a copy
of this software and associated documentation files.
The above copyright notice and this permission notice shall be included in all
copies or substantial portions of the Software.
-->
<?php
include_once('esp-database.php');
// Keep this API Key value to be compatible with the ESP code provided in the project page. If you change this value, the ESP sketch needs to match
$api_key_value = \"tPmAT5Ab3j7F9\";
$api_key= $sensor = $location = $value1 = $value2 = $value3 = \"\";
if ($_SERVER[\"REQUEST_METHOD
Technologies used
Hardware components
- ESP32
- ESP8266
- Arduino
- Raspberry Pi
Software & tools
- Arduino IDE
What you get
- Working project / hardware kit, tested before delivery
- Complete source code with explanation
- Project demo and guidance for your viva
- Project report, PPT and IEEE paper support (on request)
Delivery & Payment
Delivery takes a minimum of two weeks from the date your inquiry is confirmed.
Payment is in two parts:
• 50% advance to start the project
• Remaining 50% before delivery
Note:
• Documentation and PPT are not included by default
• If you need documentation/PPT, it can be arranged for extra time and cost
We'll confirm the exact timeline and cost with you after reviewing your requirements.
Related IoT/ESP32 projects

IoT/ESP32
ESP32 External Wake Up from Deep Sleep
This article shows how to put the ESP32 in deep sleep mode and wake it with an external wake up like a button press. We'll cover how to use...
View project
IoT/ESP32
ESP32: Upload Files to LittleFS using Arduino IDE
Upload files to the ESP32 Filesystem (LittleFS) by using a plugin for Arduino IDE (1.8.X). The plugin lets you use three different filesyste...
View project
IoT/ESP32
ESP32: Guide for MicroSD Card Module using Arduino IDE
Use a microSD card with the ESP32: you'll learn how to read and write files to the microSD card. To interface a microSD card with an ESP32 b...
View project
IoT/ESP32
ESP32 Save Data Permanently using Preferences Library
Save data permanently on the ESP32 flash memory using Preferences.h library. The data held in the flash memory persists across resets or pow...
View project